You know the question people always ask me? It’s not about paint colors or countertop materials, not at first. It’s usually a variation of this: “My new kitchen has everything, but it just… feels wrong. Why?” My answer, almost every time, is to look up. The lighting isn’t just an accessory; it’s the energy, the very soul of the space. It dictates whether a room feels sterile or soulful, clinical or welcoming.
In my work, I blend the clean, functional precision of European modernism with the profound sense of balance and flow from my Vietnamese heritage. They seem like opposites, but they meet beautifully in lighting. The West gives us the incredible technology and structural thinking for perfect task illumination, while the East reminds us that light must also nurture the spirit—it should feel like warm sunshine or soft moonlight. Getting this balance right is the secret to a kitchen that doesn’t just function beautifully, but feels like the true heart of your home.
Planning the Perfect Glow: Foundational Considerations (Part 1)
Before you fall in love with a single pendant or recessed can, we have to lay the groundwork. Think of this as preparing the soil before planting a garden. We’re not just hanging lights; we’re choreographing how light and life will move through your space. This foundational stage is about understanding your kitchen’s rhythm and needs, ensuring the final result feels intentional and effortless.
1. Assess Your Kitchen’s Task Zones for Optimal Illumination
Forget the architect’s blueprint for a moment. Instead, think about your own personal map of the kitchen. Where do you stand when you chop vegetables? Where do you lean to read a recipe? Where does your family gather for a quick breakfast? These are your energy zones, or what designers call “task zones.” We often think of the kitchen as one big room, but it’s really a collection of smaller spaces with different purposes.
Lighting these zones isn’t about flooding the whole room with light; that’s a classic modernist mistake that creates a flat, lifeless space. The goal is to give each activity its own dedicated light. This is about providing focused, yang energy for active tasks like cooking, and a softer, yin energy for restful moments. Getting this right means no more straining your eyes or working in your own shadow. It’s the first, most crucial step to creating a space that works with you, not against you.
This kind of specific lighting plan feels intuitive and deeply calming in a way that a single, glaring overhead light never will. Let’s move on to how we layer these different energies together.
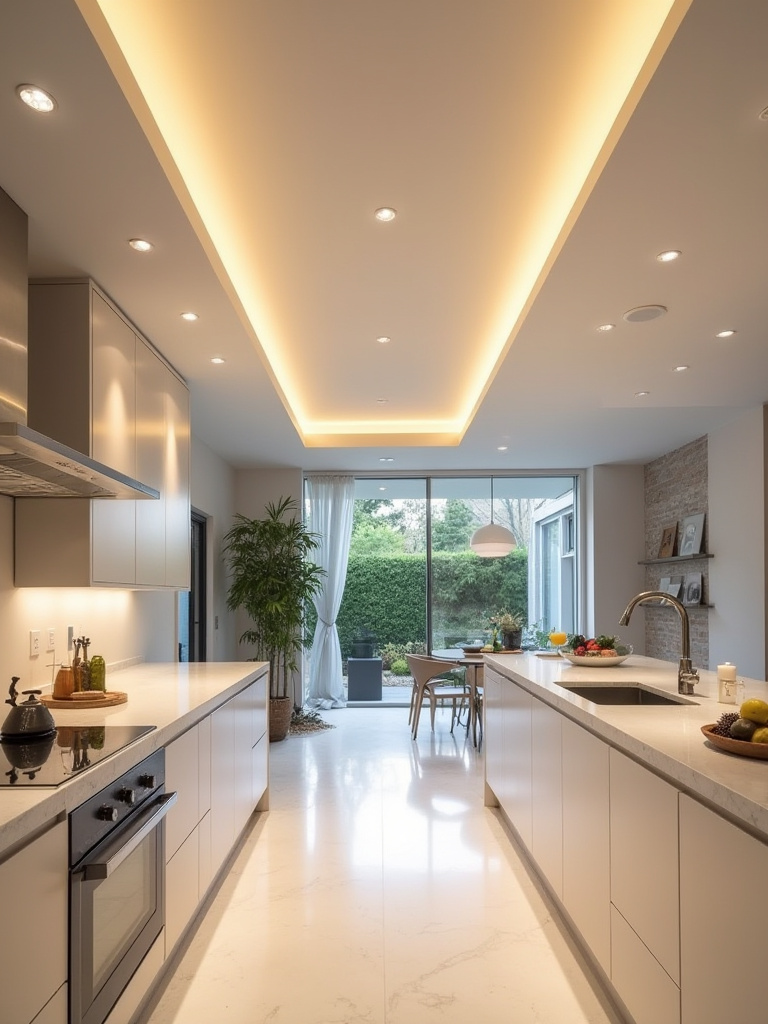
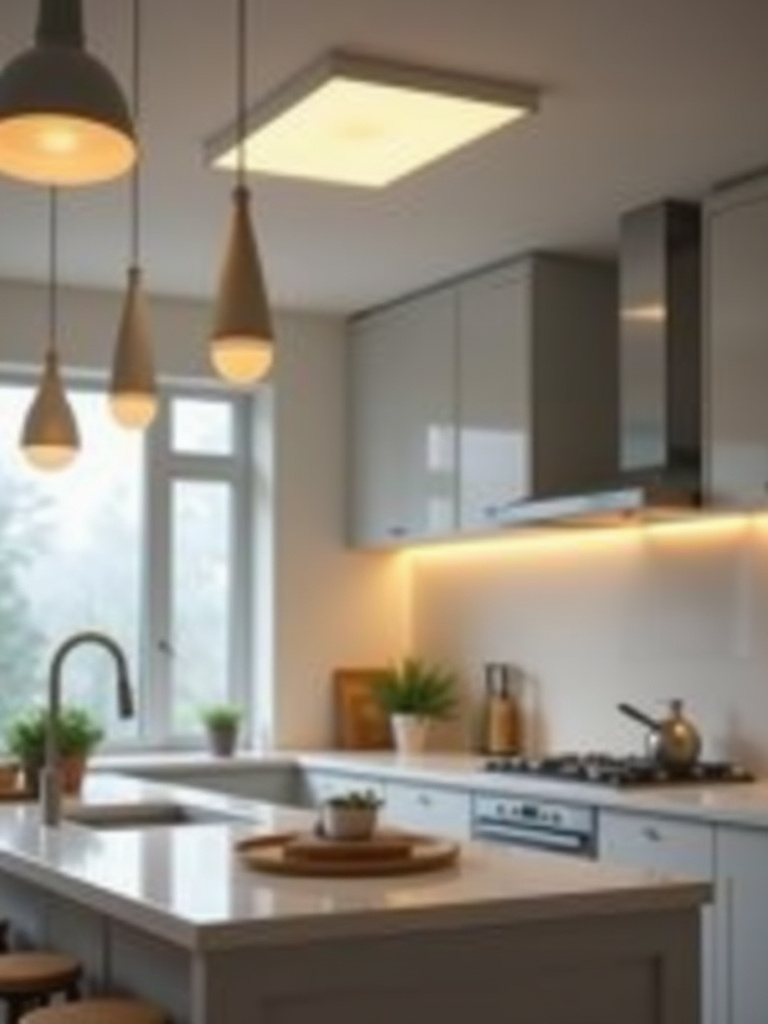
2. Understand the Three Layers of Kitchen Lighting for Comprehensive Brightness
Every beautifully lit room you’ve ever admired, whether you realized it or not, uses a three-layered approach. It’s a universal design principle that brings depth and balance. Most people just install a big light in the middle of the ceiling and call it a day, but that’s like trying to paint a masterpiece with a single color. It falls flat.
First is Ambient light, the general, foundational glow. This is the soft, overall light that makes the room feel safe and welcoming, like a gentle sunrise. Think recessed lighting or a central flush-mount. Next comes Task light, the focused hero. This is the bright, direct light you need over your counters, sink, and stovetop—the workhorses of your kitchen. And finally, there’s Accent light. This is the subtle, magical layer. It’s the little spotlight on a piece of art or the gentle glow from inside a glass cabinet. It adds sparkle and personality. When you combine them, you create a dynamic, harmonious space that can adapt to your every need.
Mastering this trio is the shortcut to a kitchen that looks professionally designed, effortlessly moving from a bright culinary workshop to a serene space for evening conversation.
3. Determine Your Kitchen’s Lumens Requirement for Adequate Brightness
Don’t let the technical terms scare you. “Lumens” is simply how we measure brightness. And while designers can get lost in complex calculations, the concept is simple: you need a “brightness budget” for your kitchen. Getting this wrong is the reason so many kitchens feel either like a dim cave or a sterile operating room. It’s a matter of balance.
The common mistake is to either under-light the space, leaving you to squint while you cook, or over-light it with fixtures that are far too powerful, creating a harsh, anxious energy. For a quick guide, think of it this way: for your general (ambient) lighting, aim for about 30-40 lumens per square foot. For your focused task areas, you’ll want to double that, aiming for 70-80 lumens per square foot. Just multiply your kitchen’s square footage by those numbers to get a good starting point. This isn’t a rigid rule, but a guideline to ensure your space is comfortable and functional.
Ultimately, this number is just the beginning. The quality of that light, which we’ll discuss next, is what truly shapes the room’s character.
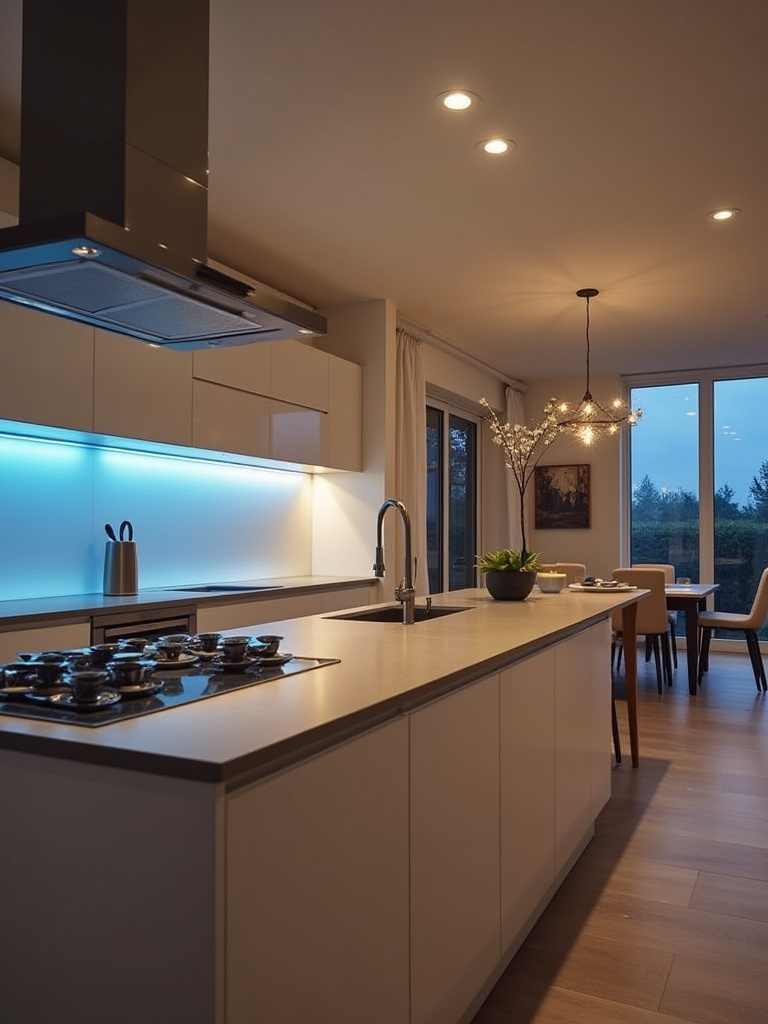
4. Select the Right Color Temperature (Kelvin) to Match Your Kitchen’s Mood
Here’s where the real poetry of lighting comes in. Color temperature, measured in Kelvin (K), is the warmth or coolness of the light. This single choice can make your kitchen feel like a cozy, fire-lit sanctuary or a crisp, modern gallery. It’s pure emotion. Most people buy bulbs without ever looking at the Kelvin number, and that’s a huge missed opportunity.
The scale is simple: lower numbers are warmer (more yellow, like a candle’s flame at 2700K), while higher numbers are cooler (more blue, like daylight at 5000K). The corporate, sterile feel many people hate comes from using bulbs that are too cool, like those you’d find in an office. For a kitchen, the sweet spot is almost always between 3000K and 3500K. This range offers a clean, bright light that still feels warm and inviting. It renders the colors of your food and finishes beautifully without feeling harsh or yellowed.
I once worked with a client who loved their new white kitchen but felt it was cold. They had installed 5000K bulbs everywhere. We simply swapped them for 3000K bulbs, and the entire space was transformed. It instantly felt like home. This small detail is anything but small in its impact.
Planning the Perfect Glow: Foundational Considerations (Part 2)
We’ve covered the internal elements, but a kitchen doesn’t exist in a vacuum. It interacts with the world outside and the infrastructure within your walls. Getting these two elements right is the difference between a lighting plan that looks good on paper and one that works flawlessly in real life.
5. Account for Natural Light Sources to Avoid Over or Under-lighting
In both Asian design philosophy and European modernism, natural light is revered. It’s the most beautiful, dynamic light source we have, and it’s free. A huge mistake is designing your artificial lighting plan as if the sun doesn’t exist. You have to work with nature, not against it. Your lighting should complement the daylight, not compete with it.
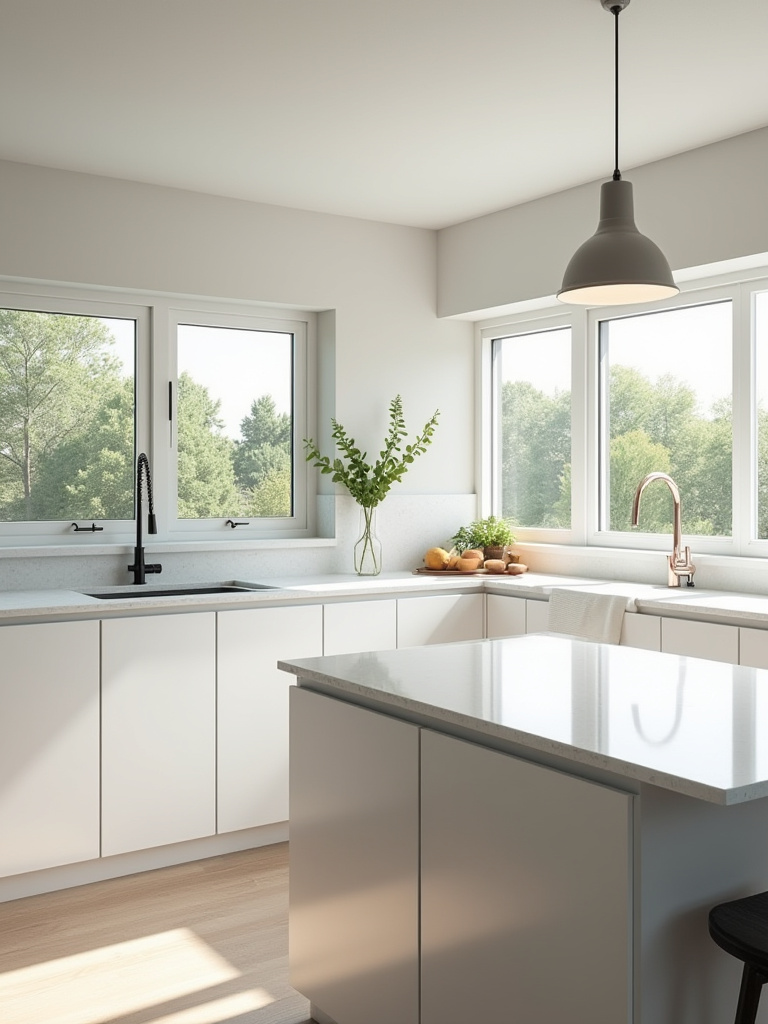
Spend a full day in your kitchen and simply observe. Where does the morning sun fall? Which corner stays in shadow all afternoon? Your artificial lighting needs to fill in those gaps. The goal is a seamless transition from day to night. For example, the side of the kitchen that gets brilliant afternoon sun may not need as many fixtures as the darker side. And absolutely everything should be on a dimmer. This allows you to dial back the artificial light when the sun is strong and ramp it up as evening falls.
Ignoring natural light is like having a conversation where one person just talks over the other. Honoring it creates a dialogue, a harmonious space that feels alive and connected to the rhythm of the day.
6. Review Electrical Capacity and Wiring Limitations Before Upgrading
Now for the least glamorous, but most critical, point. I have seen clients spend a fortune on gorgeous fixtures, only to discover their old wiring can’t handle the load. It’s a heartbreaking and expensive mistake. Before you do anything else, you must understand what’s happening behind your walls.
This isn’t something to guess at. Older homes, in particular, often have circuits that are already pushed to their limit. Adding a dozen new recessed lights, under-cabinet strips, and three powerful pendants can easily overload a circuit, leading to constantly tripped breakers or, far worse, a fire hazard. Think of your electrical system as the foundation of a house; you can’t build something beautiful on a weak base.
My shortcut here is simple and non-negotiable: hire an electrician for one hour to do an assessment. For a small fee, they can tell you exactly what your system can handle and what you’ll need to do if you plan on adding a significant number of new lights. It’s the best money you will ever spend on your renovation.
Strategic Selection and Placement of Fixtures (Part 1)
Now for the exciting part—choosing the fixtures themselves. This is where we bring our foundational plan to life. Each type of fixture has a specific job to do, and placing it correctly is key. Think of this as adding the musicians to the stage; each one plays a different instrument, and together they create a beautiful symphony.
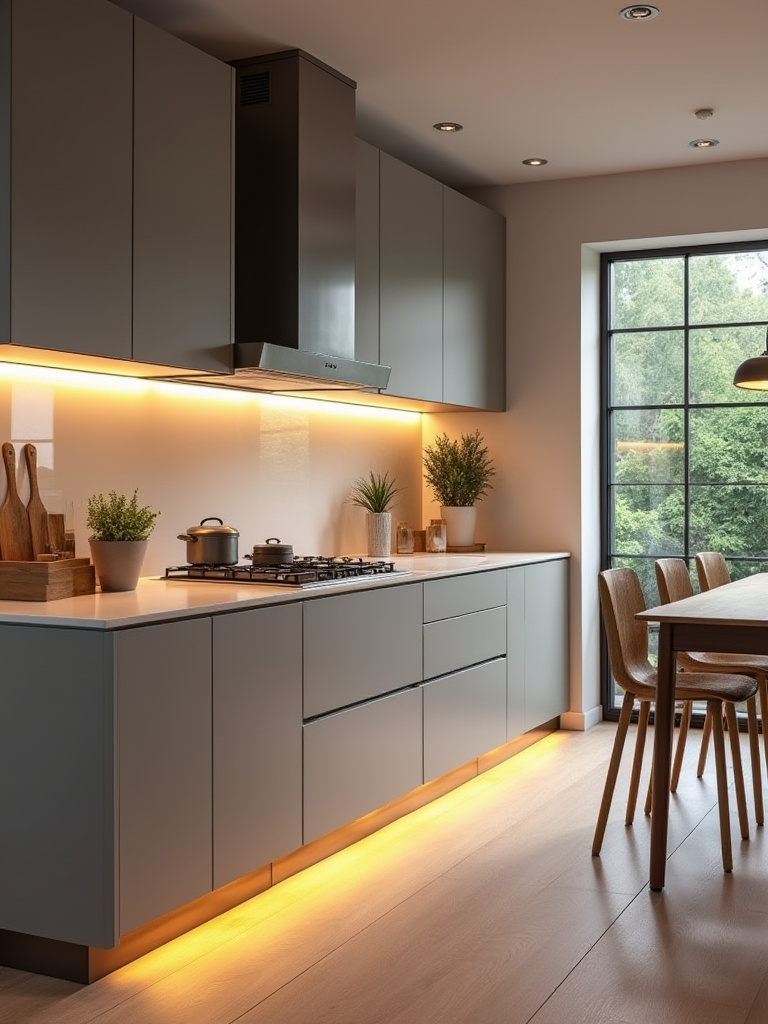
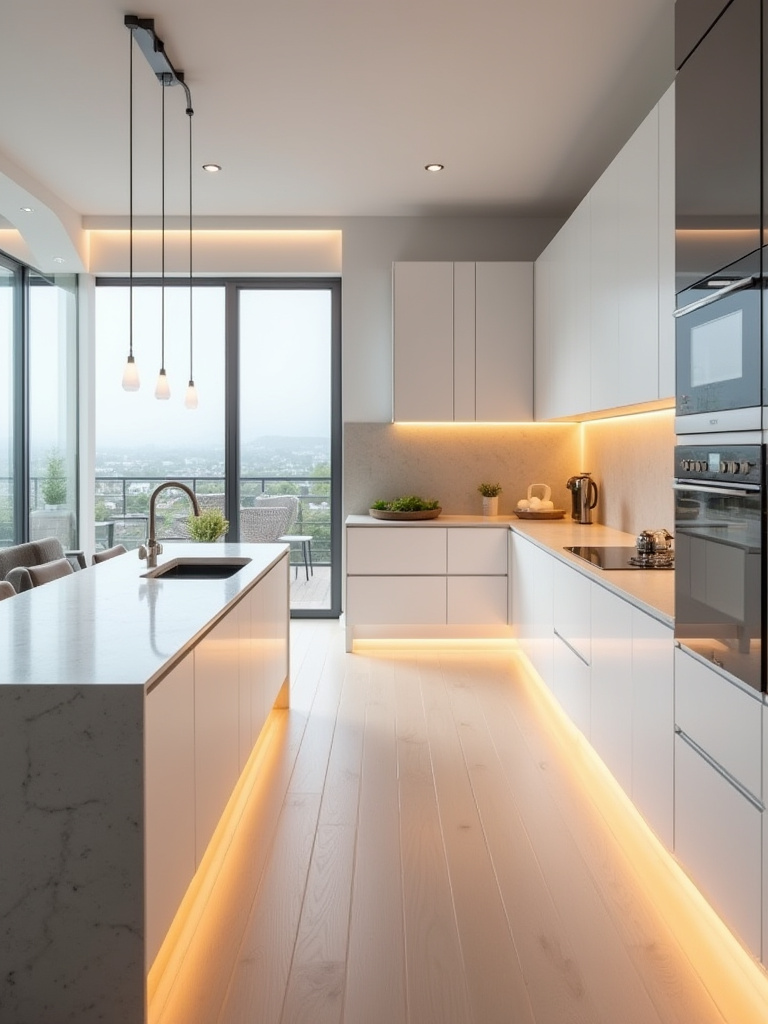
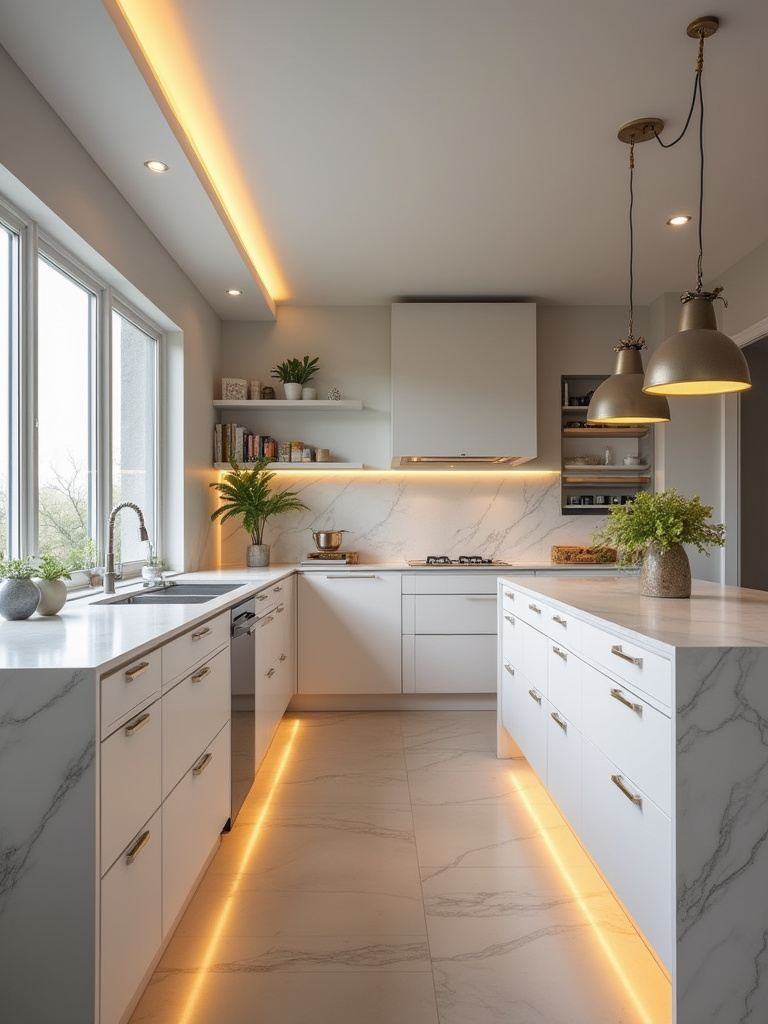
7. Choose Functional Under-Cabinet Lighting for Enhanced Task Visibility
If you make only one lighting upgrade to your kitchen, let this be it. Under-cabinet lighting is an absolute non-negotiable for a functional kitchen. Overhead lights, no matter how bright, will always cast a shadow on your counters right where you need to see most. Trying to chop, mix, or read a recipe in your own shadow is frustrating and unsafe.
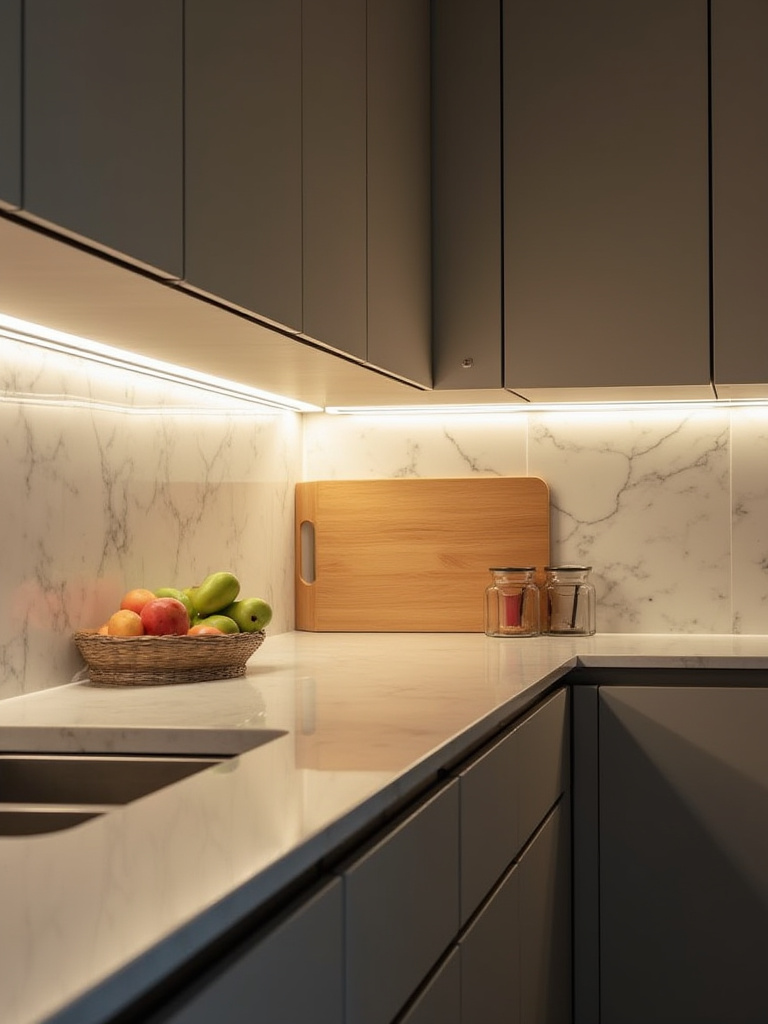
Under-cabinet lights are the solution. They put bright, focused light directly onto your work surface, transforming it into a brilliant and efficient prep zone. The best choice today is almost always LED strips or tape. They provide a seamless, even line of light with no hot spots. And when you’re not cooking, you can dim them down to create a soft, beautiful glow that makes the kitchen feel serene and welcoming.
A client once told me that installing under-cabinet lighting was more life-changing than her new expensive countertops. It’s that significant. Don’t skip this.
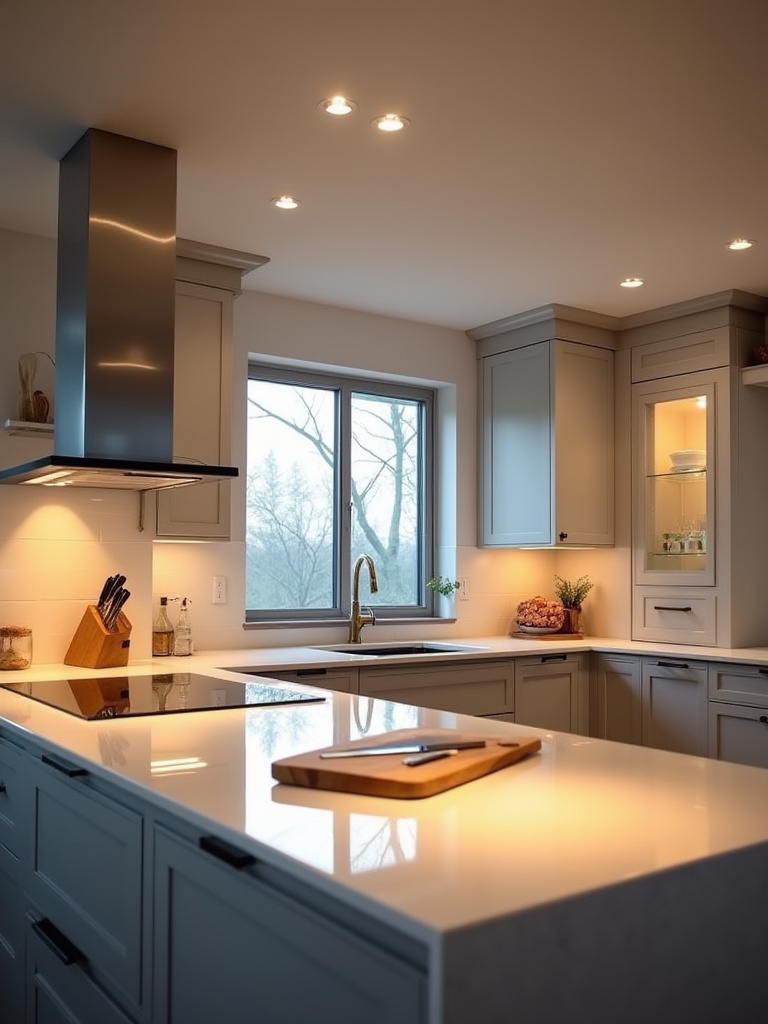
8. Implement Dimmable Recessed Lights for Flexible Ambient Illumination
Recessed lights get a bad rap sometimes, often because they’re used incorrectly. People put too many in, creating a “ceiling acne” effect, or they use them as the only source of light. But when used thoughtfully, dimmable recessed lights are the quiet, sophisticated workhorse of ambient lighting. They provide the clean, unobtrusive foundation of light that makes the entire room feel bright and airy.
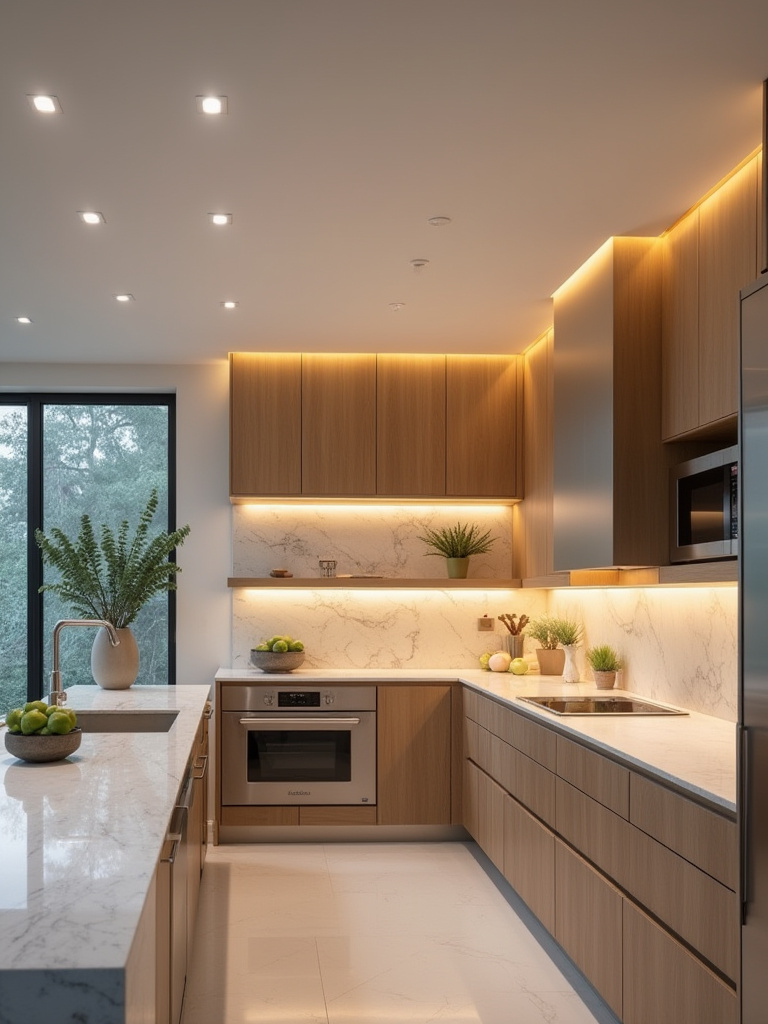
The trick is in the spacing and the dimmers. Spacing them correctly creates an even wash of light, eliminating dark corners and making the room feel larger. But the dimmers are the magic ingredient. With them, your recessed lights can provide bright, clear light for cleaning the kitchen, then dim down to a barely-there glow for a late-night glass of wine. That flexibility is the hallmark of a well-designed space.
Think of recessed lights not as the stars of the show, but as the beautifully designed stage itself, allowing your statement pieces and task lighting to truly shine.
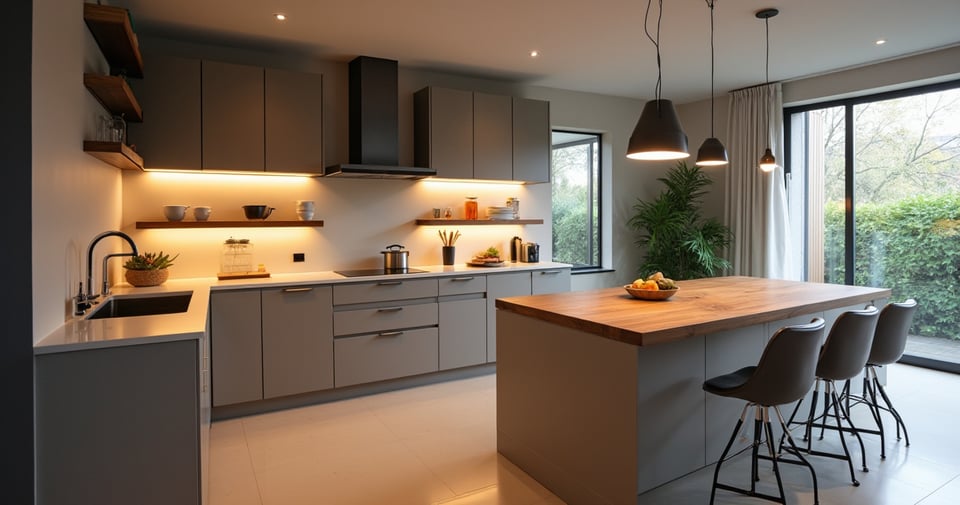
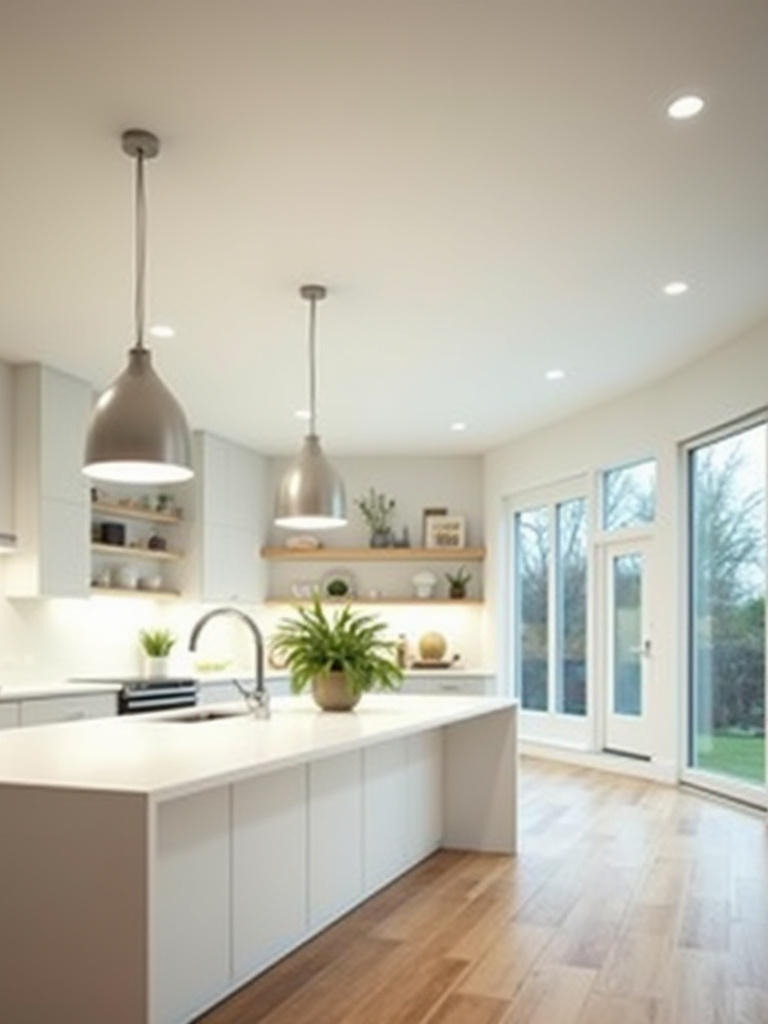
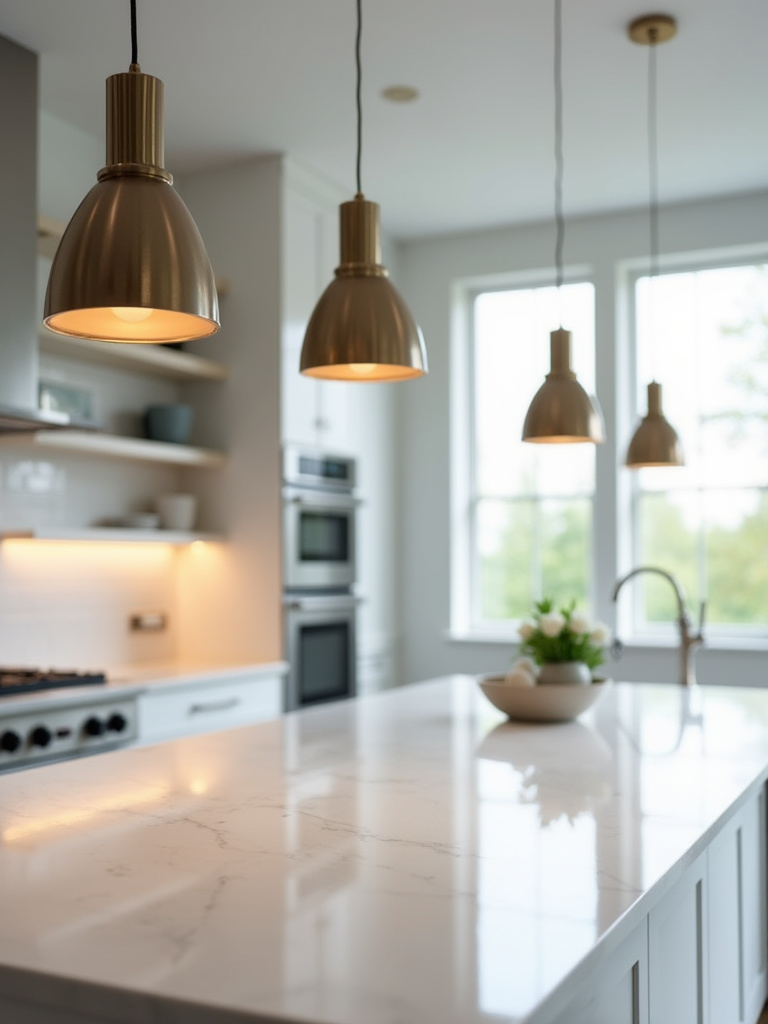
9. Incorporate Statement Pendants Over Islands or Peninsulas for Visual Anchor
Here is where we introduce the soul. A statement pendant over an island is functional sculpture. It’s the visual anchor, the focal point, and the heart of the room all at once. It’s the piece that draws people in and invites them to gather. So many people play it too safe here, choosing something small and forgettable. But the island is your chance to be bold and express your personality.
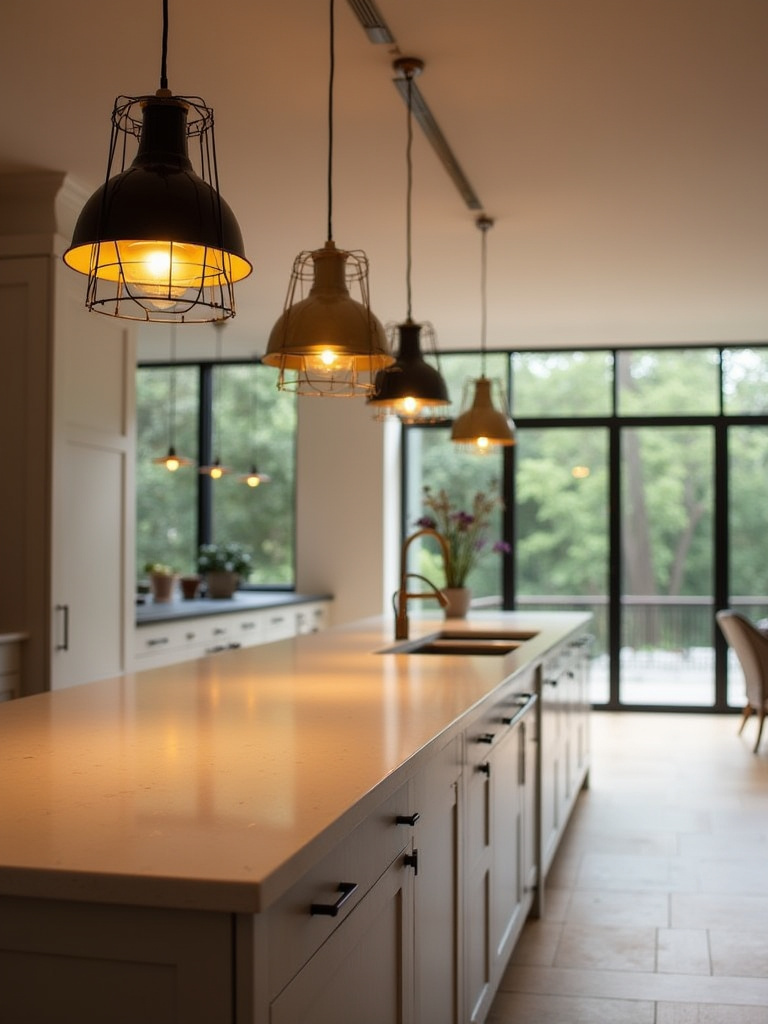
The two most common mistakes are getting the scale and the height wrong. For scale, don’t be afraid to go a little bigger than you think; a tiny pendant over a large island looks lost. A good rule is for the width of the fixture (or the total width of a series of fixtures) to be about 2/3 the width of your island. For height, the bottom of the pendant should hang about 30-36 inches above the countertop. This provides great task light without blocking sightlines.
This isn’t just a light; it’s the piece that tells your kitchen’s story. Take your time and choose something you truly love.
10. Select Decorative Chandeliers for Dining Nooks to Elevate Ambiance
If your kitchen includes a dining nook or a small table, a decorative chandelier is a must. This fixture has one primary job: to create intimacy and define the dining space as separate and special. It’s a clear signal that this is a place to slow down, connect, and enjoy a meal. It transforms a simple table and chairs into a destination.
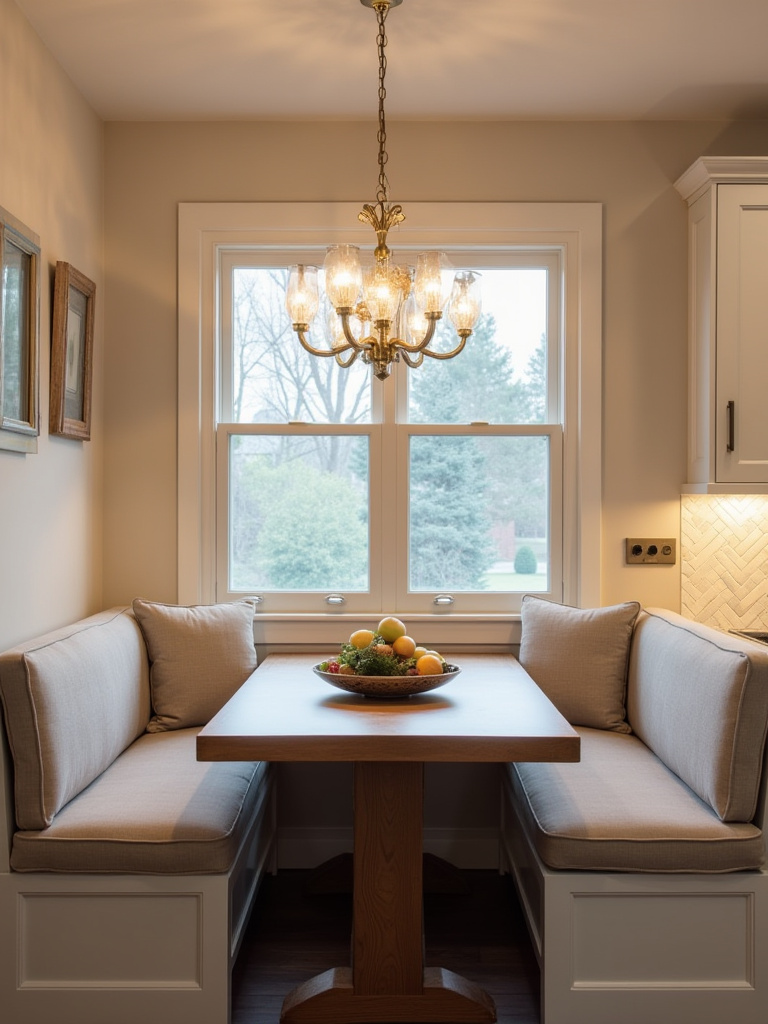
Just like with island pendants, scale and height are critical. The chandelier should be centered over the table, not the nook itself, and its diameter should be about half to two-thirds the width of the table. Again, hang it so the bottom is 30-36 inches above the tabletop. This creates a beautiful, intimate pool of light over your dining surface, fostering conversation and connection.
Using a chandelier here is a wonderful way to introduce a different material or shape, adding a layer of texture and sophistication that elevates the entire kitchen.
Strategic Selection and Placement of Fixtures (Part 2)
We’ve covered the major players, but a truly exceptional lighting plan is in the details. These specialized fixtures are like the supporting cast that makes the lead actors look even better. They solve specific problems and add layers of polish and personality that take a kitchen from good to unforgettable.
11. Opt for Track Lighting to Highlight Art or Adjustable Spot Illumination
Track lighting has evolved far beyond the clunky systems of the 80s. Today’s options are sleek, minimal, and incredibly versatile. I love using it in kitchens where flexibility is key. It’s the perfect tool for creating a “gallery” moment—washing a wall of beautiful tile, highlighting a piece of art, or illuminating open shelves filled with treasured ceramics.
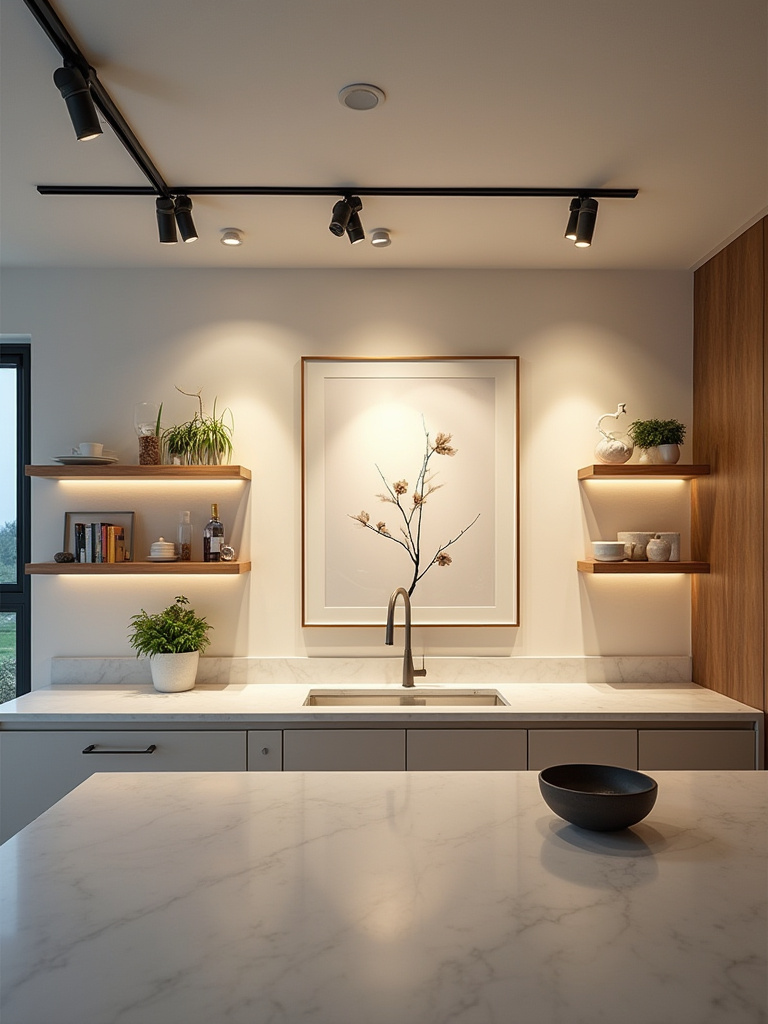
The beauty of track lighting is its adaptability. You can move, angle, add, or remove individual heads as your needs or decor change, all without calling an electrician. This is European functionalism at its best. A single track can wash a wall with a soft floodlight while also aiming a narrow spotlight onto a specific object.
Use it to add drama and focus. It’s an elegant solution for drawing the eye to the beautiful details you’ve carefully curated in your kitchen.
12. Ensure Proper Spacing of Ceiling Lights for Uniform Light Distribution
This might sound a bit technical, but it’s the secret to making your ambient lighting feel effortless and serene rather than chaotic. Improper spacing of recessed lights is what leads to those distracting “hot spots” on the floor and dark, gloomy corners. The goal is an even, overlapping wash of light.
A simple rule of thumb for standard 8-foot ceilings is to space recessed lights about 4 to 6 feet apart. Another helpful trick is the half-distance rule: the distance between a light and the wall should be about half the distance between two lights. For example, if your lights are 4 feet apart, they should be about 2 feet from the walls.
Taking the time to sketch out a grid on paper before the electrician arrives ensures a result that feels calm and balanced, not random and patchy. It’s a small planning step that makes a huge visual impact.
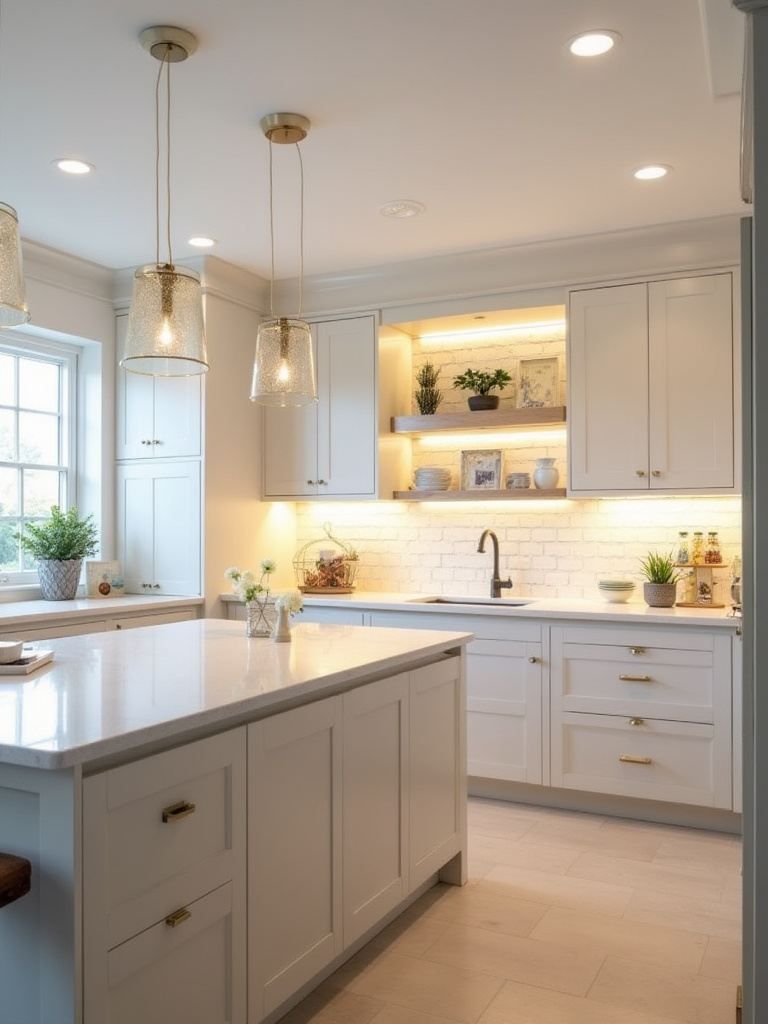
13. Consider Specialty Lighting for Pantries or Display Cabinets
This is where lighting becomes a small, everyday luxury. So often, pantries and cabinets are dark voids where things get lost and forgotten. Adding integrated lighting to these spaces is a complete game-changer. Opening a pantry door and having the interior instantly and evenly illuminated feels organized and effortless.
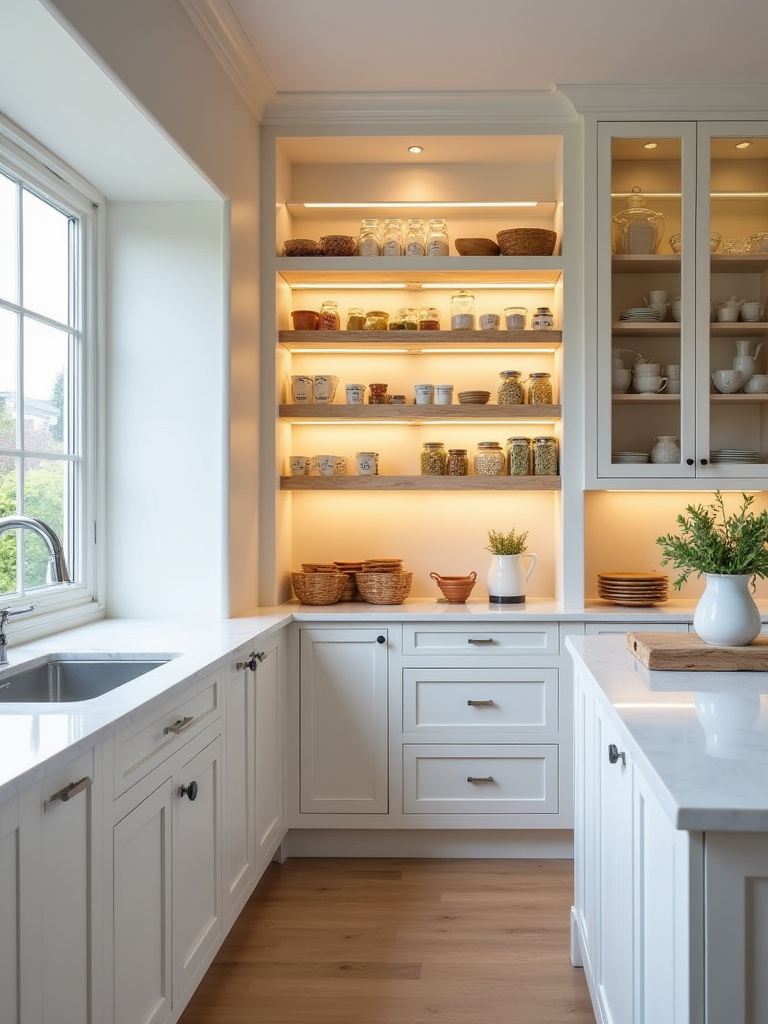
The same principle applies to display cabinets. A soft light from within a glass-fronted cabinet transforms your everyday dishes into a beautiful feature. It adds a wonderful layer of depth and warmth to the kitchen, especially in the evenings when you dim the main lights. Use LED tape lights along the interior front edge of the shelves for a seamless, high-end look.
This is a detail that clients always tell me brings them a surprising amount of daily joy. It’s functional, beautiful, and makes your kitchen feel custom and thoughtfully designed.
Enhancing Style, Smart Controls, and Long-Term Care (Part 1)
Now that the fixtures are chosen and placed, let’s refine the experience. A great design doesn’t just look good on day one; it adapts to your life and endures over time. This is about choosing fixtures that honor your home’s style, using technology to enhance the mood, and making smart choices that are both sustainable and practical.
14. Match Fixture Styles with Your Kitchen’s Overall Aesthetic
This seems obvious, but it’s where many people get tripped up. They fall in love with a fixture online without considering its relationship to the rest of the room. A light fixture is not a standalone object; it’s part of a conversation with your cabinetry, hardware, and countertops. An ornate, traditional chandelier will look out of place in a sleek, minimalist kitchen, and vice-versa.

The secret is to create harmony, not necessarily uniformity. Your fixtures don’t all have to be from the same collection, but they should share a common thread—be it the finish (like brushed brass), the shape (clean lines or soft curves), or the overall style (industrial or rustic).
Before you buy, create a small mood board. Put a picture of your chosen faucet, cabinet pull, and potential light fixtures together. Do they feel like they belong in the same family? This simple visualization exercise can prevent a costly and dissonant mistake.
15. Utilize Smart Lighting Controls for Personalized Ambiance and Efficiency
I used to think smart lighting was a gimmick. I was wrong. It’s one of the most powerful tools we have for creating a truly responsive and harmonious home. Technology, when used thoughtfully, can serve our well-being. Smart controls allow you to shift the entire mood of your kitchen with a single tap or voice command.
Imagine having a “Cooking” scene that brings all your task lights to full, cool-toned brightness. Then, a “Dinner” scene that dims everything down to a warm, intimate glow. Or a “Good Morning” scene that slowly brightens the room as you wake up. This is technology in service of life, allowing your space to adapt to your needs in an instant.
It’s the ultimate fusion of modern functionality and the ancient desire for a home that nurtures us. It’s not about being flashy; it’s about creating an environment that feels effortlessly right, for any moment.
16. Select Energy-Efficient LED Options for Cost Savings and Durability
This is simply the smart choice, both for your wallet and for the planet. There is no longer any reason to use incandescent or halogen bulbs in a kitchen. LED technology has evolved beautifully, offering wonderful light quality in a full spectrum of color temperatures, and it’s incredibly efficient.
An LED bulb uses a fraction of the energy of an old-school bulb and can last for decades. I once explained this to a client as the ultimate “buy it for life” choice for your home. You save money on your utility bills every month, and you virtually eliminate the chore of changing light bulbs. It’s a decision that simplifies your life and reduces your environmental footprint.
Just be sure to choose high-quality, dimmable LEDs. Look for a high CRI (Color Rendering Index) of 90 or more. This ensures the colors in your kitchen—especially your food—will look vibrant and true, not washed out.
17. Maintain Your Fixtures Regularly to Preserve Appearance and Function
A kitchen is a working room. Grease, dust, and steam are a part of life. And over time, they build up on your light fixtures, dimming their output and dulling their finish. You wouldn’t go a year without wiping down your countertops; your lights deserve the same attention.
Set a reminder to give your fixtures a gentle cleaning every few months. For most, a soft, damp cloth is all you need. Pay special attention to any glass shades or diffusers, as cleaning them can dramatically increase the light output. While you’re up there, check that bulbs are screwed in tightly and that pendants are hanging straight.
This simple act of care preserves the beauty and function of your investment. It’s a small ritual that keeps your kitchen feeling bright, clean, and loved.
Enhancing Style, Smart Controls, and Long-Term Care (Part 2)
Finally, let’s talk about empowerment. Things will eventually flicker, dim, or stop working. Knowing how to handle the most common small issues yourself is not just practical; it gives you a deeper sense of connection to and control over your own home.
18. Troubleshoot Common Lighting Issues Before Calling a Professional
Before you spend $150 for an electrician to come out and tighten a light bulb, learn the simple diagnostic flow. It will save you so much time and money. When a light goes out, check these three things in this order:
- The Bulb: Is it screwed in tightly? If so, swap it with a bulb from another lamp that you know works. 90% of the time, the bulb has simply burned out. It’s the first and easiest thing to check.
- The Circuit Breaker: Go to your electrical panel. Has a breaker tripped? It will be flipped to the “off” or a middle position. Firmly push it all the way off, then back on. This often solves the problem of a whole section of lights going out at once.
- The Switch: Sometimes, especially with dimmer switches, the internal connection can fail. If you’ve checked the bulb and the breaker, the switch itself might be the culprit. If you’re not comfortable replacing a switch, this is when you call a professional.
But by checking the first two things, you’ll solve the vast majority of your lighting problems yourself. It’s an empowering skill that every homeowner should have.
Conclusion
As you can see, illuminating your kitchen is a journey. It begins not with fixtures, but with feeling—understanding how you want to live in the space. It’s about creating a thoughtful balance between the bright, functional clarity of modern design and the warm, soulful harmony that makes a house a home. By layering light, choosing fixtures with intention, and embracing technology that serves your life, you move beyond mere illumination. You start to craft an atmosphere.
The beauty of these principles is that they can be applied whether you’re undertaking a full renovation or just changing a single light fixture. You now have the knowledge to look at your kitchen with new eyes, to see not just where the light is, but where it could be. So, take the first step. Begin by simply observing. Then, make one small change. Trust that by thoughtfully shaping the light, you are truly shaping the energy and joy within your home’s heart.