The bathtub – a sanctuary of calm in our hectic lives – serves as more than just a functional fixture. In many Eastern traditions, bathing rituals represent purification and renewal, while Western design often emphasizes efficiency and luxury. When these philosophies merge, magic happens. Whether your current tub leaves you uninspired or you’re dreaming of a space that honors both function and tranquility, a thoughtful bathtub remodel can transform your daily routine into a rejuvenating ritual.
As someone who has studied bath traditions across cultures, I’ve gathered 24 ideas that honor both practical Western efficiency and Eastern mindfulness. These insights will guide you through creating a bathing space that serves as both functional necessity and personal sanctuary.
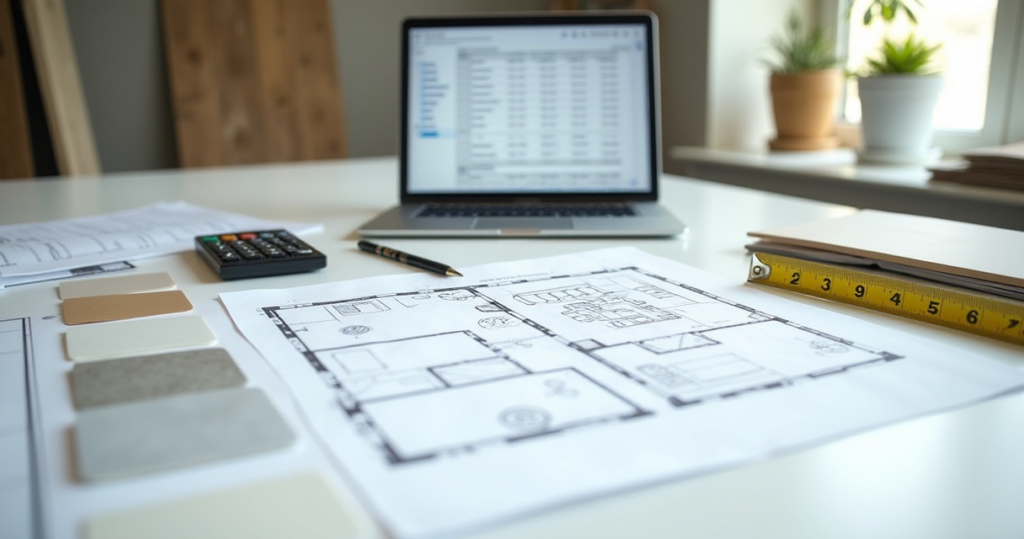
1. Setting Your Bathtub Remodel Budget
The journey toward your ideal bathing space begins with honest financial planning. A basic bathtub remodel replacing an existing tub with a similar model typically ranges from $1,500 to $5,000, while mid-range projects involving new tile work and minor plumbing adjustments can reach $5,000 to $10,000. High-end transformations featuring luxury materials and significant layout changes often exceed $10,000, sometimes climbing to $15,000 or more.

Your comprehensive budget should account for several key components: materials (tub, surround, fixtures), labor (often 40-60% of total cost), permits, disposal fees, and a crucial contingency fund of 10-20%. This buffer protects against the unexpected – hidden water damage, outdated plumbing, or structural issues that might only become apparent once walls are opened.
The unexpected environmental story behind your budget planning begins with considering long-term value rather than just upfront costs. Materials that offer durability and timeless appeal often provide better lifetime value than trendy, less durable options that might require replacement sooner.
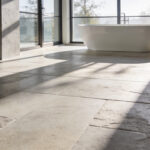
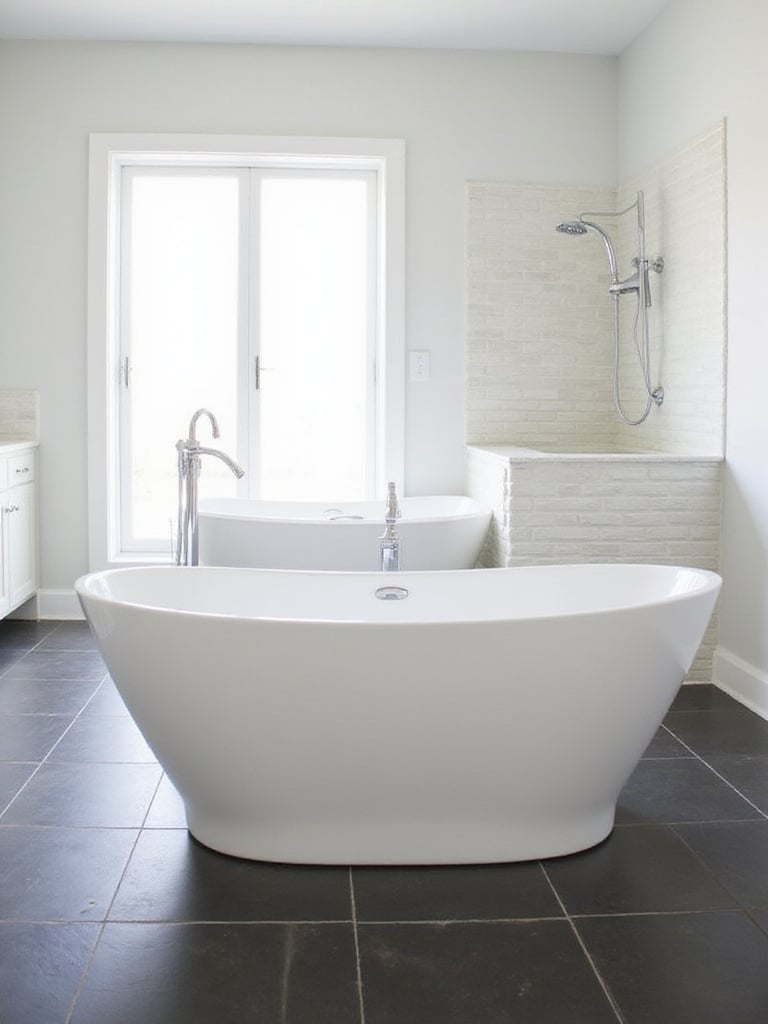
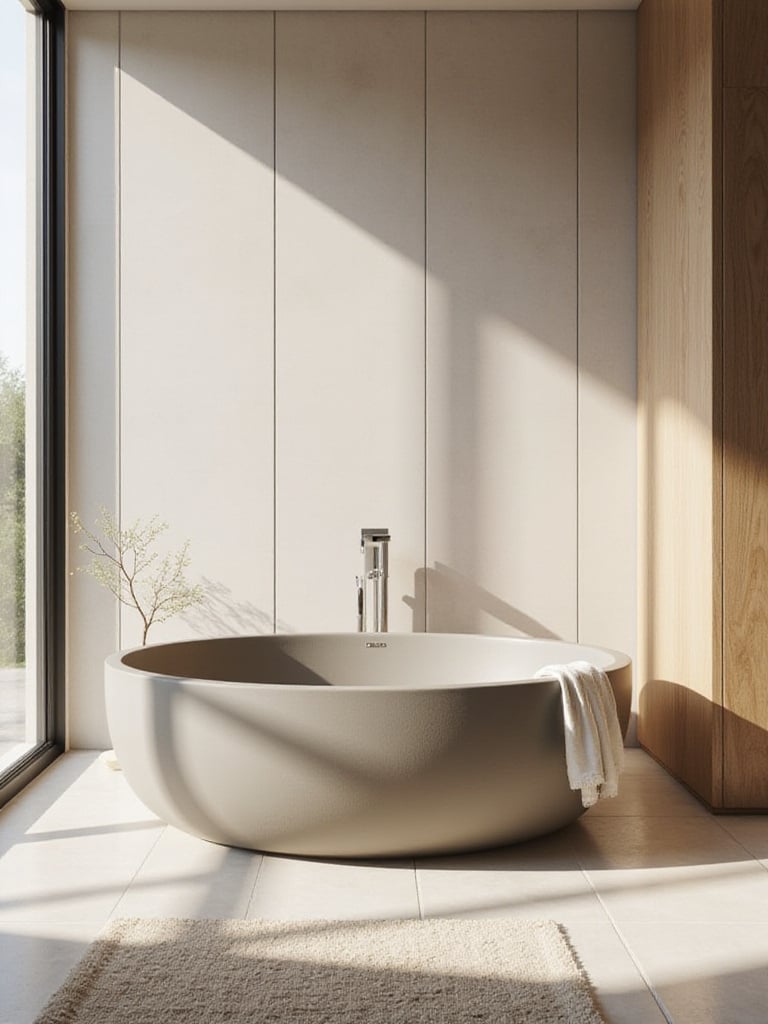
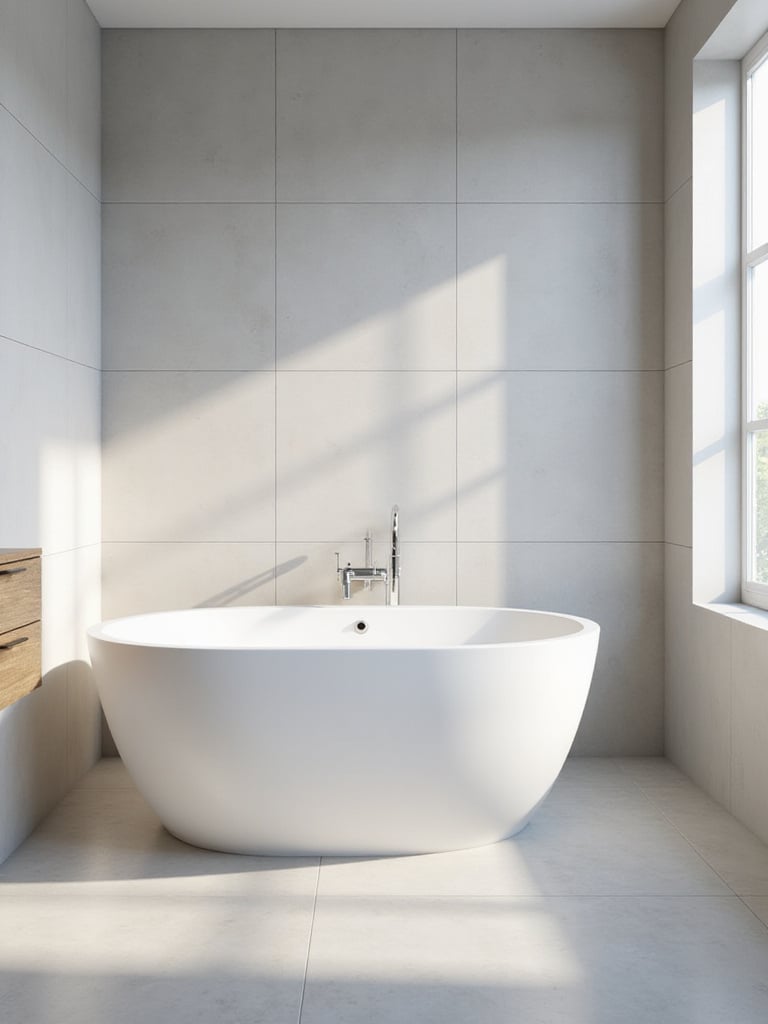
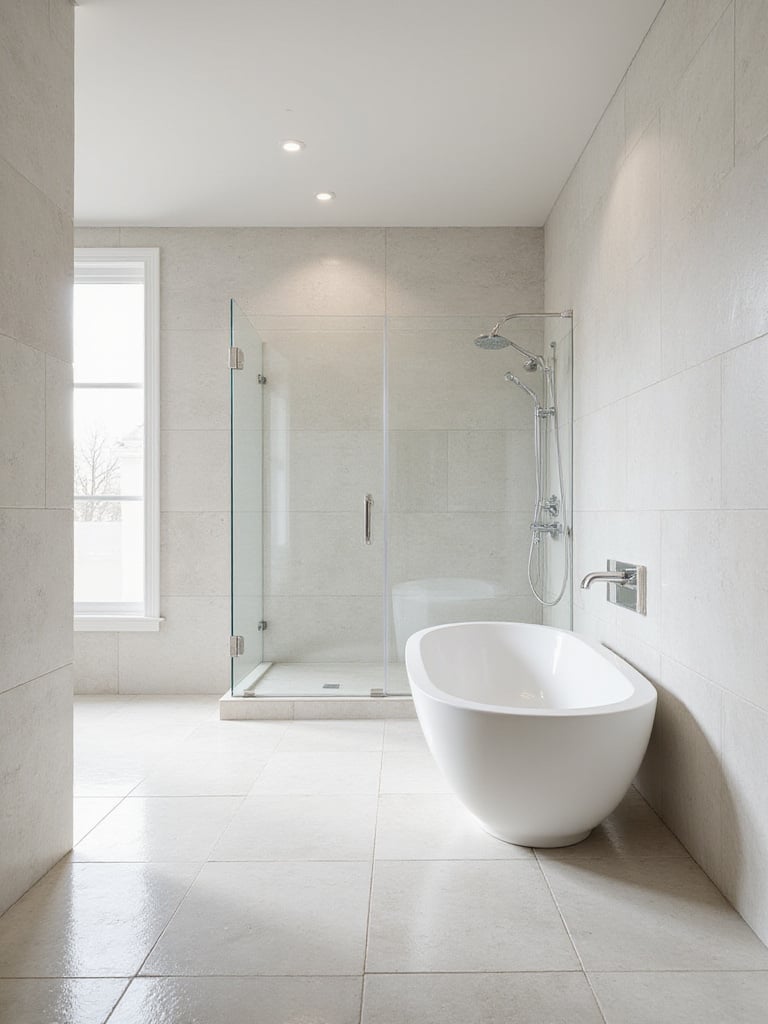
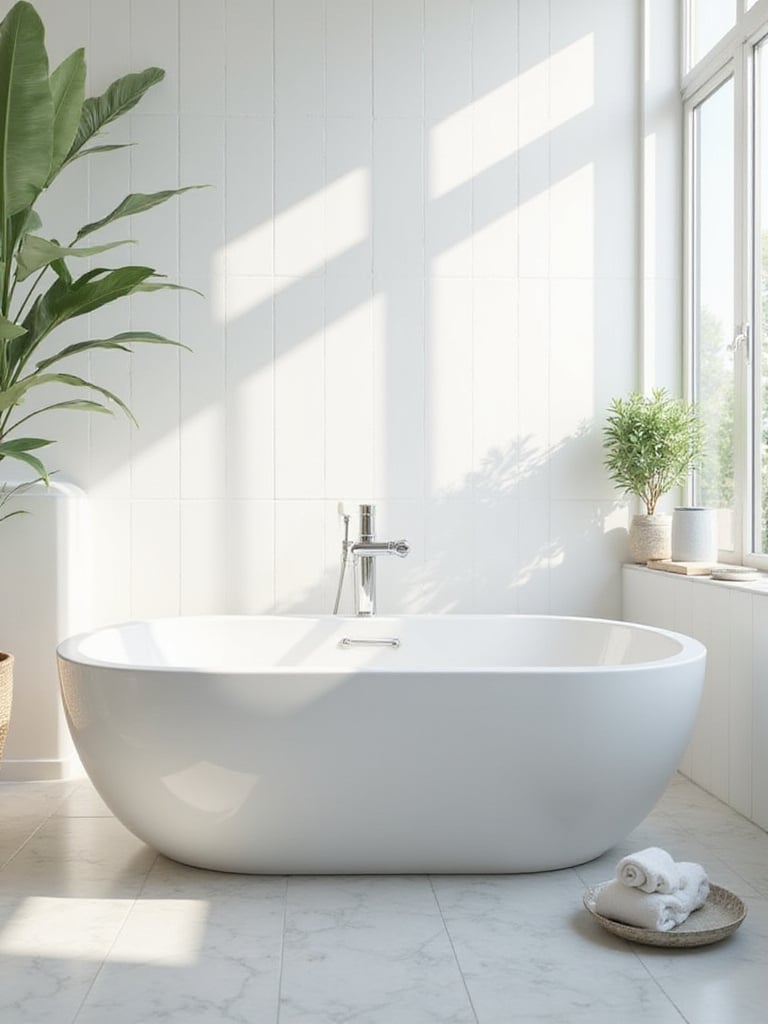
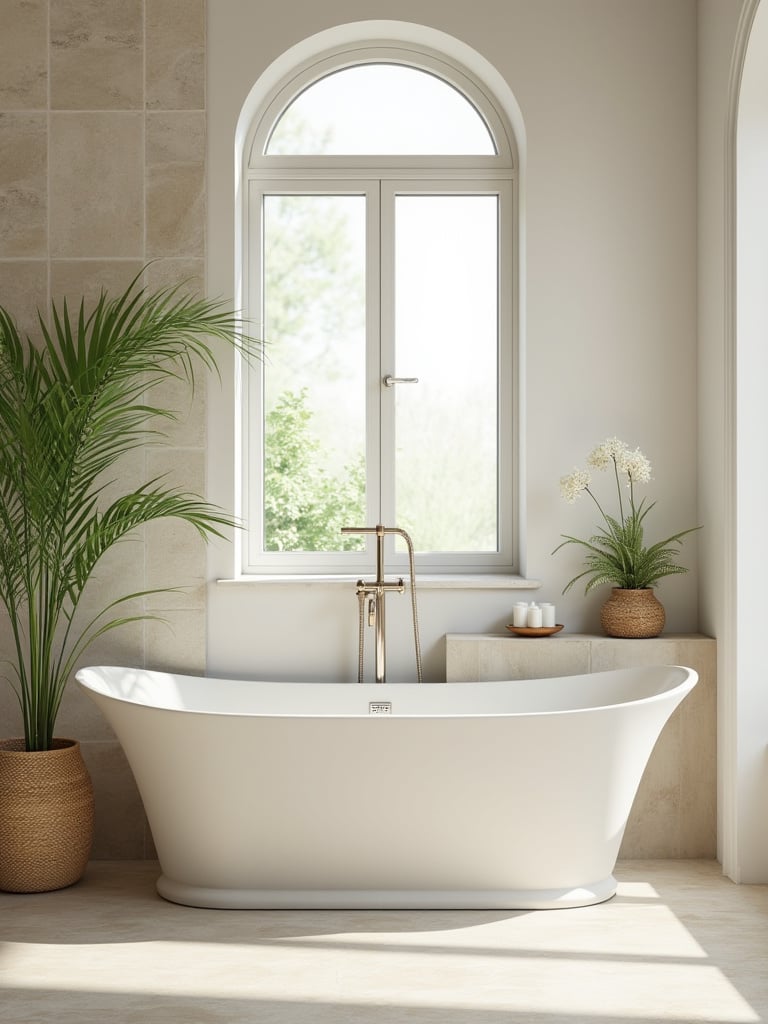
2. Choosing the Perfect Bathtub Type for Your Space
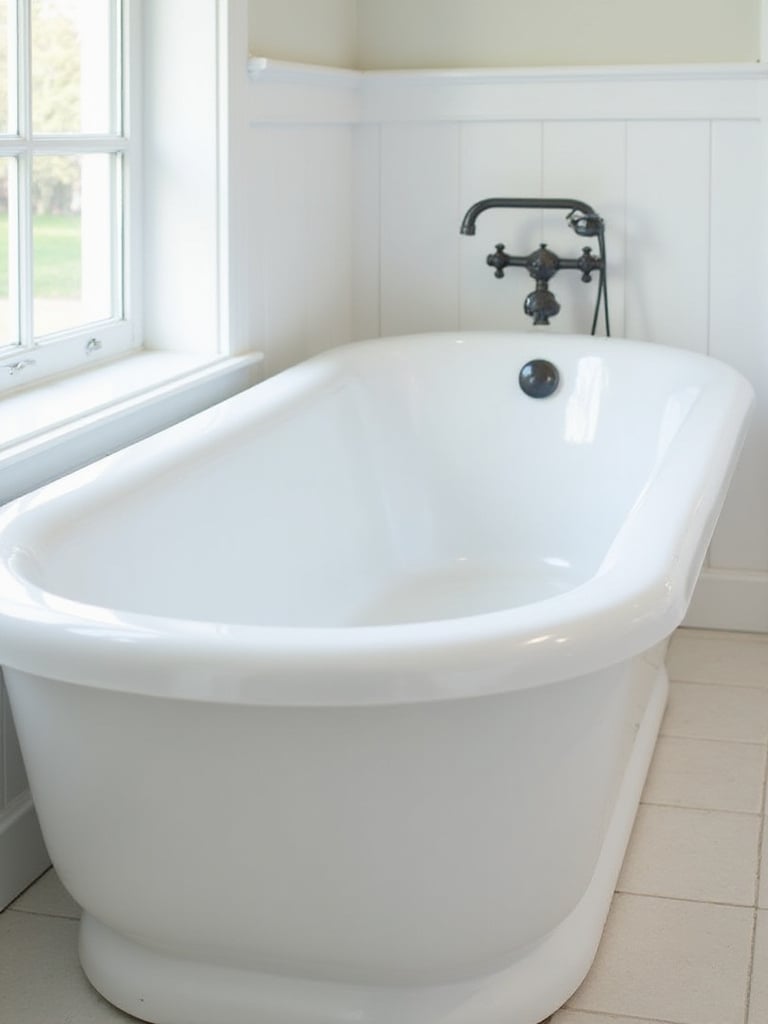
The silhouette draws inspiration from both your practical needs and aesthetic vision. For standard bathrooms, alcove tubs (installed within three walls) remain the most space-efficient and cost-effective option, often serving as shower/tub combinations. Freestanding tubs create dramatic focal points but require more floor space, while drop-in models offer design flexibility within custom surrounds. Corner tubs maximize awkward spaces, and walk-in models prioritize accessibility.
Determining the right size involves meticulous measurement of your available space, accounting for door swings and traffic patterns. Standard alcove tubs typically measure 60 inches long by 30-32 inches wide, but variations exist for different spaces. Consider the primary users’ height and bathing preferences – deep soakers require different dimensions than family-friendly models used primarily for showering.
Beyond the obvious placement, consider using your tub selection as an opportunity to honor cultural influences in your design. A deep Japanese-inspired soaking tub can transform a Western bathroom into a contemplative retreat, while adding classic clawfoot details to a minimalist space creates fascinating tension between traditional and contemporary elements.
3. Selecting the Best Material for Durability & Style
The craftsmanship reveals itself in details like material selection, which significantly influences your tub’s longevity, maintenance requirements, and aesthetic impact. Acrylic offers versatility in shape and color, moderate durability, and lighter weight for easier installation. Fiberglass provides the most affordable option but with shorter lifespan and susceptibility to scratching. Cast iron delivers exceptional durability and heat retention but at significantly higher weight and cost. Enameled steel offers a middle ground between cast iron and lighter materials, while solid surface materials provide non-porous, seamless options with excellent heat retention.
Material choice directly impacts maintenance requirements and longevity. Cast iron and solid surface represent the most durable options, potentially lasting decades with proper care. Acrylic offers good durability with easier maintenance, while fiberglass typically requires more careful treatment to prevent damage. For heat retention – crucial for extended soaking – cast iron excels, followed by solid surface, acrylic, enameled steel, and finally fiberglass, which loses heat most quickly.
The traditional methods used result in distinctive characteristics for each material. Consider not only practical aspects but also the tactile experience – how the material feels against skin, how it sounds when filled with water, how it ages over time. These sensory elements contribute significantly to the daily bathing experience.
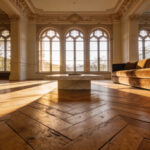
4. Finding the Right Style to Match Your Bathroom Vibe
The designer’s attention to detail shows in how your bathtub’s style harmonizes with your overall bathroom aesthetic. Begin by analyzing your existing space: note the vanity design, fixture finishes, tile patterns, and architectural elements. Create a visual collection of inspirational images to identify recurring themes in designs you’re drawn to. This process helps crystallize your vision and ensures your bathtub selection enhances rather than conflicts with your desired atmosphere.
Different bathtub styles naturally complement specific design aesthetics. Alcove and drop-in tubs offer versatility across styles, while freestanding tubs range from traditional clawfoot models (perfect for vintage or traditional spaces) to sleek, sculptural forms (ideal for contemporary settings). The bathtub’s lines should echo your overall design language – clean, straight edges for modern spaces; curved, decorative elements for traditional or vintage-inspired rooms.
What makes this design special is the way it can bridge cultural influences. Consider how Eastern bathing traditions emphasize immersion and ritual, while Western approaches often focus on efficiency and luxury features. A thoughtful bathtub remodel can honor both perspectives, creating a space that feels both grounded and elevated.
5. Maximizing Your Existing Bathroom Layout
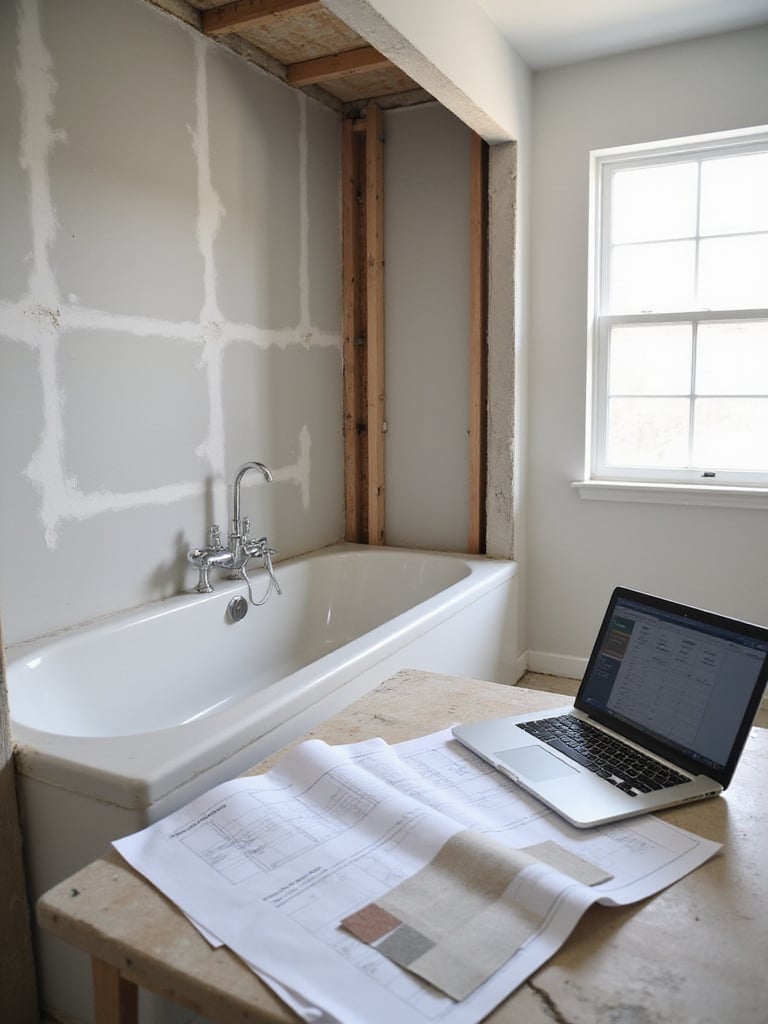
If you’ve struggled with similar rooms before, you’ll appreciate how thoughtful layout planning can transform even challenging spaces. The primary constraints when working within an existing bathroom include the location of drain and supply lines, the dimensions of your current tub area, and the placement of other fixtures. Moving plumbing significantly increases both complexity and cost, so most remodels focus on replacing the tub within approximately the same footprint.
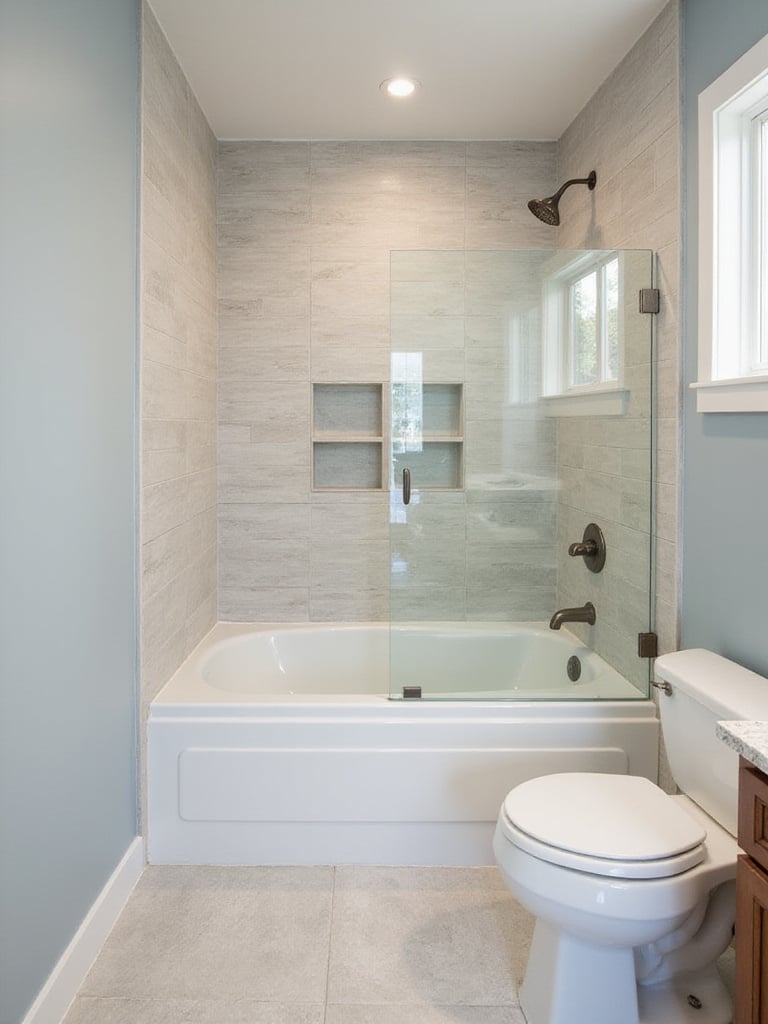
To create a sense of spaciousness without structural changes, consider visual techniques and smart fixture choices. Clear glass shower doors create openness compared to curtains or frosted glass. Selecting a tub with a lower profile or thinner edges reduces visual bulk. Recessed storage niches provide functionality without consuming floor space. Strategic lighting brightens the space while Large-Format Tiles with minimal grout lines create visual continuity.
Even in smaller spaces, here’s how this works: careful measurement becomes your best friend. Document the exact dimensions of your existing tub alcove and note the precise drain location relative to the walls. These details ensure your new tub will fit properly without requiring costly plumbing relocations.
6. DIY vs. Hiring a Pro: Which is Right for You?
When clients ask us about balancing skill with ambition, we encourage honest self-assessment. Several factors should guide your decision between DIY and professional installation: your experience with plumbing, tiling, and construction; the project’s complexity; your available time; budget constraints; and local building code requirements. While DIY can reduce labor costs, it requires significant skill and time investment.
The risks of DIY bathtub remodels shouldn’t be underestimated. Improper plumbing can lead to leaks, water damage, and mold. Incorrect waterproofing or tiling may fail prematurely. Lack of experience often results in aesthetic disappointments, wasted materials, and potential safety hazards. Professional installation becomes particularly crucial when altering plumbing lines, relocating fixtures, making structural changes, or when you lack experience with complex tasks.
- Consider a hybrid approach: Handle simpler tasks yourself (demolition, painting, basic prep) while hiring professionals for technical aspects (plumbing, waterproofing, complex tiling)
- Get multiple quotes: Consult at least three licensed, insured contractors to establish realistic cost expectations
- Check references thoroughly: View past work and speak with previous clients before making your decision
The styling mistake most people make is underestimating the technical complexity of bathroom renovations. Water management, proper support for heavy fixtures, and code compliance all require specialized knowledge that most homeowners develop only through years of experience.
7. Understanding the Bathtub Remodel Timeline
After months of sourcing and curation, you’ll want to know exactly how long your bathtub transformation will take. The physical work for a standard bathtub remodel typically requires 3-5 days of active construction. However, the complete timeline – including planning, obtaining quotes, ordering materials (which may have significant lead times), and scheduling contractors – often extends from several weeks to a couple of months.
A typical bathtub remodel progresses through distinct phases: Planning & Design (1-4+ weeks), Preparation & Demolition (1-2 days), Plumbing & Structural Work (1-3 days), Tub Installation (1 day), Wall/Surround Installation (1-3 days), Fixture Installation (0.5-1 day), and Finishing Touches (1-2 days). These timeframes represent the actual work; delays frequently occur, particularly when waiting for custom or special-order materials.
The unexpected environmental benefit comes from thorough planning. Ordering materials well in advance and creating a visual project timeline with key milestones helps prevent delays and keeps all parties informed of expectations. Consider seasonal factors as well – contractors often have busier periods where scheduling becomes more challenging.
8. Accurately Estimating Remodel Costs
The artisans’ commitment to environmental practices means nothing without proper financial planning. Breaking down your bathtub remodel costs into distinct categories helps create realistic expectations: Materials (tub, tile, fixtures, supplies), Labor (typically 40-60% of total cost), Demolition & Disposal, Plumbing Modifications, and that crucial Contingency Fund for unexpected issues (10-20% of your budget).
Obtaining reliable contractor quotes requires clear communication. Define your project scope in detail, gather estimates from at least three reputable contractors, check references and reviews, ensure quotes include itemized breakdowns, and verify proper licensing and insurance. Remember that the lowest bid isn’t always the best value – experience, reputation, and communication matter significantly.
- Create a detailed spreadsheet: List every potential material and labor component
- Research local costs: Prices vary significantly by geographic location
- Consider long-term value: Sometimes higher upfront costs for quality materials result in lower lifetime expenses
- Factor in financing costs: If using loans or credit, include interest in your total budget calculations
The heritage technique gets a contemporary update through careful budgeting that honors both quality craftsmanship and financial responsibility. This balance ensures your bathtub remodel delivers lasting value without unnecessary financial strain.
9. Incorporating Accessibility Features
The maker’s journey from apprentice to master influenced my perspective on accessibility – it’s not just about accommodating specific needs but creating universally comfortable spaces. Essential accessibility features include properly anchored grab bars, non-slip flooring, low-threshold or zero-threshold entry options, built-in seating, easy-to-operate fixtures like lever handles, adequate lighting, and clear floor space for movement.
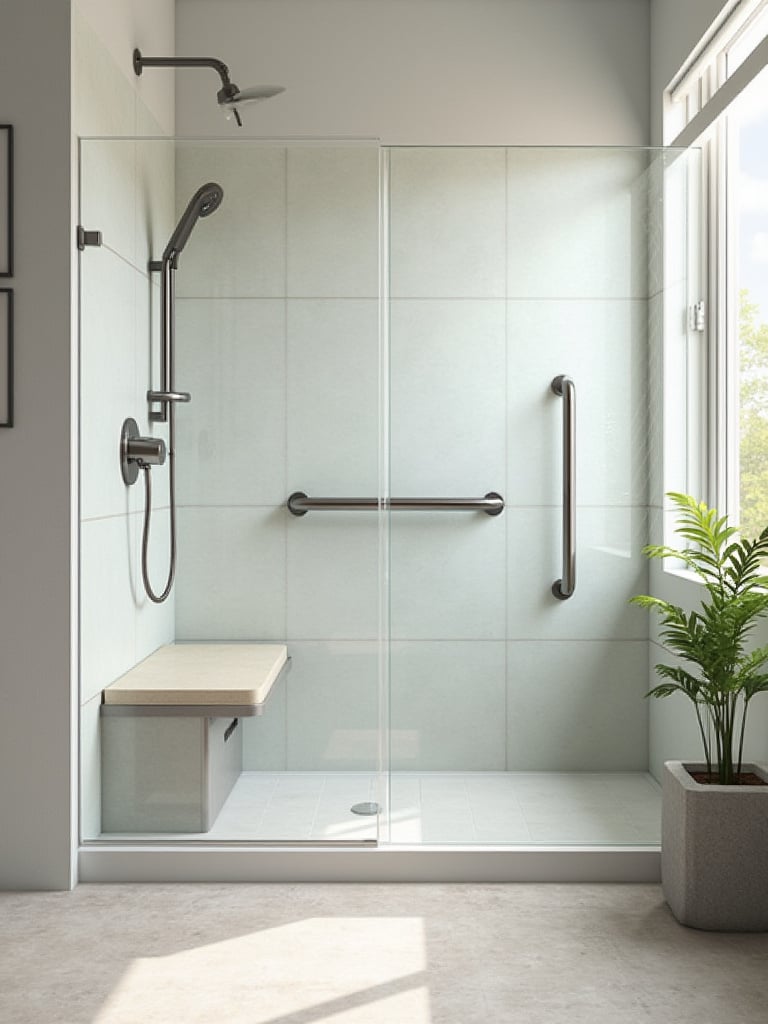
The differences between standard tubs, low-threshold showers, and walk-in tubs are significant. Standard tubs require stepping over walls typically 14-16 inches high. Low-threshold showers feature minimal curbs (usually under 2 inches) or curbless designs for easy entry. Walk-in tubs incorporate sealed doors allowing users to enter without climbing over walls. These accessibility features benefit everyone – not just elderly individuals or those with disabilities – by enhancing safety and convenience while future-proofing your home.
The cultural heritage preserved in each piece includes thoughtful accessibility. Consider consulting an occupational therapist for personalized recommendations, especially if addressing specific mobility challenges. Stylish grab bars that double as towel bars or decorative elements provide safety without an institutional appearance, demonstrating how accessibility and aesthetics can beautifully coexist in your bathtub remodel.
10. Addressing Plumbing Needs & Upgrades
The discovery of this technique happened when plumbing systems evolved from simple drainage to sophisticated water delivery networks. During a bathtub remodel, addressing plumbing is critical because these hidden systems connect your tub to water supply and drainage. This renovation opportunity allows inspection for wear, corrosion, or leaks while ensuring your plumbing supports new fixtures and meets current building codes. Ignoring plumbing issues during your remodel can lead to costly damage later.
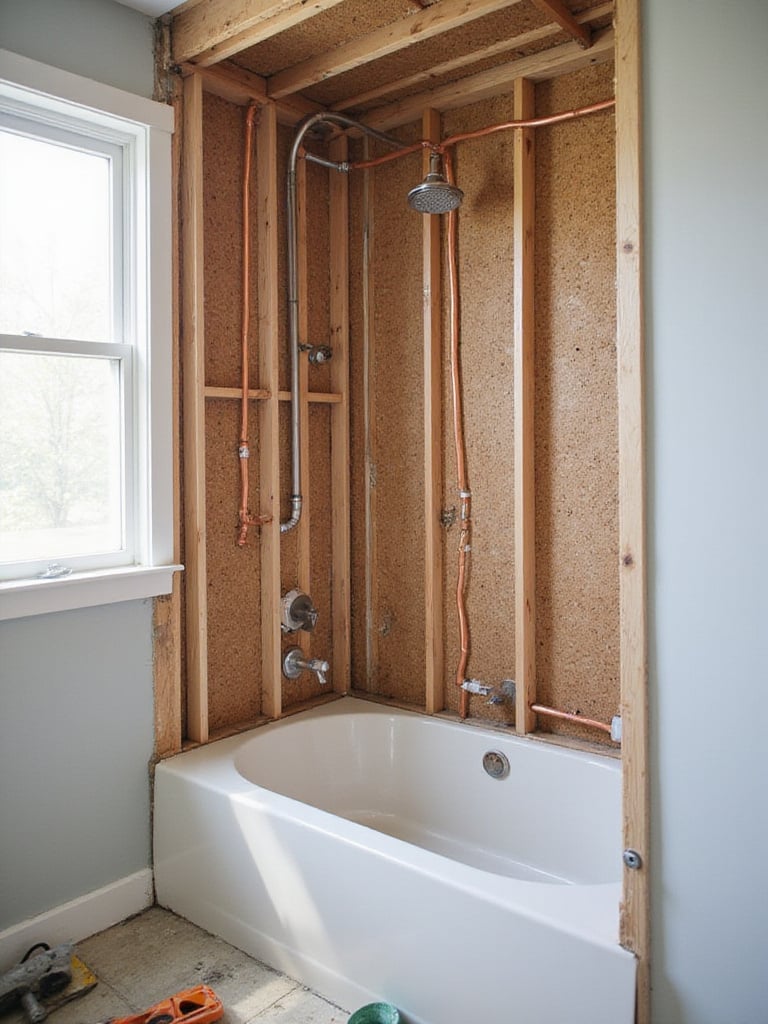
Common plumbing challenges encountered during bathtub remodels include outdated or corroded pipes, insufficient water pressure, slow drainage, incorrectly sized supply or drain lines, existing leaks, and non-compliant installations. Professional plumber involvement becomes essential when relocating plumbing lines, changing pipe materials, installing complex fixtures, addressing suspected leaks, or ensuring proper venting. Consider upgrading to PEX or copper pipes, installing pressure-balancing/thermostatic shower valves, improving drain capacity, enhancing ventilation, and upgrading fixtures for better performance.
Running your hand across this material reveals the importance of what lies beneath the surface. A thermostatic shower valve that maintains consistent water temperature regardless of pressure fluctuations not only enhances comfort but also improves safety by preventing sudden temperature changes – a perfect example of how thoughtful plumbing upgrades can transform your bathing experience during a bathtub remodel.
11. Picking Out Your Faucets and Fixtures
The third-generation workshop where this comes to life understands that faucets and fixtures are both functional necessities and design statements. Bathtub faucets come in several primary configurations: deck-mounted (installed on the tub rim), wall-mounted (attached to the wall above the tub), freestanding (floor-mounted for freestanding tubs), and Roman tub fillers (high-flow deck-mounted options). Your selection should consider your tub style, available mounting locations, and desired features like high-flow capacity or handheld components.
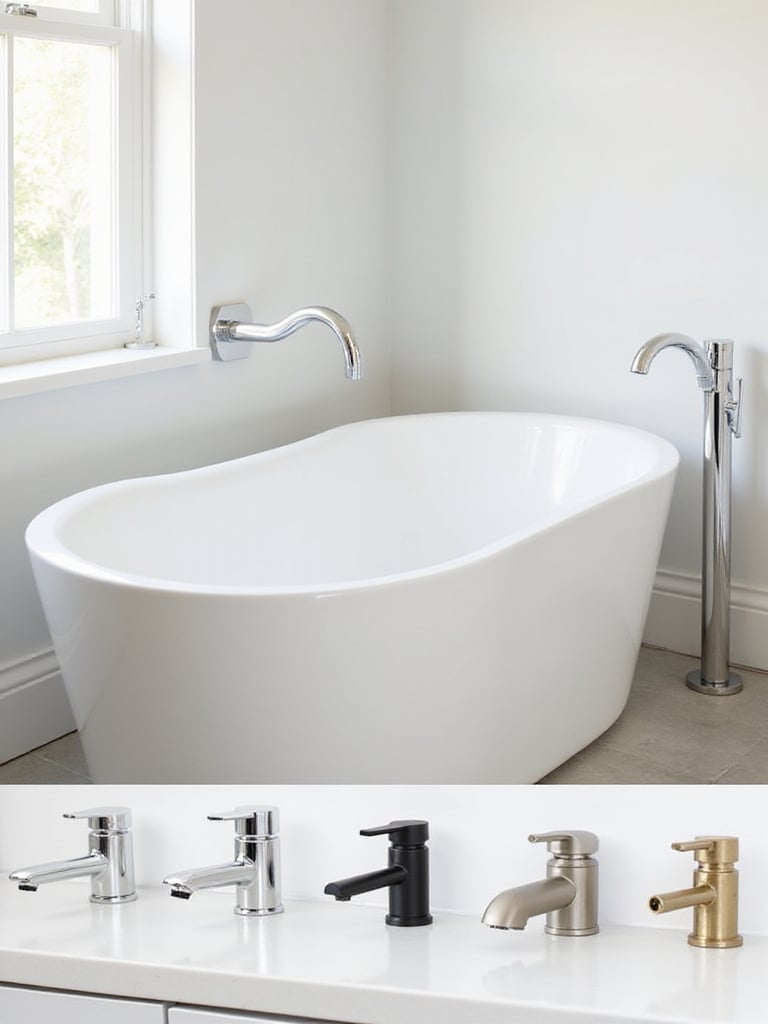
Popular fixture materials include solid brass (most durable), zinc alloy (mid-range durability), and plastic (least durable). Common finishes range from classic polished chrome and brushed nickel to trending matte black, oil-rubbed bronze, and specialized PVD (Physical Vapor Deposition) finishes that offer superior durability. When selecting, consider your bathroom’s overall design aesthetic, durability requirements, maintenance preferences, and coordination with other hardware elements.
The collaboration began with a conversation about how Eastern design often emphasizes the ritual of water flow while Western approaches focus on technological innovation. Verify compatibility between your chosen faucet and your specific tub model before purchasing, particularly checking hole drilling specifications and ensuring your water supply configuration supports the fixture’s requirements. Consider mixing metal finishes thoughtfully – perhaps matte black faucets with brushed brass accents – to create visual depth and customized character in your bathtub remodel.
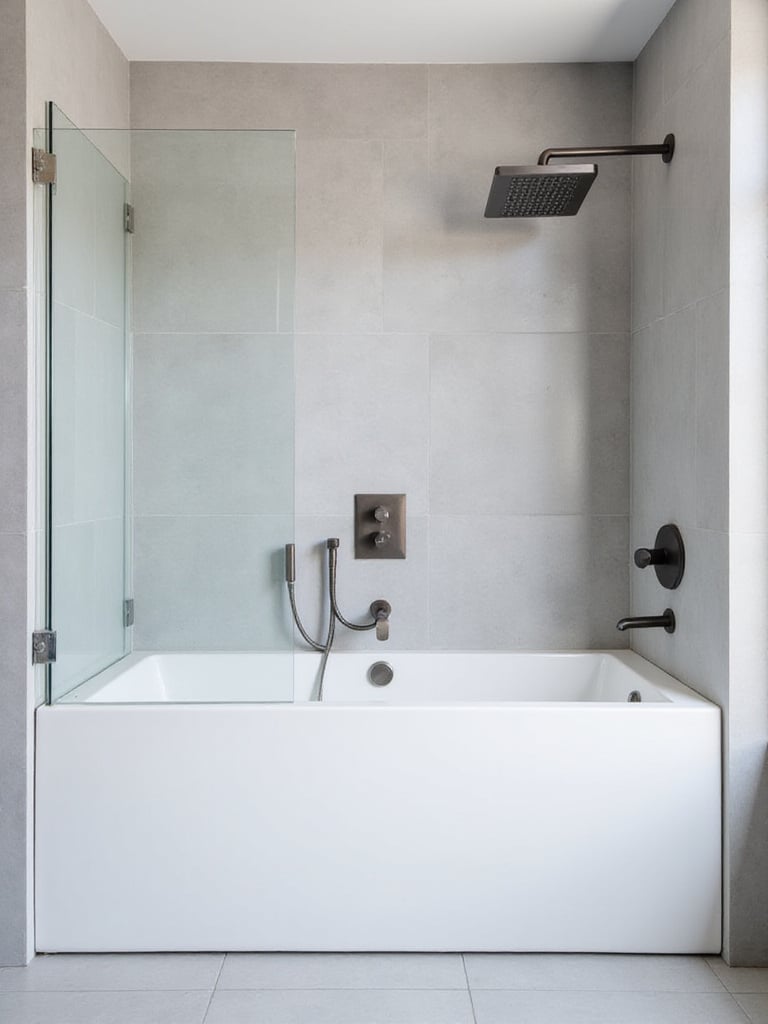
12. Planning for Tile or Wall Surrounds
Look closely and you’ll notice the subtle texture of different surround materials, each offering distinct advantages. The primary options include ceramic or porcelain tile (versatile, durable, endless design options), natural stone tile (unique patterns, luxury appeal, higher maintenance), acrylic or fiberglass panels (affordable, low maintenance, limited design options), solid surface materials (seamless, non-porous, mid to high price range), and composite or PVC panels (budget-friendly, easy installation, moderate durability).
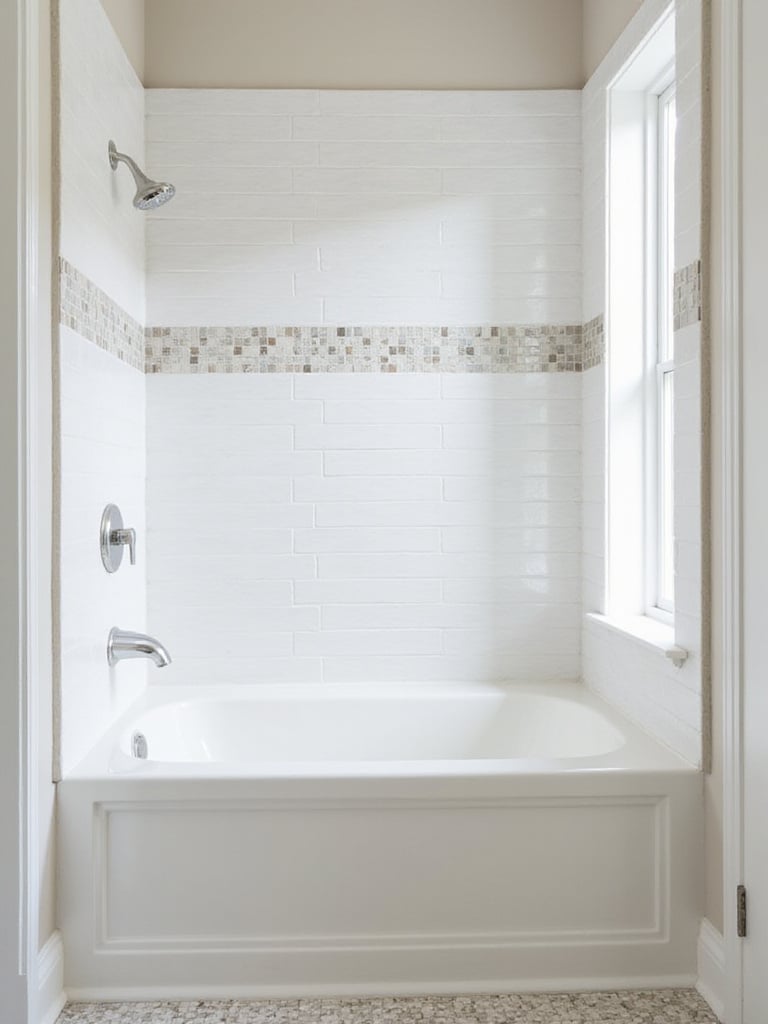
The installation process differs significantly between tile and panel systems. Tile installation involves multiple labor-intensive steps: installing waterproof backing, applying mortar, setting individual tiles, grouting, and sealing. This process typically takes several days but offers unmatched customization. Wall panel surrounds install in larger sections, significantly reducing installation time and complexity, with fewer or no grout lines for easier maintenance, though with more limited design options. Proper waterproofing beneath either system is absolutely critical – water penetration through grout or panel seams can cause structural damage and mold growth.
The interplay between the colors creates fascinating possibilities for your bathtub remodel. Calculate your required materials carefully, adding 10-15% extra for waste and future repairs. Consider incorporating a decorative accent band of mosaic or patterned tile within a field of larger, simpler tiles to add visual interest without overwhelming the space or significantly increasing cost.
13. Ensuring Proper Waterproofing
The sustainable journey of this material involves creating impermeable barriers against moisture intrusion. Proper waterproofing represents the single most critical element in preventing long-term damage during your bathtub remodel. Bathrooms naturally experience high moisture levels, and any water penetration beyond the visible surfaces can lead to structural deterioration, mold growth, and expensive repairs. Effective waterproofing creates an essential protective shield for the underlying structure.
Critical areas requiring thorough waterproofing include all walls surrounding the tub/shower (extending at least 6 inches above the showerhead), the floor around the tub, and especially all seams, corners, edges, and penetrations where fixtures or pipes pass through surfaces. Common waterproofing methods include sheet membranes (like Schluter-KERDI) adhered to the substrate, liquid membranes troweled or rolled onto surfaces, waterproof backer boards with inherent moisture resistance, and integrated systems combining compatible components from a single manufacturer.
- Prepare surfaces meticulously: Ensure substrates are clean, dry, structurally sound, and dust-free
- Pay special attention to transitions: Corners, seams, and penetrations require extra care and often specialized products
- Follow manufacturer instructions precisely: Proper application techniques and curing times are non-negotiable
- Consider professional installation: Waterproofing failures cause the most expensive bathroom damage
While conventional options often rely on multiple layers of protection, one integrated waterproofing system from a reputable manufacturer can provide superior performance through components designed to work together seamlessly – an approach that simplifies installation while maximizing protection during your bathtub remodel.
14. Improving Bathroom Ventilation
The magic of this piece lies in its ability to manage moisture, the invisible enemy of bathroom longevity. Proper ventilation proves essential during and after your bathtub remodel because high humidity from bathing can trigger mold growth, peeling paint, warped cabinetry, and structural deterioration. Installing or upgrading ventilation systems quickly removes moisture, protecting your new finishes and preserving the integrity of the entire room.
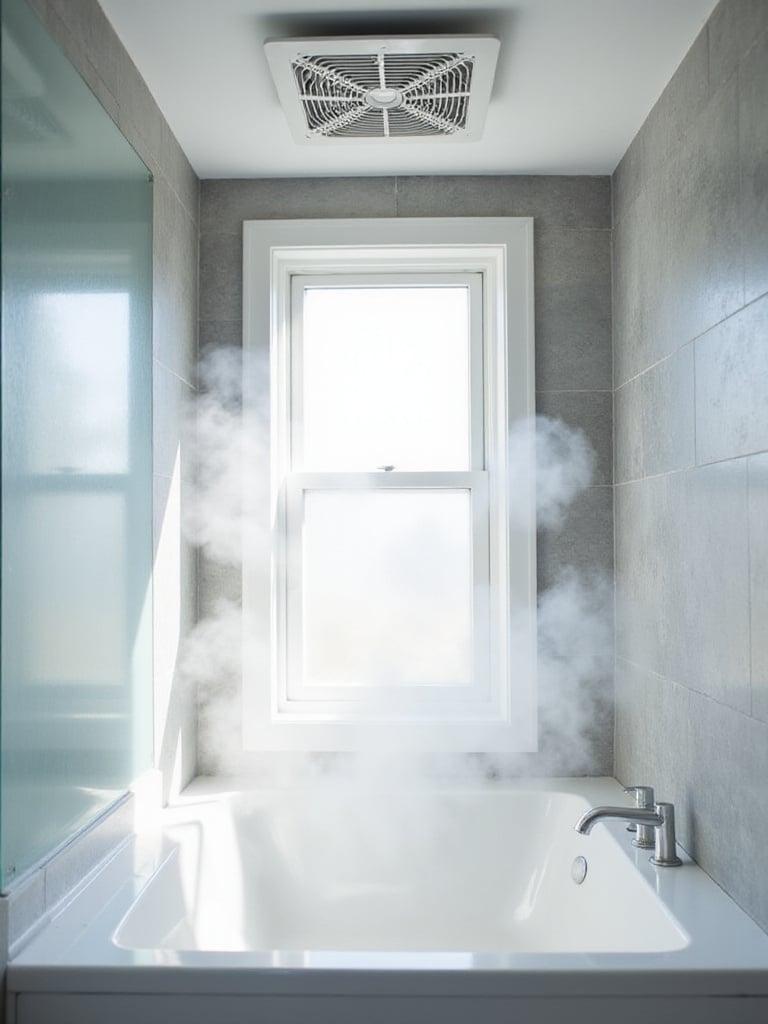
Signs of inadequate ventilation include persistent condensation on surfaces, a heavy or damp feeling in the air, musty odors, and visible mold or mildew growth. When selecting a new bathroom exhaust fan, focus on capacity (measured in Cubic Feet per Minute/CFM), which should match your bathroom’s square footage (minimum 50 CFM for small bathrooms, 1 CFM per square foot for larger spaces). Also consider noise level (Sones), energy efficiency, and helpful features like humidity sensors or programmable timers. Ensure the fan vents directly outside your home, not into an attic or other enclosed space.
The unexpected pairing that always works is combining proper ventilation with thoughtful bathtub remodel planning. Consider upgrading to a high-efficiency, ultra-quiet exhaust fan with humidity-sensing technology that automatically activates when moisture levels rise – a feature that protects your investment even when family members forget to turn the fan on manually.
15. Optimizing Lighting Around the Tub
As morning light filters through, the texture creates dramatically different effects depending on your lighting design. Strategic lighting around your bathtub area serves three essential purposes: safety (preventing accidents), ambiance (creating mood), and functionality (providing adequate illumination for activities like cleaning). Well-planned lighting also highlights architectural features and design elements of your bathtub remodel.
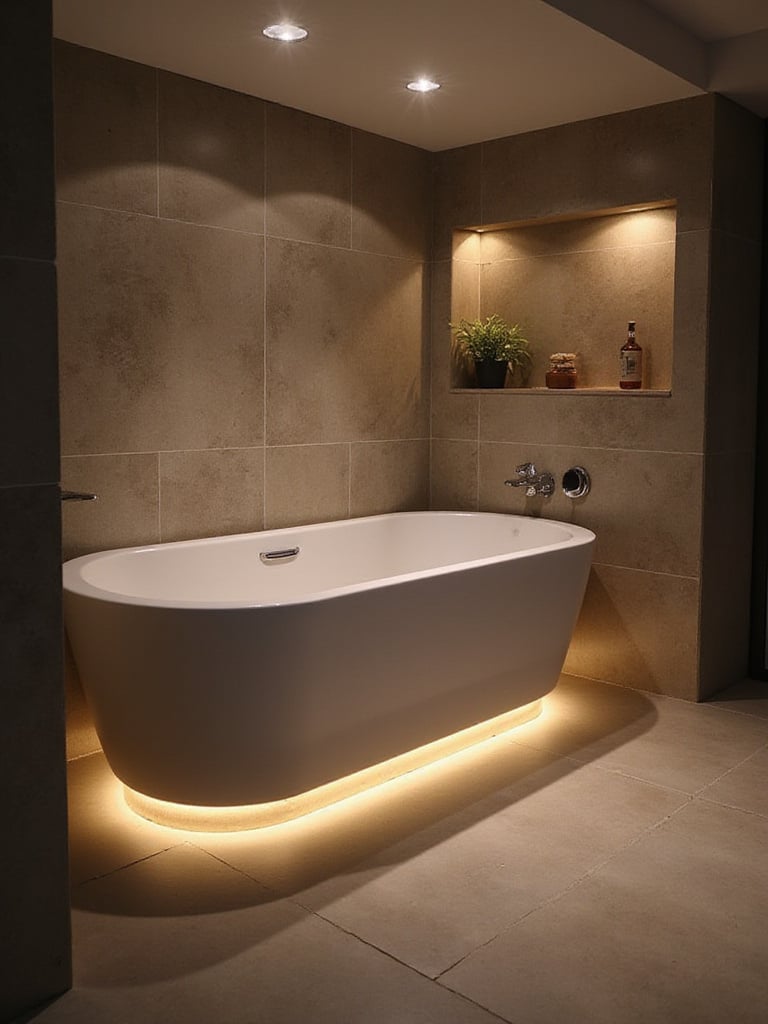
The most effective approach incorporates layered lighting: ambient illumination for overall brightness, task lighting for specific activities, and accent lighting to create atmosphere and highlight design features. Safety considerations are paramount – all fixtures in wet zones must have appropriate IP (Ingress Protection) ratings indicating their water resistance. Circuits must be GFCI-protected, and low-voltage options are preferable in the wettest areas. Dimmable lighting adds versatility, allowing adjustment from bright illumination for cleaning to soft, relaxing levels for soaking.
The mood shifts dramatically when you add thoughtfully positioned lighting to your bathtub remodel. Consider recessed, waterproof LED downlights directly above the tub for clean, shadow-free illumination, complemented by decorative sconces at appropriate heights on adjacent walls. LED strip lighting in niches or under floating elements adds depth and interest without consuming valuable space.
16. Adding Smart Storage Solutions
The artisan collective that creates these pieces understands that intelligent storage transforms daily bathing routines. Incorporating smart storage during your bathtub remodel addresses the perennial bathroom challenge of insufficient space. Integrated storage solutions keep toiletries organized and accessible, improve functionality, enhance aesthetics by reducing clutter, increase safety by keeping items off slippery surfaces, and ultimately make the space more enjoyable to use.
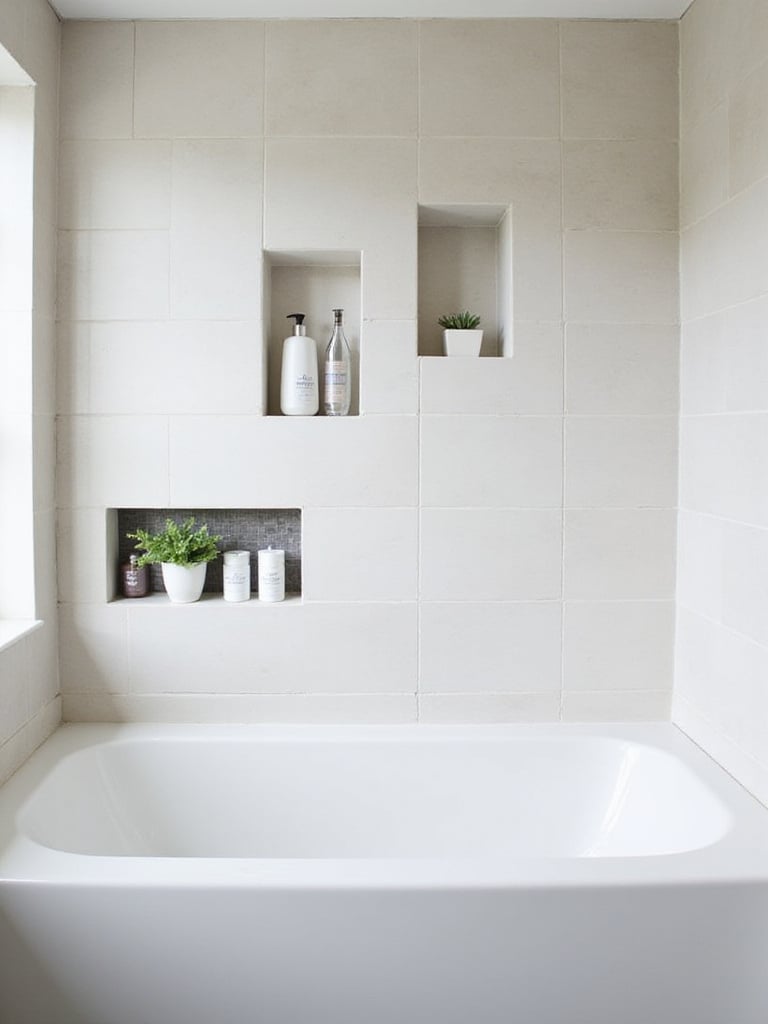
Popular built-in storage options for bathtub areas include recessed shower niches (cavities built into wall studs and waterproofed to match surrounding surfaces), integrated shelving or ledges within the surround material, corner shelves, and shallow recessed medicine cabinets. These built-in solutions offer clean, finished appearances without consuming floor space or creating cleaning challenges around freestanding accessories.
The visual weight balances perfectly when storage is incorporated during the initial design phase of your bathtub remodel. Plan early, as built-in options require framing modifications and proper waterproofing before finishing surfaces are applied. Consider installing multiple niches at different heights to accommodate various users’ needs, or create a feature wall with several recessed compartments of different sizes to organize products logically while adding visual interest.
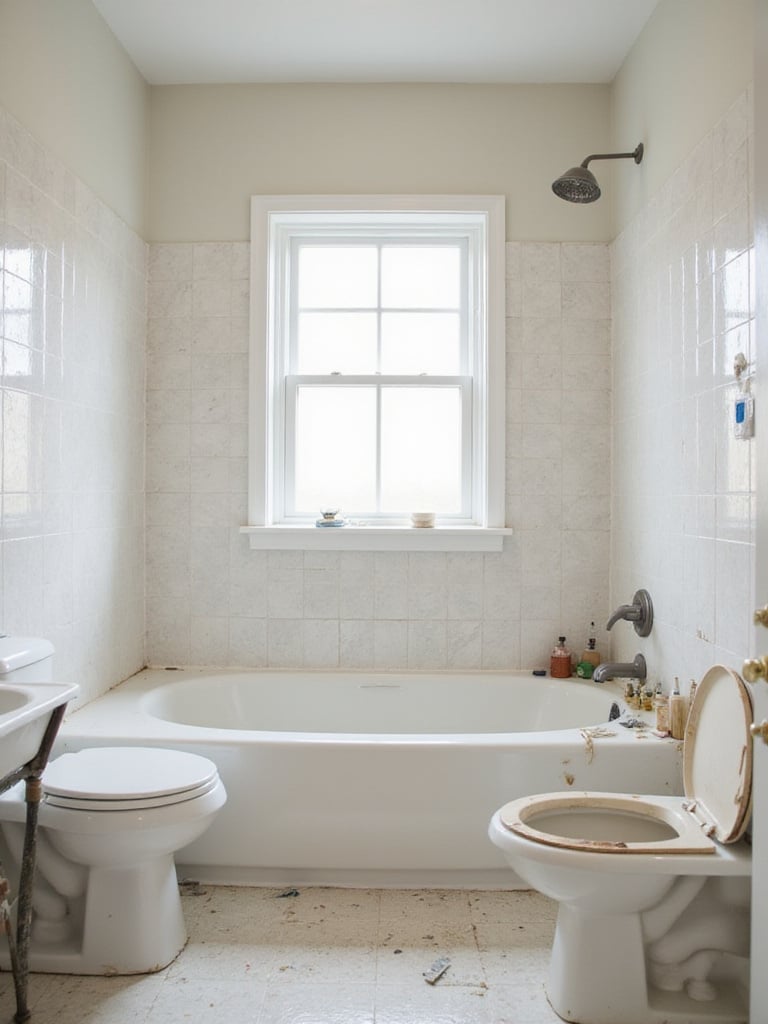
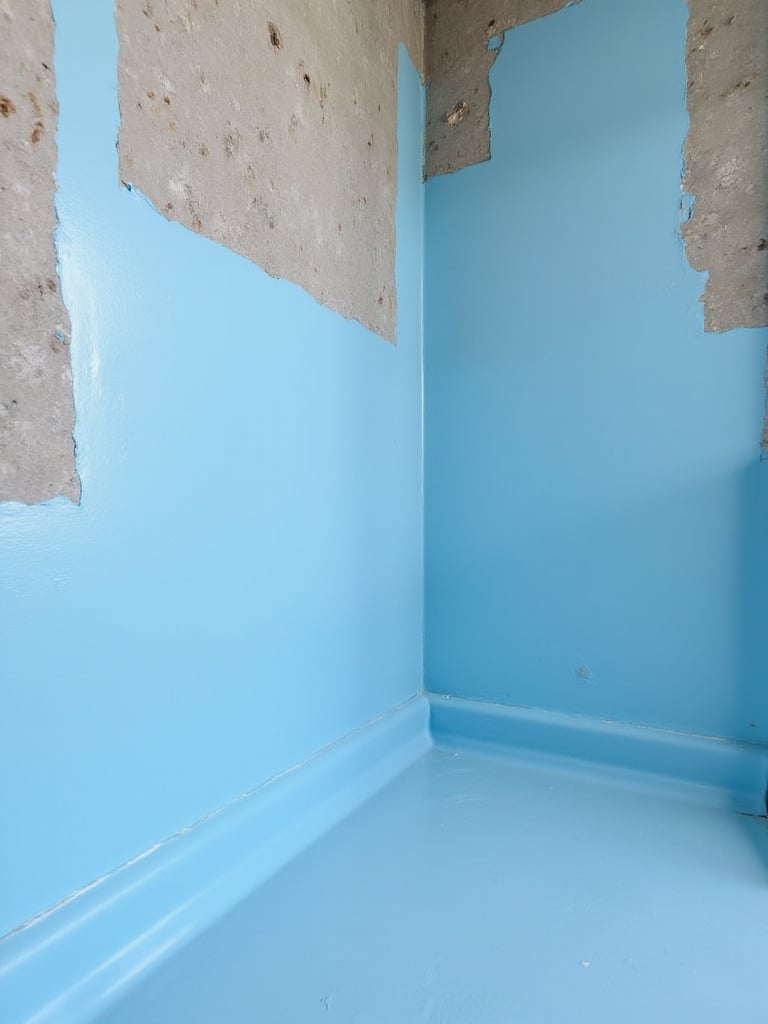
17. Dealing with Old Tub Removal & Disposal
The challenge of awkward spaces becomes easier when approaching old tub removal strategically. Common challenges include managing the substantial weight of cast iron tubs (often 300-500+ pounds), navigating tight doorways and hallways, carefully disconnecting plumbing connections, and preventing damage to surrounding surfaces. Even lighter fiberglass or acrylic tubs present challenges due to their bulky dimensions and sometimes awkward installation methods.
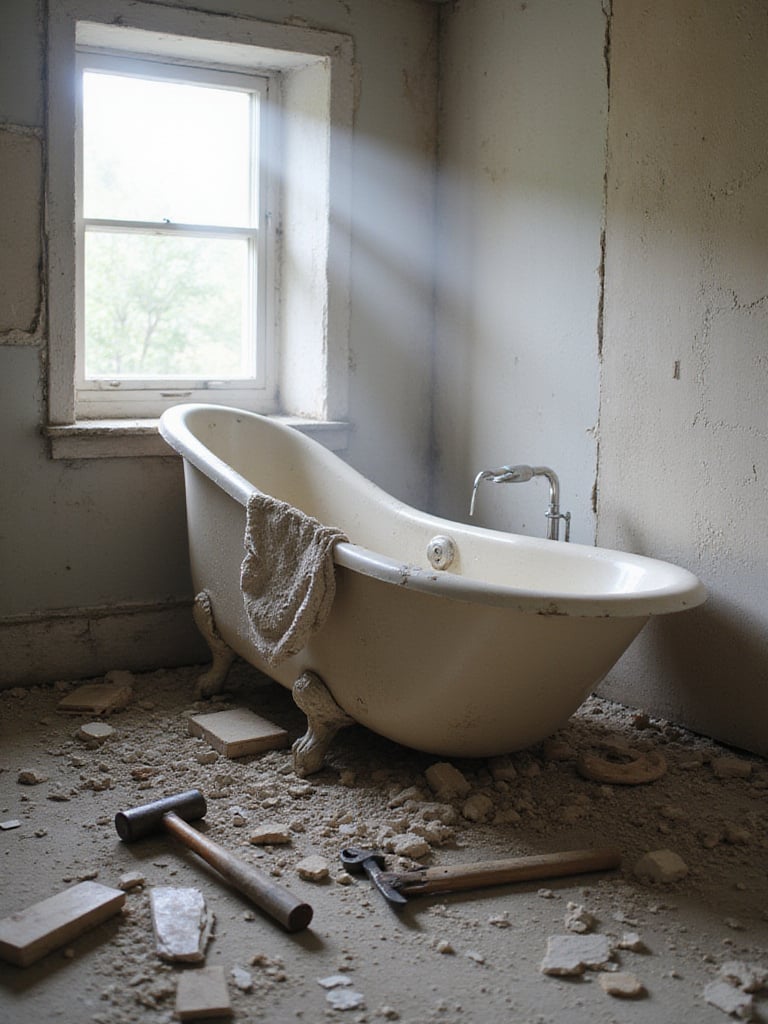
Disposal options for your old bathtub include municipal waste disposal facilities, scrap metal recycling centers (for cast iron or steel tubs, which sometimes earn small payments), specialized junk removal services (convenient but typically more expensive), or donation/resale for vintage tubs in good condition. DIY removal of heavy cast iron tubs is possible but physically demanding, often involving breaking the tub into smaller pieces with a sledgehammer. This approach requires significant strength, appropriate safety gear, and careful planning.
The finishing touch that elevates the entire look begins with properly removing what came before. Before attempting tub removal, carefully disconnect all plumbing connections (drain, overflow, faucet) using appropriate wrenches and tools. For cast iron tubs in upper-floor bathrooms where weight poses structural concerns, consider the controlled demolition approach – breaking the tub into manageable pieces using a sledgehammer (with proper safety gear including eye protection, heavy gloves, and dust masks) for easier transport during your bathtub remodel.
18. Considering a Bathtub Liner as an Alternative
For those worried about maintenance of a full bathtub remodel, liners offer an intriguing alternative. A bathtub liner is a custom-molded acrylic or PVC shell precisely fitted over your existing tub, sometimes extending to cover surrounding walls. Unlike refinishing (which applies new coating to the existing surface) or replacement (removing the old tub entirely), liners create a new surface directly over the original fixture, bypassing major demolition and plumbing modifications.
Bathtub liners offer several advantages: installation typically completes in just one day with minimal disruption; costs run lower than full replacement (though higher than refinishing); and the result provides a clean, seamless, non-porous surface that’s easy to maintain. Potential disadvantages include the possibility of trapped moisture between the liner and original tub if not perfectly installed, a somewhat less solid feel underfoot, limited style and color options compared to new tubs, and failure to address any underlying plumbing or structural issues.
When your existing decor doesn’t seem to coordinate with your vision but your budget or timeline doesn’t allow for complete replacement, a bathtub liner might provide the perfect compromise. Modern acrylic liners typically last 15-25 years with proper care, with many manufacturers offering 10-year to lifetime warranties. This approach works particularly well for rental properties or bathrooms scheduled for more comprehensive renovation in the future, providing a clean, updated appearance without major investment or disruption.
19. Exploring Refinishing or Reglazing Options
The environmental story behind this piece began with the concept of restoration rather than replacement. Bathtub refinishing (also called reglazing) involves restoring your existing tub’s surface through a multi-step process: thorough cleaning, repairing chips or cracks, etching the surface for adhesion, applying multiple layers of specialized coating, and polishing to a smooth finish. This approach preserves the original tub while providing a fresh, renewed appearance.
Refinishing offers significant benefits: cost savings (typically 50-70% less than replacement), minimal disruption (usually completed in 1-2 days), reduced environmental impact by keeping the tub out of landfills, and compatibility with most common tub materials including cast iron, porcelain, fiberglass, and acrylic. Potential drawbacks include strong chemical odors during application (requiring good ventilation), somewhat shorter lifespan than factory finishes (though professional applications can last 10-15 years with proper care), and results heavily dependent on the technician’s skill and the quality of materials used.
The revival of this classic form comes with a twist during your bathtub remodel. When hiring a professional refinisher, thoroughly research their reputation, ask for references and before/after photos of previous work, inquire about specific products and techniques used, and understand the warranty terms. For a dramatic statement, consider refinishing an older tub in an unexpected color like deep navy, forest green, or matte black to create a stunning focal point that honors the fixture’s heritage while adding contemporary flair.
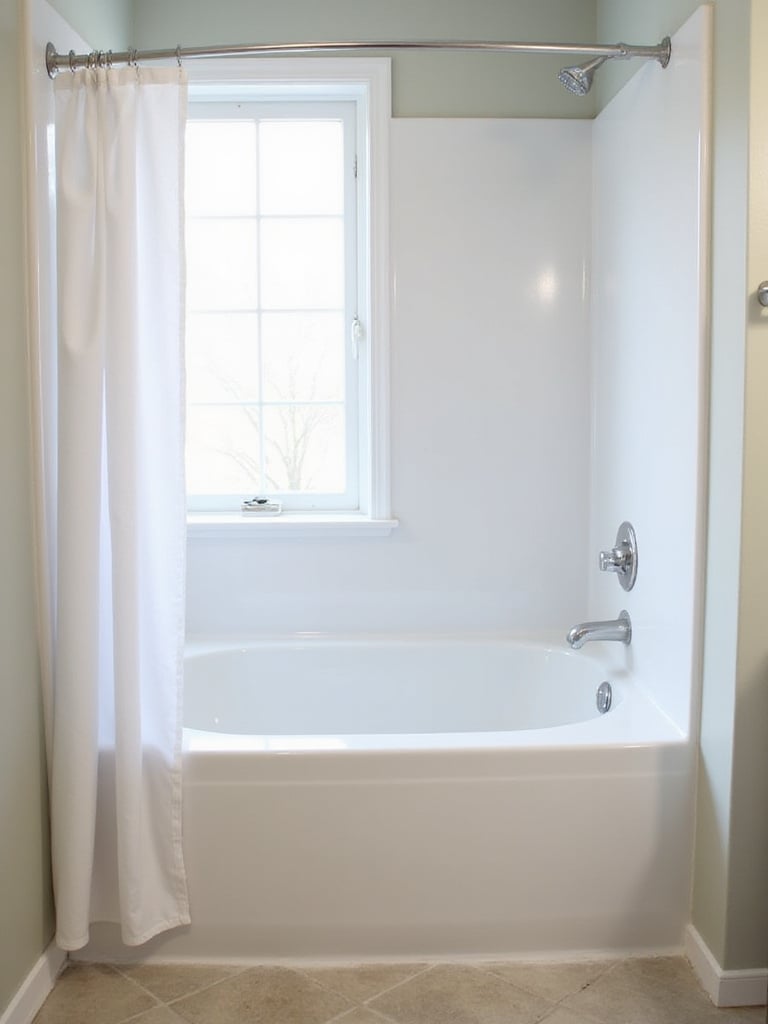
20. Integrating Shower Components (If Needed)
If you’ve struggled with similar rooms before, combining bathtub and shower functionality requires thoughtful planning. Essential components for converting a bathtub-only setup into a versatile tub/shower combination include the shower valve (preferably with pressure-balancing or thermostatic features), a diverter mechanism, shower arm and showerhead, tub spout, potentially a hand shower unit with hose and mounting bracket, comprehensive waterproofing of surrounding walls, and either a shower curtain rod or glass door enclosure.
Waterproofing becomes even more critical when adding shower functionality to a bathtub area. Water spray from showering creates significantly more wall exposure to moisture than bathing alone. This requires robust waterproofing systems behind tile or wall panels, typically involving waterproof backerboard (cement board or specialized foam board) and either liquid or sheet waterproofing membranes. Every seam, corner, and penetration must be meticulously sealed, and proper slope toward the drain is essential to prevent standing water.
The designer’s secret here is to carefully plan the height and placement of all shower components based on the primary users’ heights and preferences before finalizing any plumbing rough-in work during your bathtub remodel. Consider installing a multi-function shower system that includes both a fixed rainshower head and a handheld shower on an adjustable slide bar, accommodating users of different heights while providing versatility for various bathing needs – from full-body showering to targeted spray for cleaning the tub itself.
21. Boosting Resale Value with Your Remodel
The quality becomes evident after years of use when thoughtful bathtub remodel choices continue to appeal to future buyers. Bathroom renovations consistently rank among the home improvements with strongest impact on resale value. An updated, functional bathroom serves as a major selling point, with mid-range remodels typically offering one of the best returns on investment among home renovation projects.
According to industry reports, a mid-range bathroom remodel typically recoups about 60-68% of its cost at resale. The specific elements offering the best value include the bathtub/shower area (clean, modern fixtures), vanity (updated but not overly personalized), and lighting (bright, energy-efficient fixtures). For broadest appeal, focus on neutral, timeless finishes and durable, low-maintenance materials rather than highly specific style choices or trendy elements that might quickly date.
The renewable resources used here demonstrate the value of thinking long-term. For maximum resale appeal, choose neutral, timeless finishes for permanent elements like tile and fixtures, while expressing personality through easily changed accessories. Consider converting an outdated tub/shower combination to a spacious walk-in shower with clean lines and frameless glass if your home will still have at least one bathtub elsewhere – this modernization often appeals strongly to buyers while distinguishing your property from competing listings.
22. Avoiding Common Bathtub Remodel Pitfalls
Many homeowners wonder how to navigate potential problems during their bathtub remodel. Common budget pitfalls include underestimating material costs (particularly for custom or specialty items), failing to account for unexpected issues discovered during demolition, overlooking permit fees, and making significant changes mid-project. Protect yourself by obtaining detailed quotes, establishing clear contracts, conducting pre-demolition inspections when possible, and maintaining that crucial 15-20% contingency fund.

Finding reliable contractors requires thorough vetting: check online reviews across multiple platforms, verify proper licensing and insurance, request and contact references from similar projects, view examples of past work, and obtain detailed written bids from at least three qualified professionals. Hidden issues commonly lurking behind walls or under floors include water damage, mold growth, outdated or non-compliant plumbing/electrical systems, and structural problems. Prepare by having professionals inspect the area before demolition when possible and discussing how potential issues will be handled and priced with your contractor.
- Create a detailed scope of work: Document exactly what’s included before getting bids
- Take progress photos: Document each phase, especially open walls before they’re closed
- Establish clear communication protocols: Determine how and when updates will be provided
- Get everything in writing: Verbal agreements are easily misremembered or misinterpreted
Professional stylists approach this by first ensuring all technical requirements are properly addressed before focusing on aesthetics. During your bathtub remodel, prioritize structural integrity, proper waterproofing, and code compliance – elements that might be invisible in the finished space but form the foundation of a successful, long-lasting renovation.
23. Keeping Your New Tub Sparkling Clean
The tactile experience changes the entire room’s energy when your bathtub remains pristine through proper maintenance. Cleaning products should be matched to your specific tub material: for most acrylic, fiberglass, and porcelain surfaces, non-abrasive, mild cleaners like dish soap and water or specialized bath cleaners work best. Avoid harsh chemicals (particularly bleach on acrylic or fiberglass), abrasive powders, steel wool, or stiff brushes, which can scratch surfaces and potentially void warranties. Always check manufacturer recommendations for your specific tub material.
Regular maintenance prevents buildup and preserves your tub’s appearance. Rinse thoroughly after each use to remove soap and product residue. Perform more thorough cleaning weekly, focusing on areas prone to soap scum and mineral deposits. Prevention strategies include switching from bar soap to liquid body wash (which creates less scum), wiping down surfaces after use (particularly in hard water areas), ensuring good ventilation to prevent mildew, and applying protective treatments recommended by your tub manufacturer.
Imagine coming home to the gentle glow of a perfectly maintained bathtub after your bathtub remodel. Create a dedicated “Tub Care Kit” containing approved cleaners, microfiber cloths, a squeegee, and soft brushes, stored conveniently near the bathroom to encourage frequent light cleaning rather than infrequent, more intensive scrubbing sessions. This approach preserves your tub’s finish while making maintenance a simple part of your routine rather than a dreaded chore.
24. Making Eco-Friendly Choices for Your Remodel
What separates artisanal quality from mass-produced is often the thoughtful consideration of environmental impact. For an eco-conscious bathtub remodel, prioritize materials with durability, recycled content, and sustainable sourcing. Consider cast iron tubs (often containing recycled content), bamboo composite options, or carefully restored vintage fixtures. For surrounds, explore tiles made from recycled glass or porcelain, responsibly sourced stone, or rapidly renewable materials. Choose low-VOC paints, sealants, and adhesives to maintain healthy indoor air quality.
Water conservation represents another crucial aspect of environmental responsibility. Install WaterSense-labeled fixtures, particularly showerheads and faucets, which use at least 20% less water than standard models without sacrificing performance. A standard showerhead uses approximately 2.5 gallons per minute, while WaterSense models use no more than 2.0 GPM. Selecting durable materials for your tub and surround reduces the need for future replacements, minimizing waste and resource consumption over time.
Unlike conventional options, this approach reduces environmental impact while creating a more healthful bathing environment. Research local suppliers specializing in recycled or salvaged building materials, which often offer unique character while diverting items from landfills. Consider refinishing or reglazing your existing bathtub rather than replacing it entirely when the structure remains sound – this approach conserves resources, reduces waste, and often costs significantly less while still providing a fresh, renewed appearance for your bathtub remodel.
Conclusion
A thoughtful bathtub remodel transcends mere fixture replacement – it creates a sanctuary that honors both function and tranquility. From establishing realistic budgets and selecting materials that speak to your aesthetic sensibilities to ensuring proper technical execution and incorporating elements that enhance both present enjoyment and future value, each decision contributes to the success of your transformation.
Whether you choose a complete renovation with luxury materials or a targeted refresh through refinishing or liner installation, your renewed bathing space will serve as both practical necessity and personal retreat. The bathtub, existing at the intersection of utility and relaxation, deserves thoughtful consideration that balances Eastern mindfulness with Western efficiency. By approaching your remodel with clear intention and informed decision-making, you create not just a beautiful fixture but a daily ritual space that nurtures well-being through the simple yet profound act of bathing.