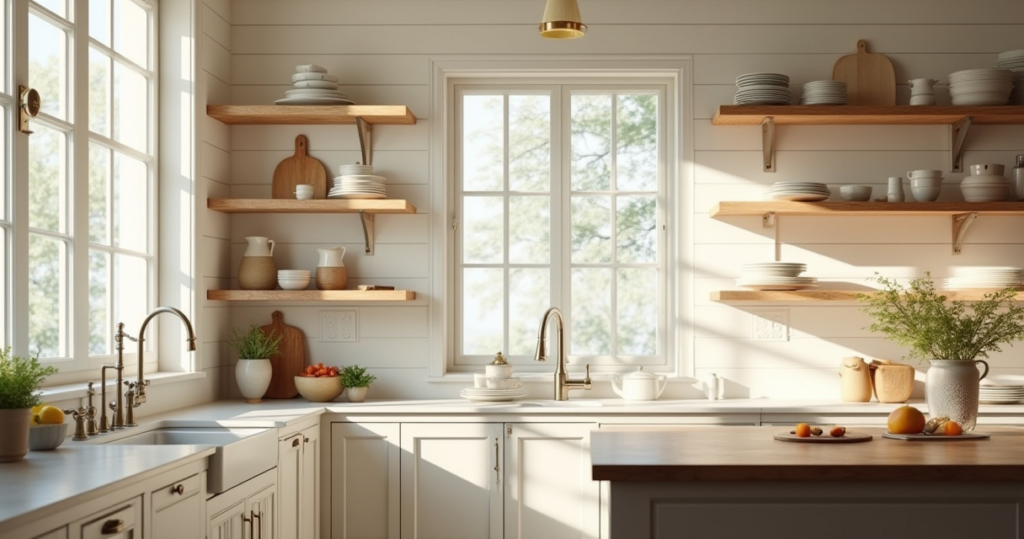
Can we talk about the great British farmhouse kitchen for a moment? You know the one. Not the catalogue version with acres of sterile white and fixtures that feel a bit, well, American. I mean the real thing: the slightly higgledy-piggledy, heart-of-the-home kitchen with flagstone floors worn smooth by generations and a simmering Aga radiating warmth. And the one thing that separates the sublime from the frankly ghastly? The lighting. It’s the most common and catastrophic mistake I see.
Last year, I visited a new client in Wiltshire. She’d spent a king’s ransom on bespoke cabinetry and a slab of marble that probably had its own postcode. But the lighting? A grid of ice-cold LED spotlights that made the entire room feel like an operating theatre. It was utterly soul-crushing. You simply can’t enjoy a proper scone under interrogation lighting. This, my dear, is the real story of lighting a farmhouse kitchen. It’s not about brightness; it’s about mood, magic, and making sure you can actually see what you’re chopping. Forget the corporate speak and let me give you the shortcuts I wish I’d known when I first started.
Laying the Foundation: Strategic Planning for Your Farmhouse Kitchen Lighting (Part 1)
Before you even think about a pretty pendant, you must do the groundwork. This isn’t the glamorous part, I’ll admit, but it’s the difference between a kitchen that works beautifully and one that simply annoys you every single day. Think of it as preparing the soil before planting a magnificent English garden; get this right, and everything else will flourish.
1. Evaluate Your Kitchen’s Existing Layout & Natural Light
First, you must properly read the room. Watch how the natural light moves throughout the day—where it pools in the morning, where it casts long shadows in the afternoon. Is your north-facing window giving off that cool, artist’s-studio light, or are you blessed with a warm southern glow? Understanding this dance of daylight is your first, and most crucial, step. It dictates everything that comes next.
Don’t just look; make a little sketch. Note where you actually do things: chop vegetables, wash up, make your morning tea. These are your “activity zones.” Most people light the center of the room and forget the corners, creating a sad little island of brightness in a sea of gloom. Your artificial lighting shouldn’t fight the natural light; it should be its charming partner for when the sun decides to take a very British holiday behind the clouds.
Now that you have a map of your kitchen’s soul, let’s choreograph the light to match the movements of your daily life.
2. Map Out Lighting Zones for Optimal Functionality
You don’t need one type of light in a kitchen; you need a team. Think of it as a cast of characters, each with a specific role. You have your main characters—the ambient, or general, lighting. Then your supporting actors—the task lighting. And finally, your delightful cameos—the accent lights. Just plopping a single fixture in the middle of the ceiling is a crime against design.
A well-lit kitchen layers these three. The ambient light (from a lovely flush-mount or perhaps a central chandelier) provides the overall glow. The task lighting (pendants over an island, a sconce by the sink, strips under the cabinets) does the heavy lifting, ensuring you don’t slice your finger instead of the carrots. And the accent lighting? That’s the clever little lamp in a forgotten corner or the soft light inside a glass-fronted cabinet that adds a whisper of warmth and personality. It’s the difference between a workspace and a living space.
Once we know where we need light, the eternal question arises: just how bright should it be? Let’s demystify the numbers, shall we?
3. Calculate Your Ideal Lumens per Square Foot for Ample Brightness
Please, darling, promise me you’ll stop talking about watts. Watts measure energy use, which is dreadfully boring. Lumens measure brightness, which is what we actually care about. Think of it this way: watts are the cost of the theatre ticket, but lumens are the brilliance of the performance. All that matters is how bright the light feels.
For general, all-over light in a kitchen, aim for around 30-40 lumens per square foot. But for your task areas—the countertops where the real work happens—you need to double that to at least 70-80 lumens per square foot. Simply measure the square footage of your kitchen, do a bit of quick maths, and you’ll have a target. This isn’t a rigid science, but it prevents you from creating a space that’s either dim and depressing or so bright you need sunglasses.
Now, let’s consider the room’s proportions, because size truly does matter when it comes to fixtures.
4. Consider Your Ceiling Height for Appropriately Sized Fixtures
This is what I call the “hats and hair” rule of decorating. A magnificent, oversized pendant light in a kitchen with a low ceiling is like a top hat on a toddler—utterly ridiculous and obstructive. Conversely, a tiny, apologetic fixture in a room with grand, high ceilings looks lost and silly. The scale has to feel right.
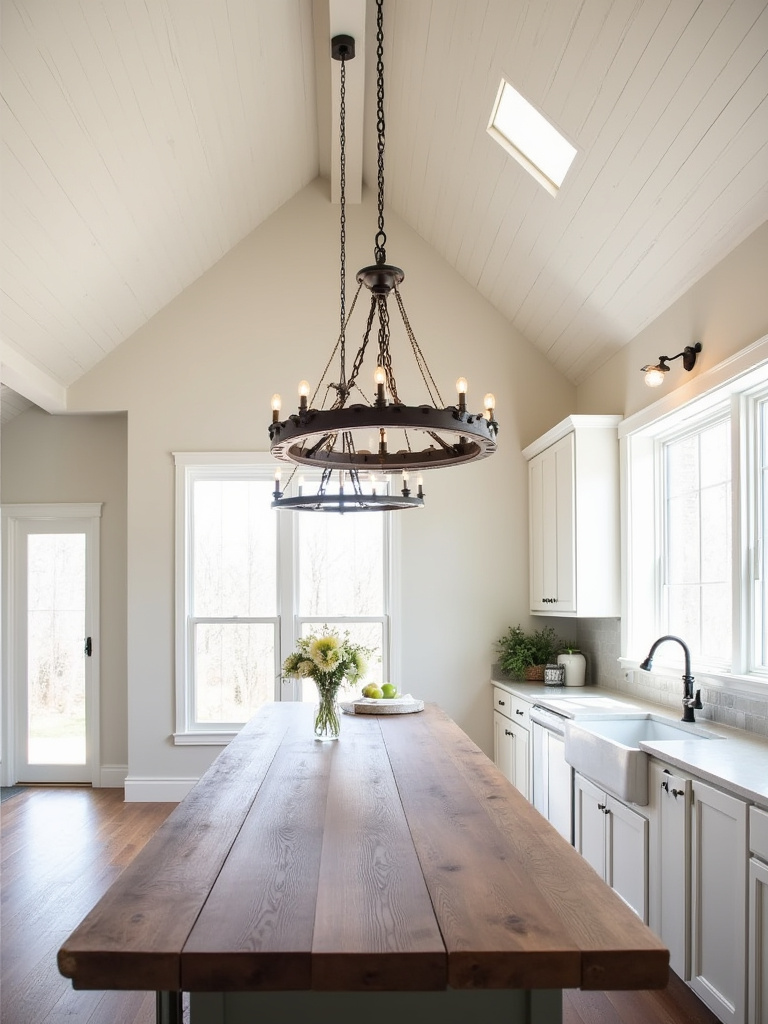
Here’s the shortcut you need: any light you walk under must have at least 7 feet of clearance from the floor. No exceptions. For pendants hanging over an island or a table, aim for the bottom of the fixture to be 30 to 36 inches above the surface. This is the sweet spot—high enough that you can see your dining companion and low enough that the light actually illuminates your work. It’s a simple rule, but it is routinely ignored, with disastrous results.
Laying the Foundation: Strategic Planning for Your Farmhouse Kitchen Lighting (Part 2)
We’ve covered the art and the science; now for the part that can feel a bit dreary but is utterly essential. Let’s talk money. Overlooking your budget is the fastest way to turn a delightful design project into a source of unending stress, and we can’t have that.
5. Set a Realistic Budget for Fixtures and Professional Installation
Right, let’s have a frank chat about brass tacks. It’s terribly tempting to fall in love with a divine, hand-forged chandelier that costs more than a small car. But you must be sensible. A proper lighting plan has many components, and you must budget for all of them, including the man who will safely connect them to your electrical system.

My advice? Allocate your budget strategically. Invest in the fixtures you’ll see and use most—a fantastic pair of pendants over the island, for instance, and excellent under-cabinet lighting. You can be more modest with the flush-mount in the pantry. And please, please, do not skimp on the electrician. Good electrical work is invisible. Bad electrical work can burn your house down. It’s simply not the place to hunt for a bargain.
Choosing and Implementing Farmhouse-Style Fixtures (Part 1)
Now for the fun part: choosing the jewelry for the room. The right fixtures are what bring the farmhouse character to life. They are honest, hard-working, and handsome—much like the ideal country gentleman. Here are the absolute essentials.
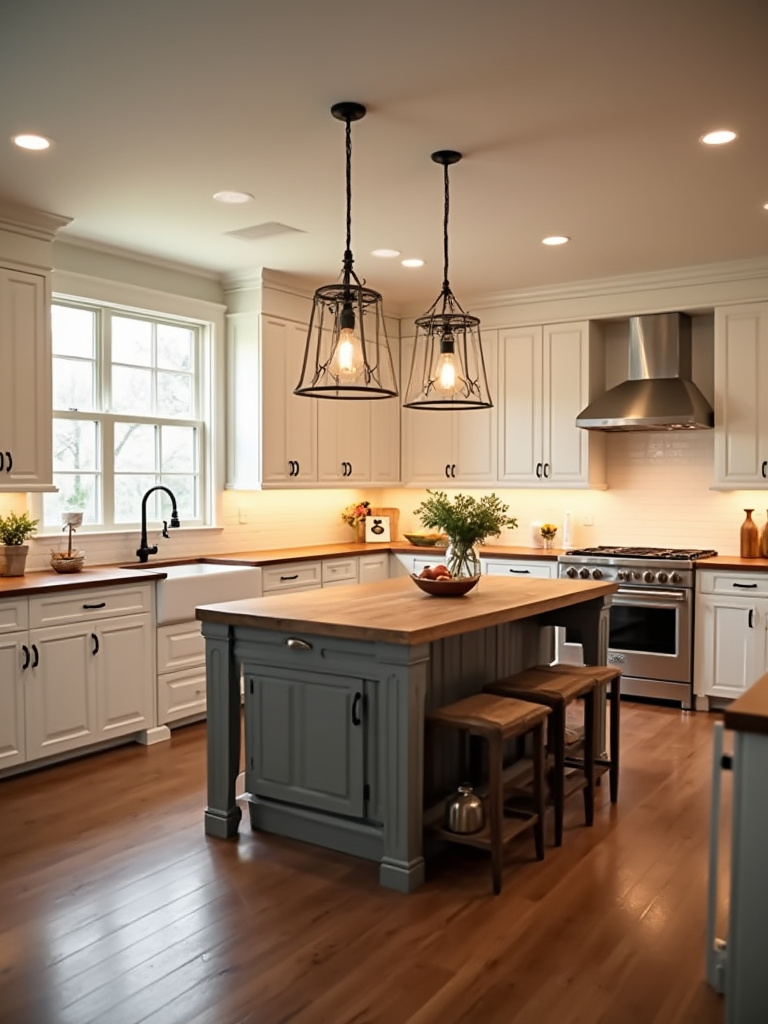
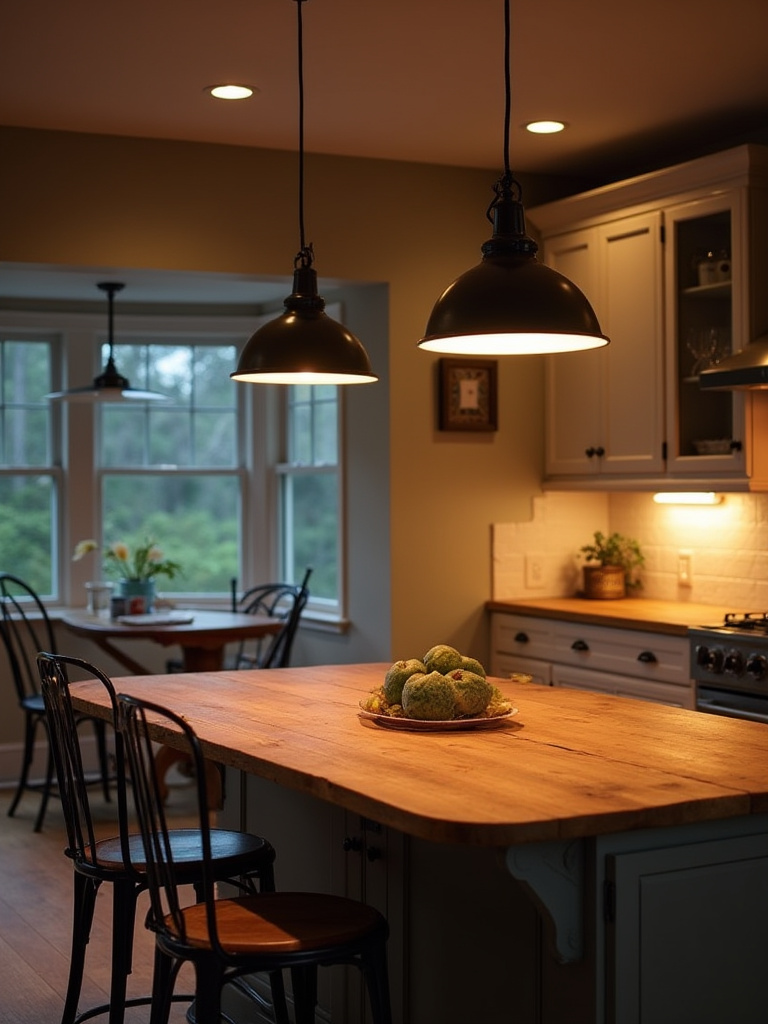
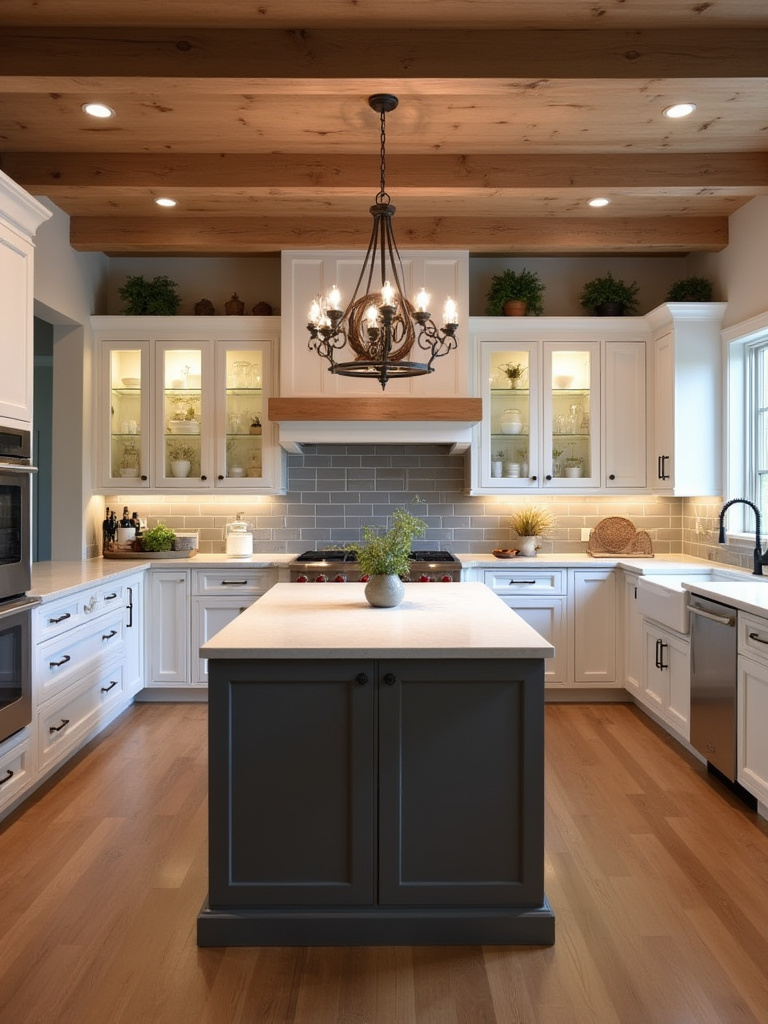
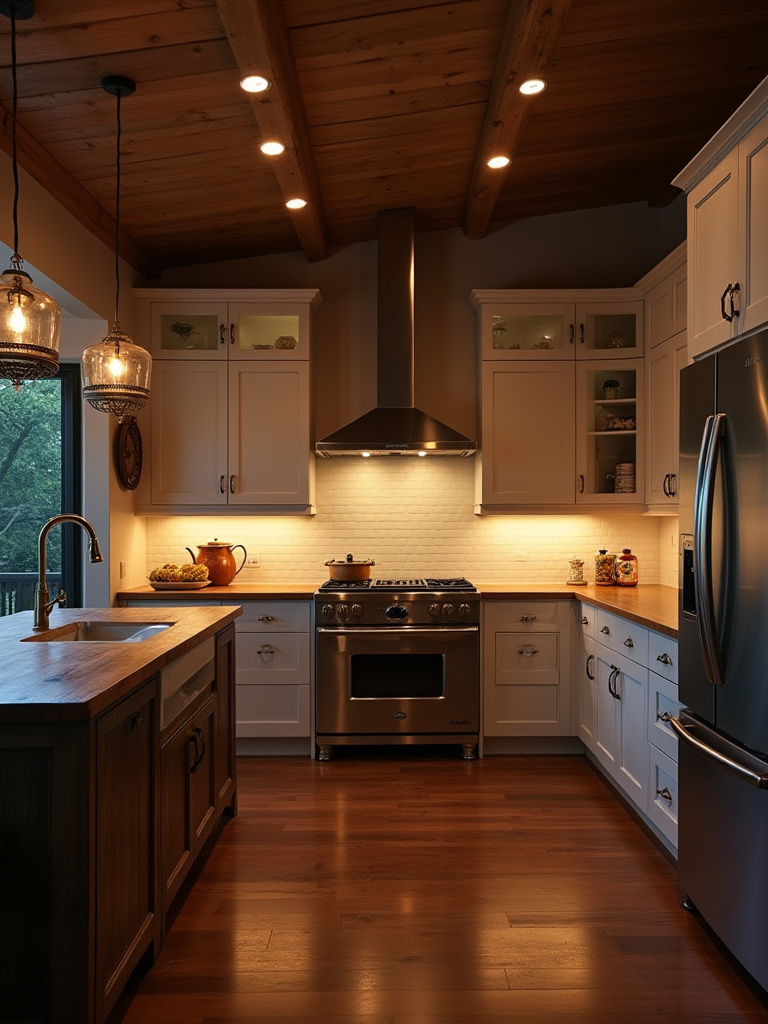
6. Embrace Classic Industrial-Style Pendant Lights Over Islands
There’s a reason these are a classic. They aren’t a “trend”; they have a pedigree. They hail from old workshops, factories, and barns—places of honest work. Their simple forms, often in spun metal or with clear glass shades, provide direct, no-nonsense light, which is precisely what you want over an island. They ground the space and serve as a brilliant focal point.
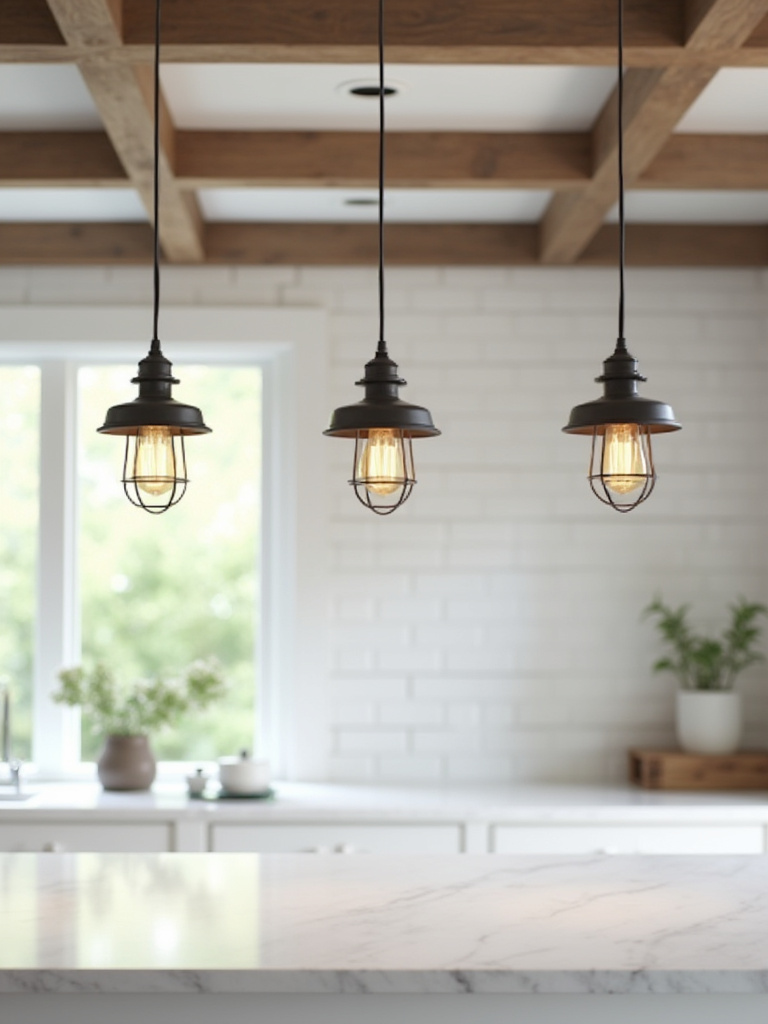
Look for finishes with a bit of life to them: oil-rubbed bronze that will patina over time, weathered zinc, or a classic matte black. Two or three in a row over an island creates a beautiful rhythm. I once worked on a converted oast house in Kent, and we hung three enormous, aged copper pendants over a 12-foot oak island. They were magnificent. They made the entire room sing.
Pendants are the stars, but every star needs a reliable supporting cast.
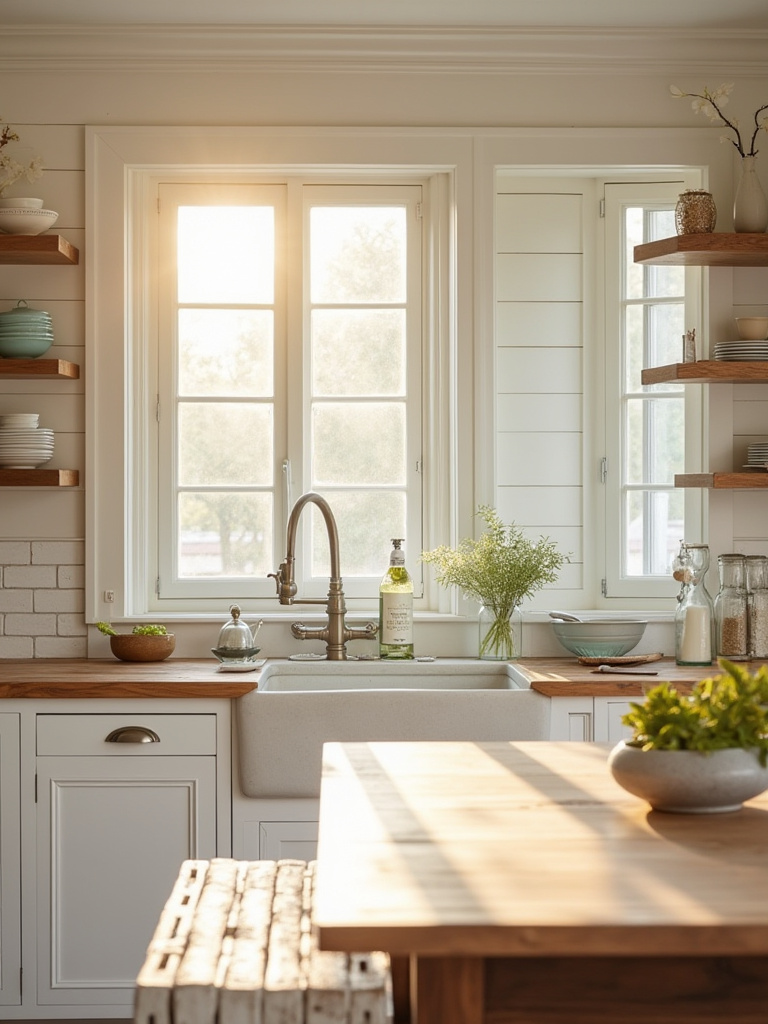
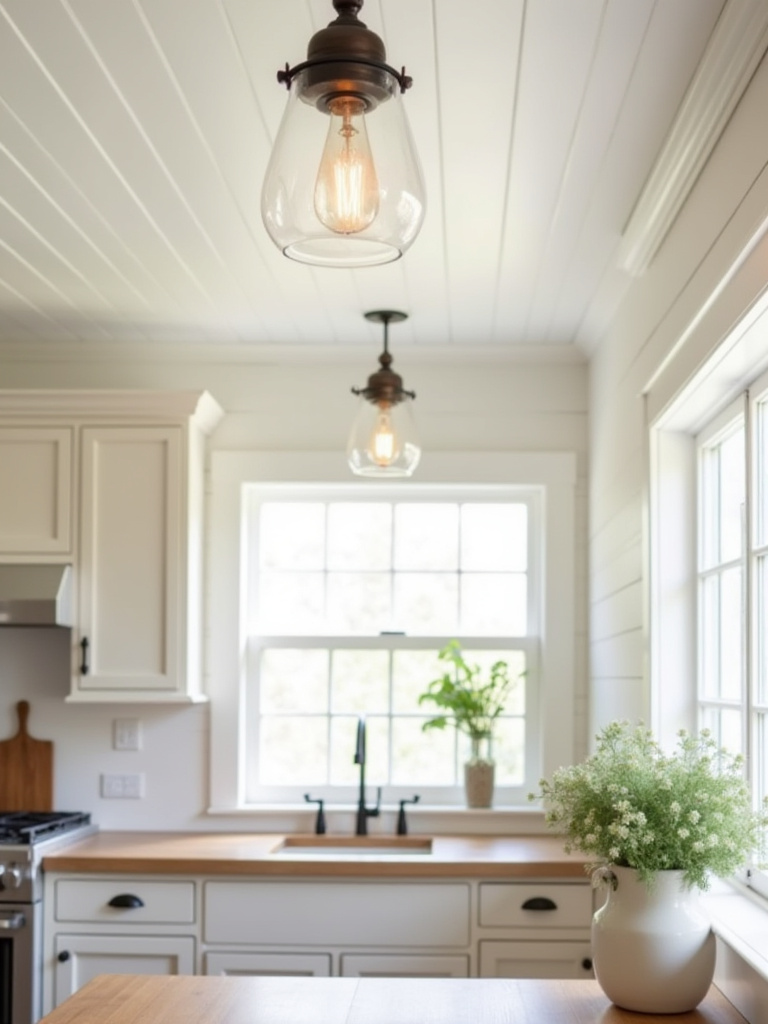
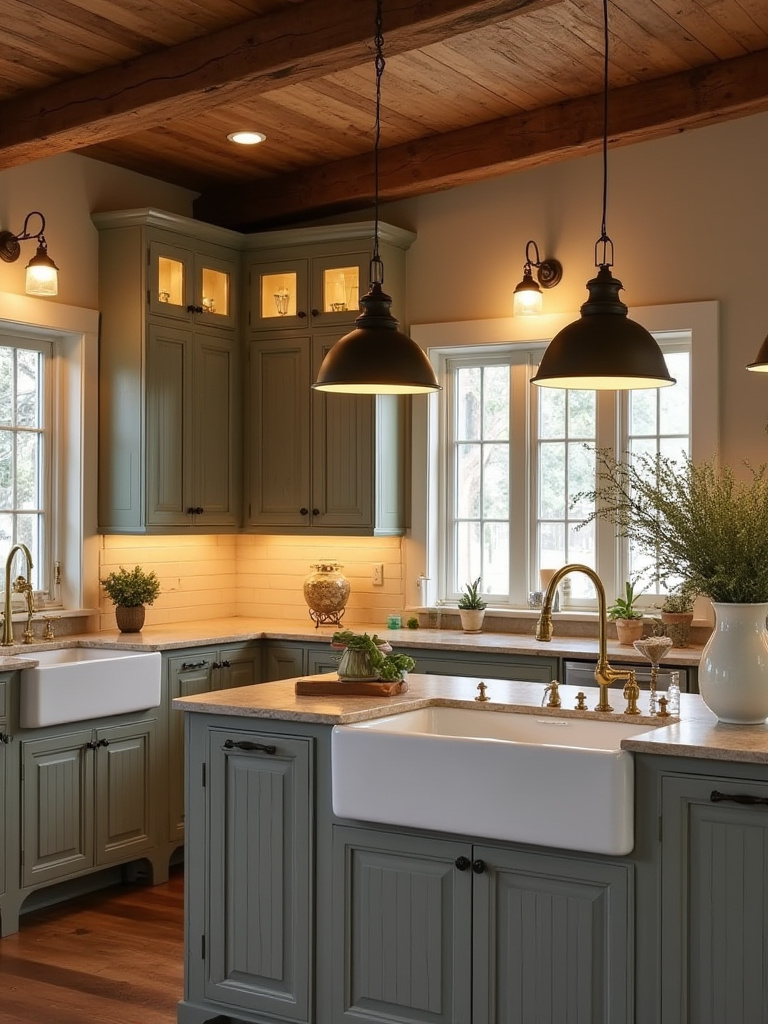
7. Select Barn Sconces for Targeted Task Lighting and Rustic Appeal
Ah, the humble barn sconce. It’s the trusty sidekick of farmhouse lighting. With its characteristic gooseneck arm and simple metal shade, it’s perfect for flanking a window over a sink or for illuminating a specific stretch of countertop. It’s a workhorse, designed to throw light down and forward, exactly where you need it.
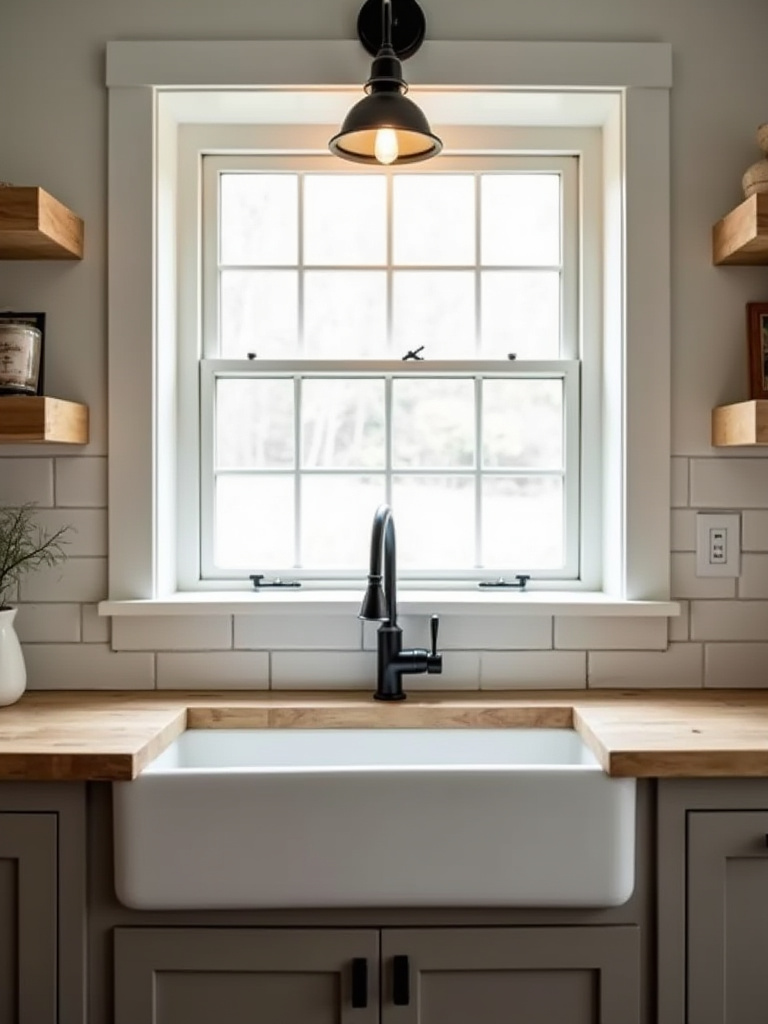
These are exceptionally useful for adding light without cluttering the ceiling. A pair of black sconces over some open shelving, for example, feels both purposeful and incredibly chic. They add a layer of light at eye level, which is far more flattering and interesting than having everything come from above. It’s a small detail that makes a room feel layered and professionally designed.
For spaces with a bit more grandeur, you may need to call in the leading lady.
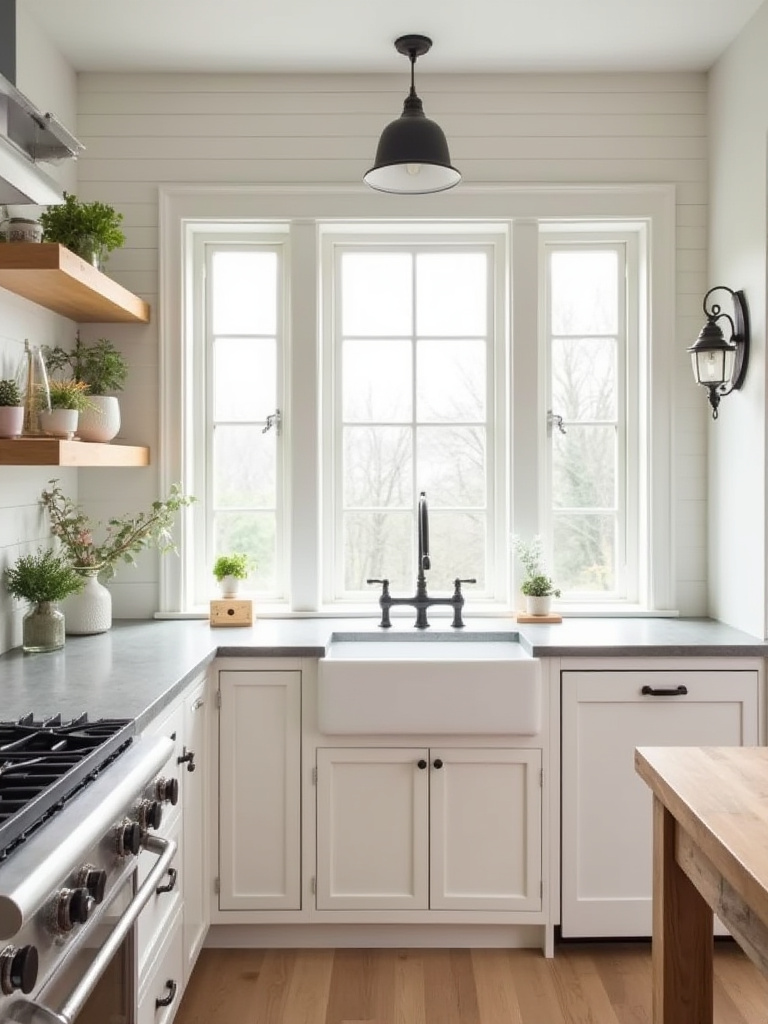
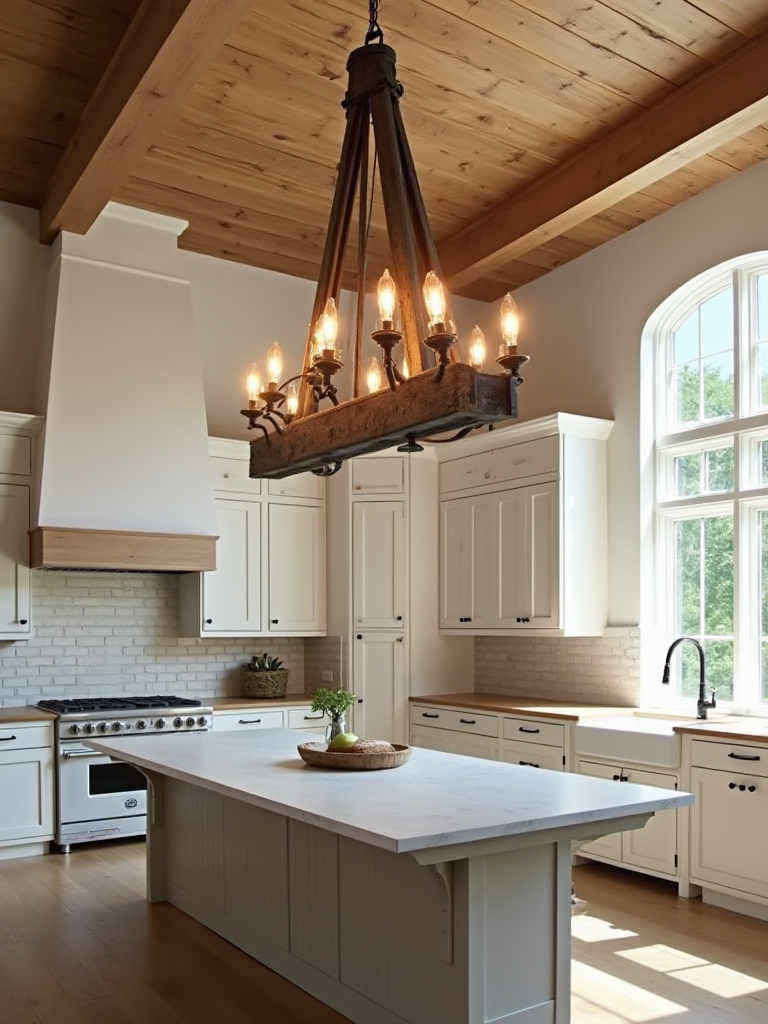
8. Integrate Rustic Chandeliers for a Statement Piece in Larger Spaces
A chandelier in a kitchen can be a stroke of genius or an unmitigated disaster. It all comes down to scale and style. If you have the ceiling height and a generous, open space, a rustic chandelier—perhaps one of wrought iron or reclaimed wood—can be the “grand dame” that anchors the entire design.
But be warned: this is not a piece for a modest kitchen. A client once insisted on a sprawling, antler-style chandelier in her perfectly charming but rather compact Cotswold cottage. It hung so low you had to duck to get to the sink, and it made the whole room feel claustrophobic. It was like having a moose in the kitchen. When in doubt, err on the side of restraint.
While the chandelier gets the glory, the next one is the true, behind-the-scenes hero.
9. Choose Under-Cabinet Strip Lighting for Practicality and Ambient Glow
This, my friend, is the single most important functional light in your kitchen. It is non-negotiable. Overhead lights inevitably cast a shadow from your own body right onto your workspace. Under-cabinet lighting eliminates this completely, bathing your countertops in clear, consistent light. It is a revelation.
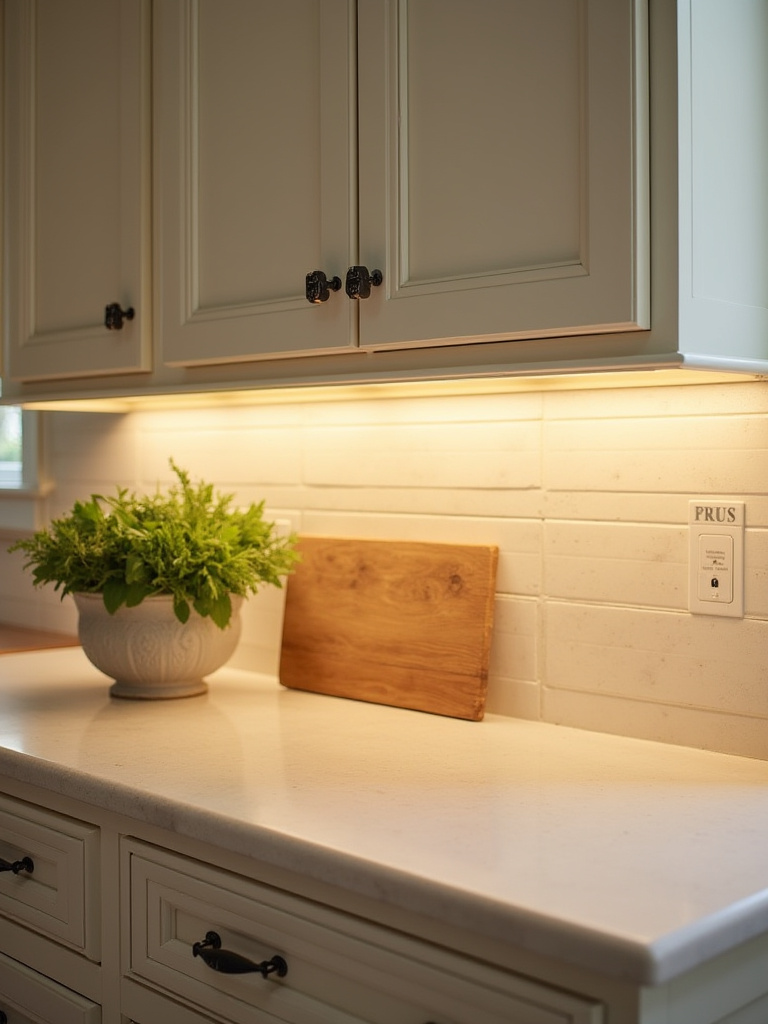
But not all strip lighting is created equal. The cheap ones create horrid little dots of light that reflect on your worktop like a budget disco. You must insist on a system with a diffuser or channel, which creates a seamless, uniform blade of light. You want a beautiful glow, not a landing strip for fairies. It’s a detail that separates the amateurs from the pros.
Choosing and Implementing Farmhouse-Style Fixtures (Part 2)
Having covered the main players, let’s discuss the subtler but equally vital fixtures and controls that refine the experience of being in your kitchen. These are the touches that add polish and incredible versatility.
10. Opt for Flush or Semi-Flush Mount Fixtures in Smaller Kitchens
For kitchens with lower ceilings or a more compact footprint, the flush or semi-flush mount is your best friend. Think of it as the well-tailored suit of the lighting world: smart, restrained, and perfectly appropriate for the setting. It provides excellent ambient light without gobbling up precious visual space or headroom.
Look for designs with a bit of farmhouse character—seeded glass, simple metal detailing in bronze or black, or a classic schoolhouse shape. A semi-flush mount, which hangs just a few inches from the ceiling, offers a touch more decorative flair than a fully flush version. It’s all about choosing a fixture that complements the room without shouting for attention.
Now, for what I consider to be the single most transformative element in any lighting scheme.
11. Prioritize Dimmable Fixtures to Control Mood and Energy Usage
If you remember only one thing from our chat, let it be this: put everything on a dimmer. Every single light. A kitchen without dimmers is a one-trick pony, and a terribly dull one at that. It robs you of all control over the atmosphere of your home’s most important room.
With dimmers, your kitchen can be bright, efficient, and buzzing with energy in the morning. Then, with the flick of a switch, it can transform into a soft, inviting, romantic space for dinner. A low, warm glow for a late-night glass of wine is one of life’s simple pleasures. Dimmers give you this power. To omit them is, frankly, madness.
Elevating the Aesthetic: Styling and Optimizing Your Farmhouse Glow (Part 1)
You’ve chosen your fixtures and planned your zones. Now it’s time to pull it all together, ensuring every element works in concert. This is the styling—the final polish that makes your kitchen look not just well-lit, but impeccably designed.
12. Coordinate Fixture Finishes with Hardware and Faucets for Cohesion
Think of the metal finishes in your kitchen—lights, taps, cabinet pulls—as a family. They don’t all have to be identical twins, but they should at least look like they belong together. Sticking to one dominant finish, like a warm antique brass or a sophisticated matte black, is the simplest way to create a cohesive, intentional look.
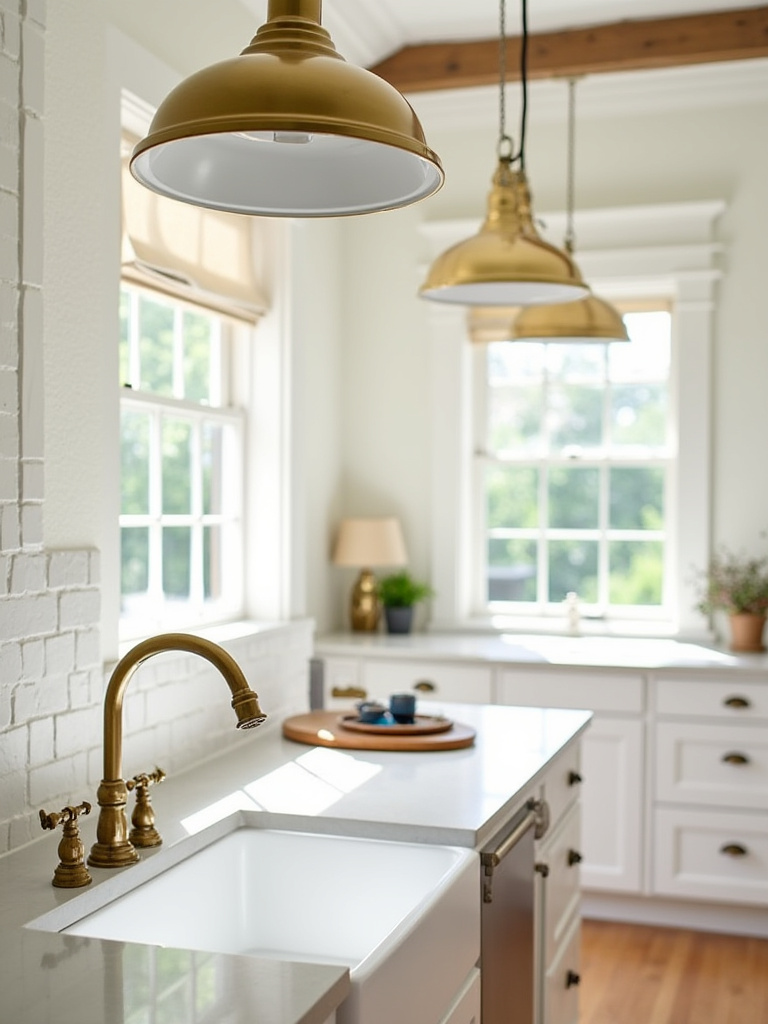
You can, of course, mix metals—it’s very chic right now. But you need a rule. For example, you might use black for all your lighting and hardware, but a lovely polished nickel for your taps. The key is to be deliberate. A random hodgepodge of finishes just looks like you couldn’t make a decision. It’s like matching your shoes and your handbag, but less fussy and far more permanent.
With the finishes harmonized, let’s revisit our layering principle to ensure depth.
13. Layer Lighting Types for Depth, Versatility, and Visual Interest
Remember our “cast of characters”—ambient, task, and accent? Now is the time to make sure they’re working together beautifully. A well-layered scheme guides your eye around the room, creates pockets of light and shadow, and adds tremendous visual interest. It stops the room from feeling flat and one-dimensional.
A classic mistake is to rely entirely on downlights from the ceiling. This casts unflattering shadows on people’s faces and creates what designers call a “cave effect,” where the ceiling is bright but the walls are dark. By layering light from different heights—pendants, sconces, and perhaps a small lamp on the counter—you create a rich, enveloping light that feels infinitely more comfortable and sophisticated.
The quality of that light, however, depends entirely on the bulbs you choose.
14. Select Warm White Bulbs (2700K-3000K) for a Cozy Atmosphere
This is so important. You must pay attention to the Kelvin scale, which measures the color temperature of light. Look for bulbs in the 2700K to 3000K range. This is the “warm white” zone, the colour of candlelight or the soft glow of an old incandescent bulb. It is inviting, flattering, and essential for a cozy farmhouse feel.
Anything higher than 3000K starts to feel clinical and blue—it’s that awful light you find in garages and hospitals. Nobody looks their best under cold light, darling. It makes your beautiful kitchen look harsh, your delicious food look unappetizing, and your own skin look wan and tired. Stick to warm white. Always.
For fixtures where the bulb itself is part of the show, there’s only one real choice.
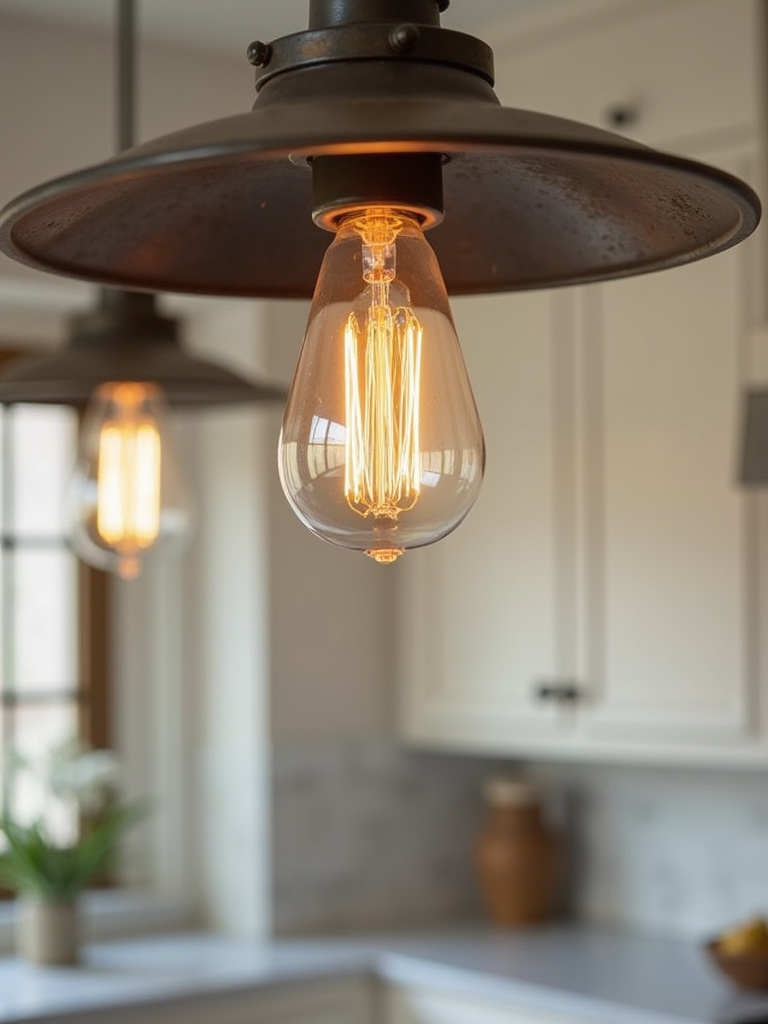
15. Incorporate Edison-Style LED Bulbs for Vintage Flair and Efficiency
Those lovely vintage-style bulbs with the visible filaments are just perfect for the farmhouse aesthetic, aren’t they? They add a touch of industrial history and a gorgeous, warm glow. The originals, however, were notoriously inefficient and had the lifespan of a mayfly.
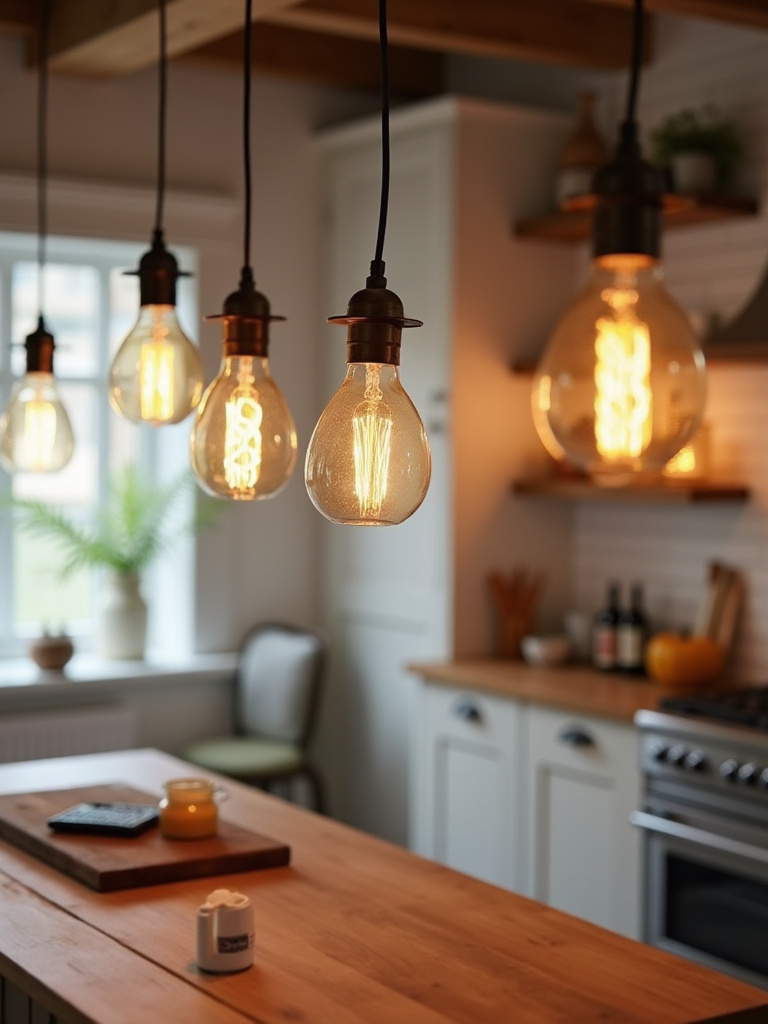
Thank heavens for modern technology. Edison-style LED bulbs give you all of the vintage charm with none of the drawbacks. They sip energy, last for ages, and are now available in a huge variety of shapes and filament styles. They are the ideal choice for any fixture with a clear glass shade or an exposed bulb design. It’s the perfect marriage of old-world soul and new-world sense.
Elevating the Aesthetic: Styling and Optimizing Your Farmhouse Glow (Part 2)
We’re in the final stretch now. These last few points are the subtle, expert touches that truly elevate a kitchen’s atmosphere from good to sublime. They are the secret weapons of the design world.
16. Strategically Place Table or Floor Lamps for Soft, Indirect Light
I know what you’re thinking: a lamp in the kitchen? Absolutely. A small, charming table lamp tucked onto a bit of countertop or a tall, slender floor lamp in a corner instantly makes a kitchen feel less like a utility room and more like a proper living space. It’s an unexpected touch that signals comfort and warmth.
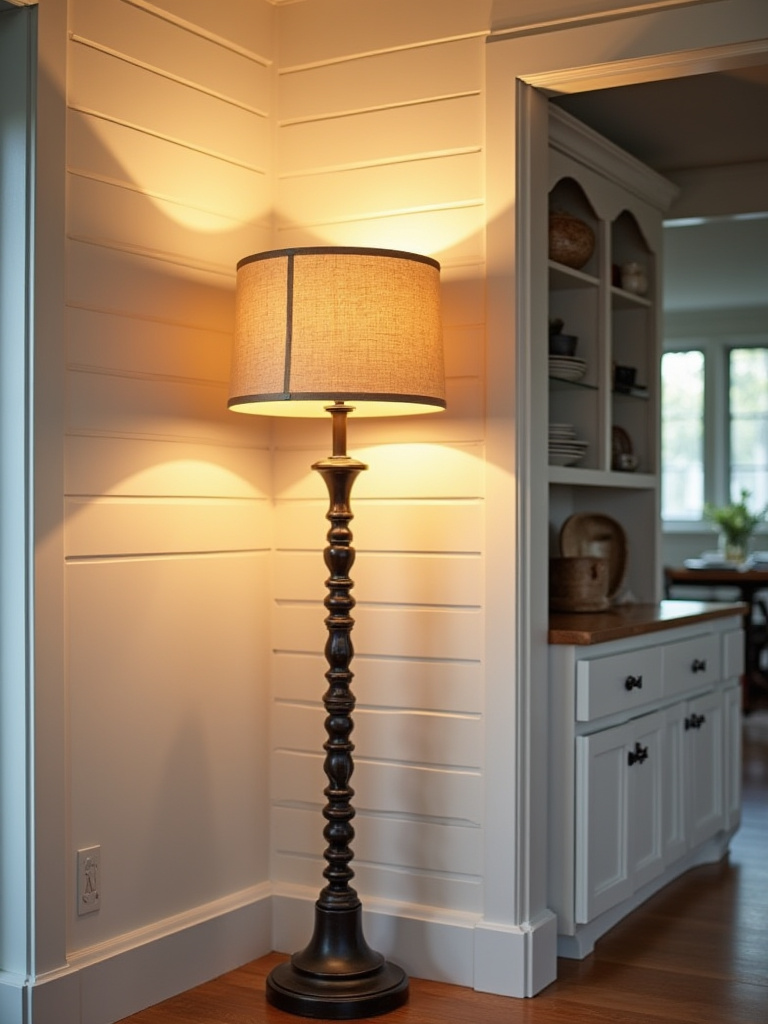
This little pool of soft, indirect light is incredibly welcoming, especially in the evening. It invites people to linger. A client of mine in Suffolk puts a tiny lamp with a pleated linen shade on her island every night after the washing up is done. She says it’s the signal that the kitchen’s work is finished, and it’s now a place to relax. I think that’s just marvelous.
From the utterly traditional, let’s pivot to the thoroughly modern.
17. Utilize Smart Home Compatibility for Automated Control and Convenience
Now, I’m no tech fanatic, but even a traditionalist like me can see the sheer brilliance of smart lighting. It’s not about turning your home into a spaceship. It’s about convenience. It’s about being able to dim all the lights with a simple voice command when your hands are covered in flour.
You can set “scenes” for different activities—a “Cooking” scene with all task lights on full, and a “Dinner” scene that dims everything to a soft, warm glow. You can even have the lights fade on gently in the morning. It’s a bit of everyday magic that, once you have it, you’ll wonder how you ever lived without. It’s the modern butler you never knew you needed.
Finally, a bit of simple housekeeping to keep everything looking its best.
18. Conduct a “Light Audit” Annually to Maintain Efficiency and Aesthetics
Think of this as a bit of spring cleaning for your light. Once a year, take the time to wipe down all your fixtures, shades, and bulbs. You’d be astounded by the amount of light-dulling grease and dust that accumulates in a kitchen. A clean fixture can be up to 30% brighter than a dirty one.
This is also a good time to check that all your bulbs are still the correct color temperature and are working properly. Sometimes a bulb gets replaced with the wrong type in a hurry, throwing the whole scheme out of whack. A quick annual audit ensures your kitchen stays as bright, efficient, and beautiful as the day the lighting was first installed.
Conclusion
There you have it. Lighting a farmhouse kitchen isn’t about following a rigid set of rules, but about understanding how light makes you feel. It’s about creating layers of warmth and function that turn the busiest room in the house into the most inviting one. It’s the silent ingredient that brings everything else to life—from the texture of the old wooden beams to the smile on a loved one’s face.
So, go on. Take a proper look at your own kitchen. Banish those cold spotlights, introduce some character, and for heaven’s sake, install dimmers. You’re not just illuminating a room; you’re crafting the warm, glowing heart of your home. A space for cooking, for gathering, for living. Now, go and let it shine.