I have to confess something. I used to think a kitchen bar was just an expensive slab of stone where you ate sad, solo breakfasts. Then I watched my Polish babcia and my Chinese wàipó try to cook in the same kitchen for a family celebration. My grandmother was rolling out pierogi dough with force, sending flour everywhere, while my wàipó was delicately folding dumplings, needing calm and precision. It was chaos. But in the middle of it all was the kitchen island, a sort of neutral territory where my cousins would sit, stealing bites of both.
That’s when it clicked. A kitchen bar isn’t a divider; it’s a bridge. It’s the place where different energies, cultures, and activities can meet without colliding. It’s the heart of the modern fusion home. But most people get it wrong. They think about the material first, the style second, and how they’ll actually live there last. So let’s flip that around and do it right.
Strategic Planning for Your Dream Kitchen Bar (Part 1)
This is the part everyone wants to skip, but it’s the foundation for everything. Getting this wrong means you’ll build a beautiful, expensive obstacle right in the middle of your home. We’re not doing that.
1. Analyze Your Kitchen Layout and Traffic Flow for Bar Placement
You know what people always ask me? “Where should the bar go?” They expect a design answer, but the real answer is about energy and movement. In Chinese culture, we talk about qi, the life force. A home needs good flow for qi to circulate. You don’t have to believe in that, but you’ve definitely felt it when a room is just… wrong. Cluttered. Awkward. That’s blocked qi. A badly placed bar is the ultimate energy dam in a kitchen.
Forget the magazines for a second and just watch how people move in your kitchen. Where’s the path from the fridge to the sink to the stove? Where do guests instinctively stand when you’re hosting? Your bar should be near that action, but not in the path. It’s a riverbank, not a boulder in the middle of the stream. I once had a client who was so proud of his huge, statement island. But at his first party, everyone was trapped in a human traffic jam around it because he’d blocked the direct path to the wine fridge. Don’t build a beautiful prison for your guests.
So before you do anything, take some painter’s tape and mark out your potential bar on the floor. Live with it for a few days. Walk around it. Pretend to cook. You’ll feel where it works and where it doesn’t, I promise.
2. Define Your Bar’s Primary Purpose: Dining, Prep, or Social Hub
Can we talk about the biggest lie in kitchen design? It’s the idea that your bar can be a master of everything: a full-time family dining table, a professional-grade prep station, and a glamorous cocktail lounge. It can’t. Trying to make it perfect for everything makes it mediocre for all of them. So you have to be honest about your life. Are you a family with kids who need a durable surface for homework and spilled juice? Or are you a couple who hosts amazing dinner parties and needs a space to stage cocktails and charcuterie?
Pick one primary purpose. That decision dictates everything else. A prep-focused bar needs to be counter-height (36 inches) and close to the stove. A social hub might be taller (42 inches) to encourage people to stand and lean, creating a more dynamic party vibe. I learned this the hard way when I designed a stunning waterfall-edge marble bar for a family with toddlers. It was gorgeous, but they were in a constant state of panic over stains and sharp corners. We ended up rounding the edges and sealing it within an inch of its life. It would have been so much simpler if we’d admitted from the start that this was a “bulletproof family zone,” not a “chic showroom.”
That said, a primary purpose doesn’t mean it can’t serve other functions. It just means you’re optimizing for one reality, and the others are a bonus.
3. Accurately Measure Available Space to Determine Bar Dimensions
This seems obvious, but it’s the step where thousands of dollars are lost. People measure the space for the bar itself, but they forget to measure the space for life happening around the bar. They forget the chair scoot-back distance. They forget the space needed to open the oven or dishwasher door fully without hitting a barstool. The result is a bar that technically fits but functionally fails.
Here’s the shortcut you need to know: You need at least 36 inches (about 90 cm) for a walkway, but honestly, 42 inches (107 cm) is the magic number, especially if it’s a main thoroughfare. For seating, don’t just measure the stool. Measure it with a person on it and another person trying to walk behind them. I wish I’d known this earlier in my career, before I had a very awkward conversation with a client who had to have people stand up and push their stools in every time someone needed to get to the fridge. The BS is that you can just squeeze it in. You can’t. Your body knows when a space is too tight, and you’ll subconsciously avoid it.
So, get out that painter’s tape again. This time, mark the bar and the space for the stools when they’re pulled out. If it feels tight now, it’ll be a nightmare later.
4. Establish a Realistic Budget for Materials, Installation, and Accessories
Let’s be real. The budget isn’t the sexiest part of design, but it’s what separates a dream from a stressful, half-finished mess. Everyone budgets for the big things—the stone, the cabinets. They completely forget what I call the “unseen costs”: the extra electrical work for the outlets, the cost of moving a plumbing line, the demo and trash removal, and the god-sent 15% contingency fund for when the contractor opens a wall and says, “Uh oh.”
Here’s my shortcut, honed from years of seeing people get this wrong: Allocate your money based on touch and impact. Splurge on the countertop. It’s the surface you see, touch, and use every single day. A beautiful, durable stone elevates the entire kitchen. Then, save on things that can be easily upgraded later. Bar stools, for example. You can start with something stylish but affordable from Wayfair and upgrade to your dream Italian leather ones in a few years. Don’t compromise on the bones of the project for temporary finishing touches.
The BS everyone tells themselves is that they’ll stick to the number and everything will be fine. It never is. The contingency fund isn’t a sign of failure; it’s a sign of a professional plan.
Strategic Planning for Your Dream Kitchen Bar (Part 2)
We’ve laid the groundwork. Now let’s refine the plan to make sure this space isn’t just usable, but genuinely comfortable and inviting for everyone.
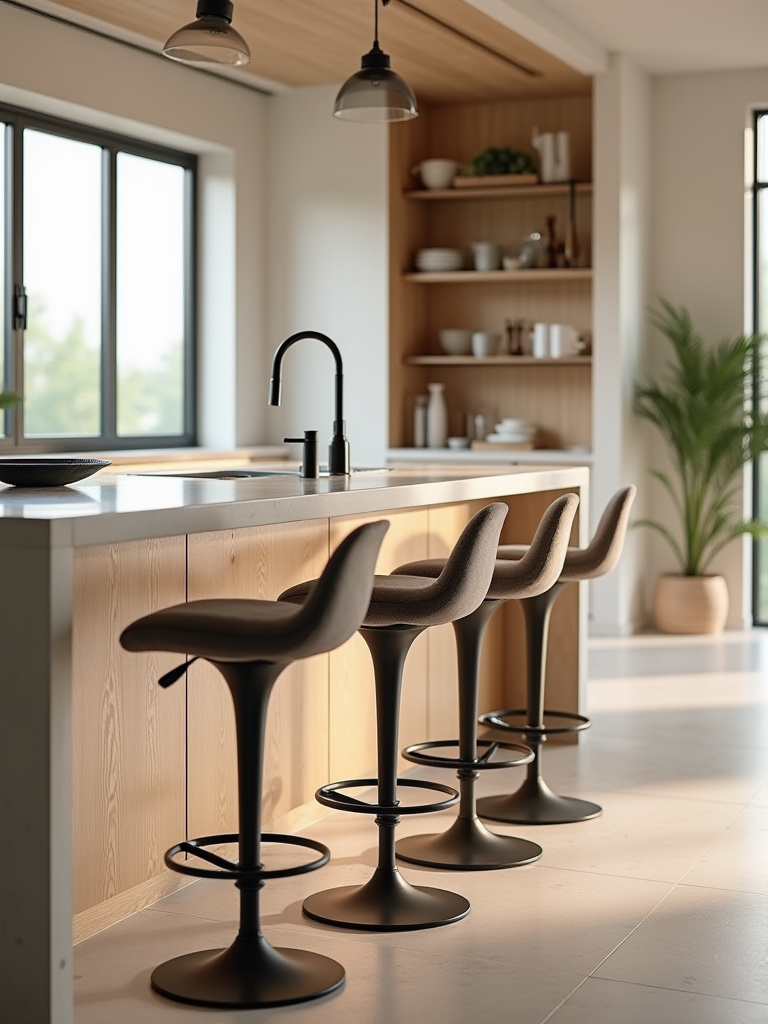
5. Research Ergonomics for Comfortable Seating and Counter Height
You know what drives me crazy? When I see these incredible kitchens with gorgeous bars and stools so uncomfortable they might as well be medieval torture devices. Ergonomics sounds like a complicated word, but it just means designing for the human body. Is the bar at a height where you can chop vegetables without hunching? Are the stools at a height where your legs aren’t dangling like a little kid’s?
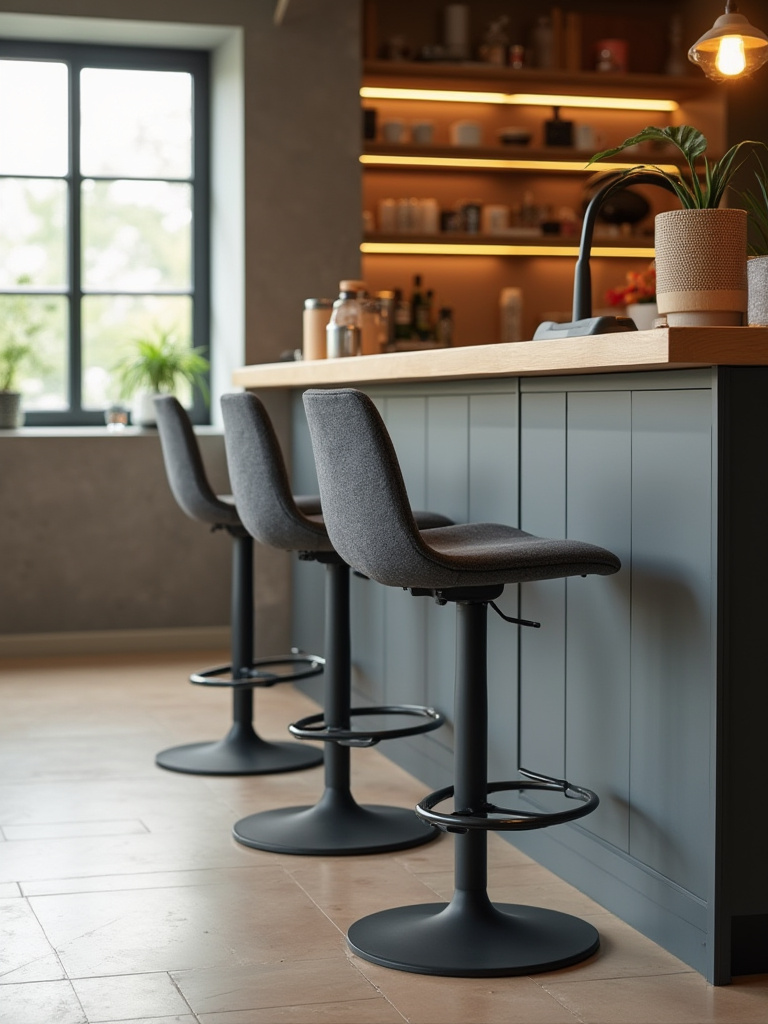
Here’s the simple version. There are two standard heights: counter height (36 inches / 91 cm) and bar height (42 inches / 107 cm).
- Counter-height bars feel integrated and are great for prep and casual seating. They need stools with a seat around 24-26 inches.
- Bar-height bars feel more like a classic pub or lounge and are great for defining a social zone. They need taller stools, around 30-32 inches.
The number one shortcut is the “10-inch rule.” You want about 10-12 inches (25-30 cm) between the top of the stool’s seat and the bottom of the counter. It’s the sweet spot for legroom. And please, for the love of good design, make sure the counter has an overhang of at least 10 inches so you can actually pull your knees under. A shallow overhang is a classic mistake that forces you to perch on the edge of your seat.
Core Design & Material Selection for Lasting Style (Part 1)
This is the fun part—bringing the vision to life. But it’s also where your choices define the soul of the space for years to come.
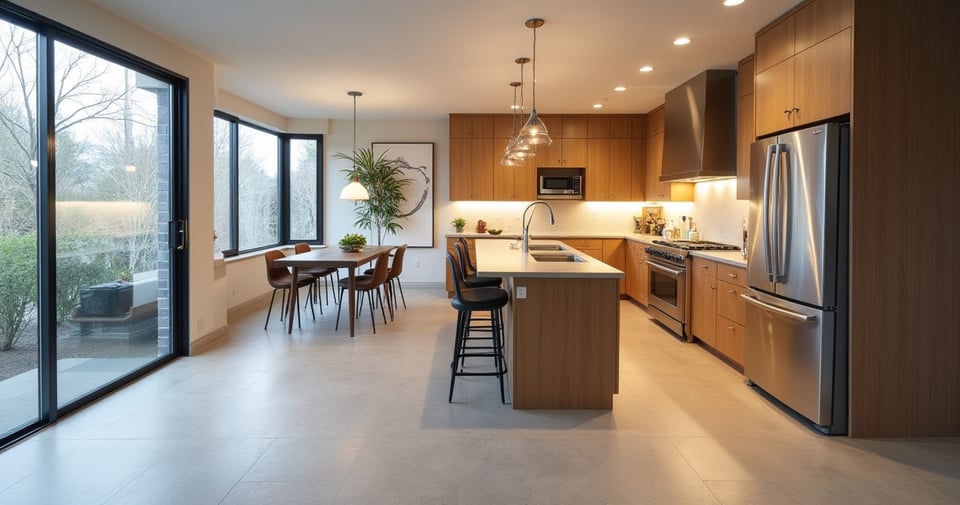
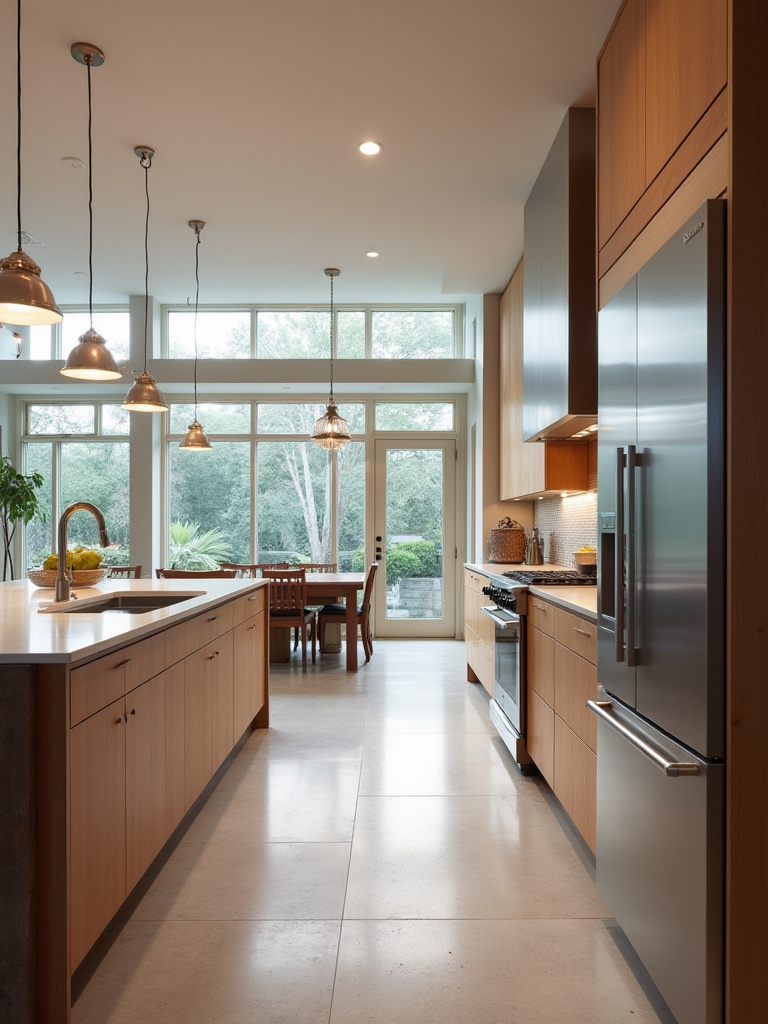
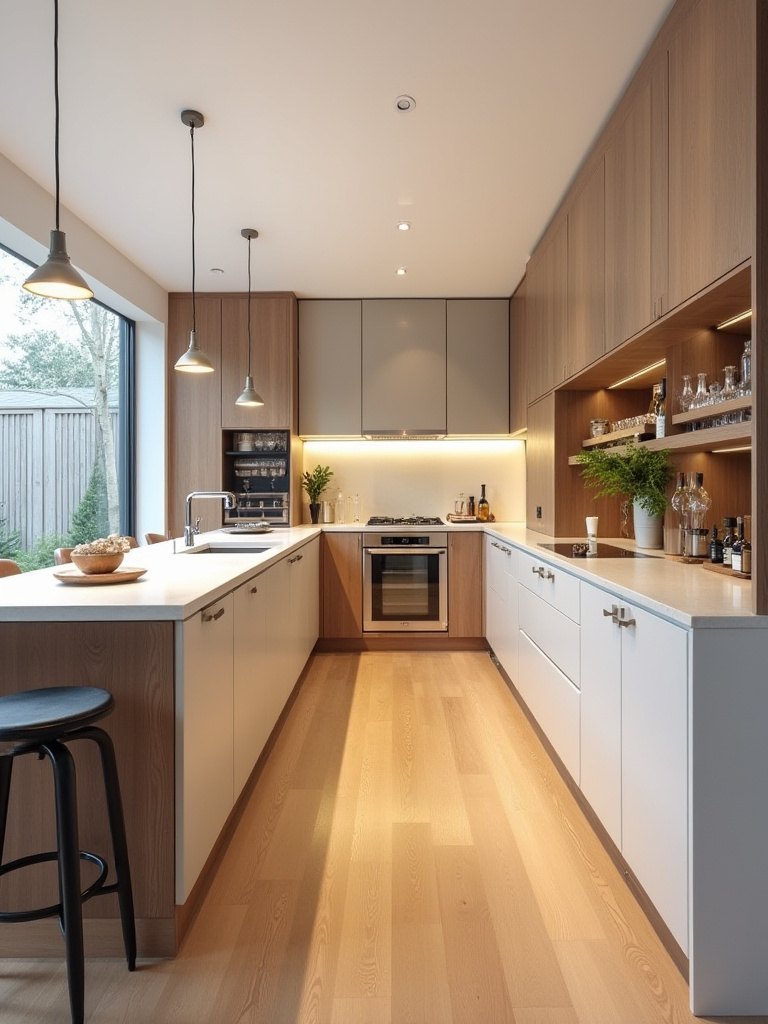
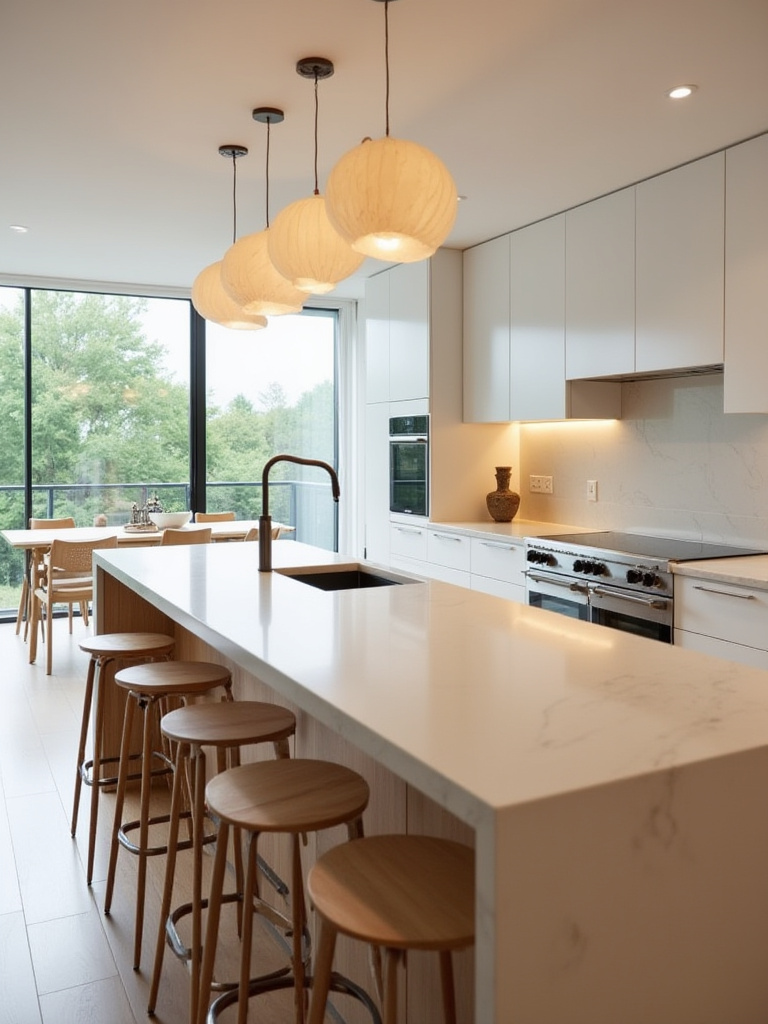
6. Choose the Optimal Bar Configuration: Island Extension, Peninsula, or Freestanding
This choice defines the entire character of your kitchen. An island is a statement piece. It’s a destination. It’s great for large, open-plan spaces where it acts as an anchor. A peninsula, which is attached to a wall on one side, is brilliant for smaller spaces or L-shaped kitchens. It creates a natural, gentle division between the kitchen and dining/living area without closing it off—a very diplomatic solution. A freestanding or portable bar is the ultimate commitment-phobe’s choice, perfect for renters or those who want flexibility.
I worked with a multicultural family in a beautiful but compact city apartment. They dreamed of an island, but it just wouldn’t fit. The husband was Polish and wanted a huge, solid surface for family buffets; the wife was Chinese and wanted to preserve a sense of open flow. We settled on a peninsula. It defined the kitchen workspace but kept it connected to the living room where their parents could sit. It offered the best of both worlds: a sense of boundary and a sense of connection. That’s what the right configuration does—it solves a human problem, not just a design one.
Think about what problem you’re trying to solve. Do you need more storage? A better boundary? Or just a beautiful focal point?
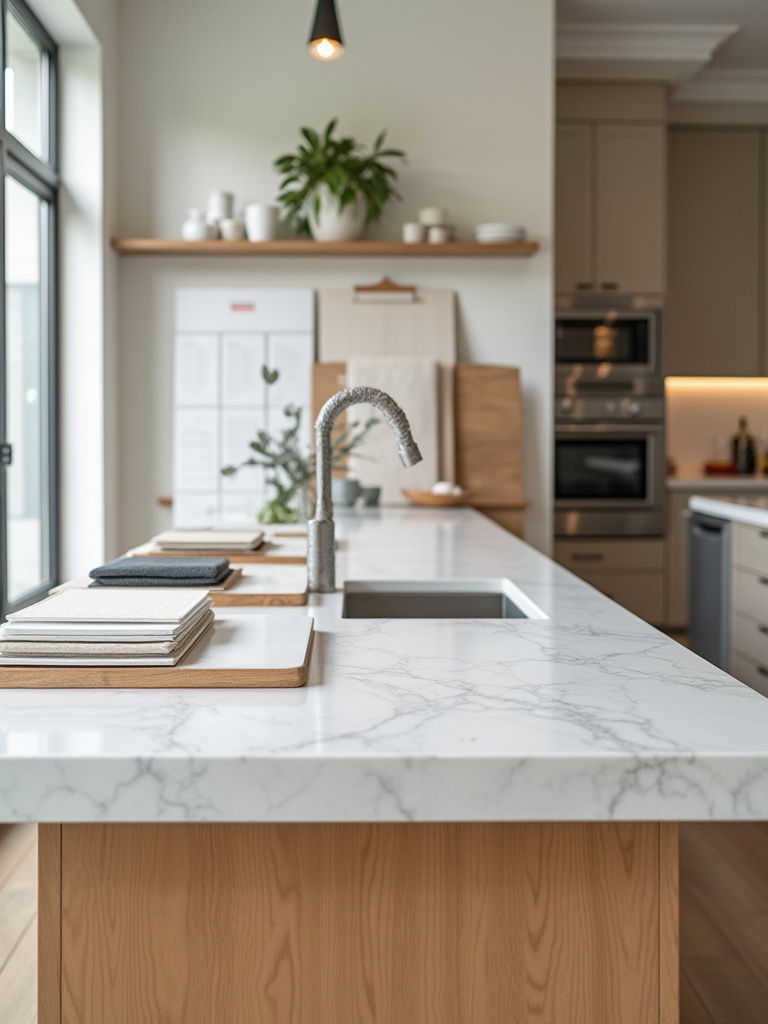
7. Select Durable and Visually Appealing Countertop Materials
The countertop is the skin of your bar. It’s what you touch, see, and interact with every day. This choice says a lot about you. Are you the kind of person who embraces the warm, story-filled patina of a butcher block that shows every knife mark and wine ring like a badge of honor? Or do you crave the sleek, indestructible calm of engineered quartz that looks perfect forever? There’s no wrong answer, but you have to be honest about your tolerance for “perfectly imperfect.”

My Polish side loves a good, hearty wood counter. It feels like an old family table, full of memories. My Chinese side appreciates the harmony and low-maintenance nature of quartz or a beautiful granite that looks like a landscape painting. The real shortcut here is to get samples. Not those tiny 2-inch squares. Get the biggest samples you can, at least 12×12 inches. Put them on your existing counters. Spill some wine on them. Leave a lemon slice on them overnight. See how they really perform and how they look in your home’s light, not a fluorescent-lit showroom.
The biggest BS is that marble is a practical choice for a high-use kitchen bar. It’s stunning, yes. But it’s also soft, porous, and will stain and etch if you even look at it with a glass of red wine. If you want that look, go for a high-quality marble-look quartz. You’ll thank me later.
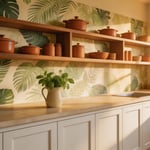
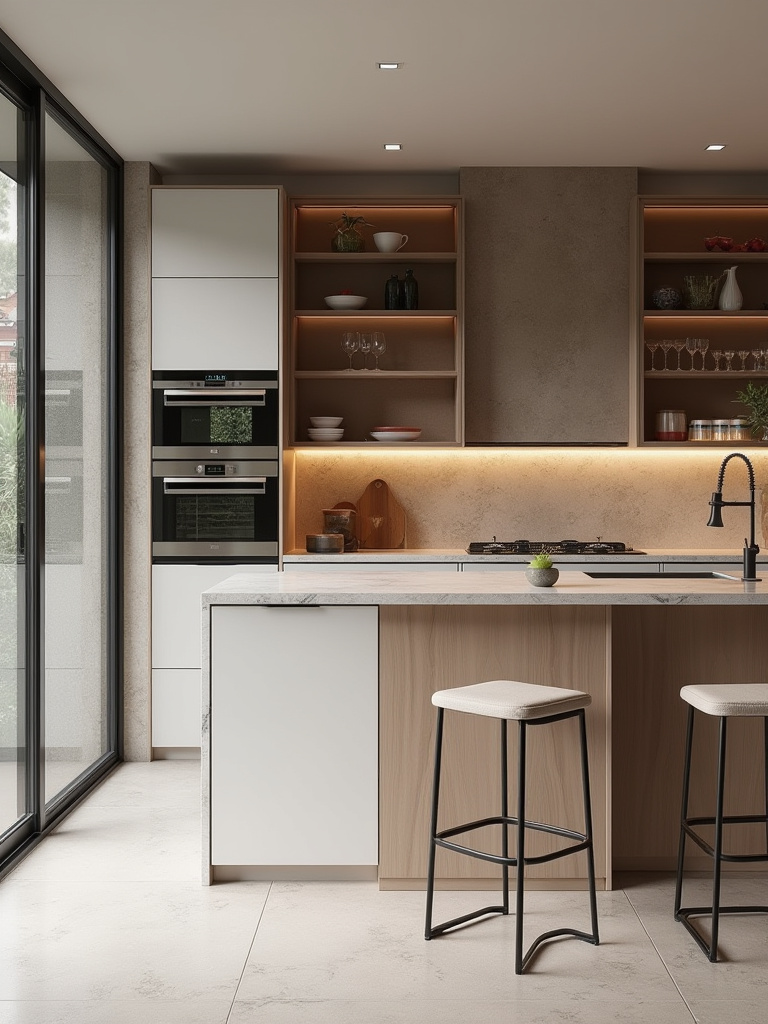
8. Integrate Smart Storage Solutions Beneath Your Bar Area
A bar without smart storage is just a big table. The space underneath is pure gold, so don’t waste it with a bunch of useless, cavernous cabinets. Think specifically about what will make your life easier. For a social hub, that could be a slim wine fridge, slots for wine bottles, and a deep drawer for cocktail shakers and linens. For a family prep station, it’s pull-out recycling bins, a drawer for cutting boards, and maybe even a hidden spot for the stand mixer.
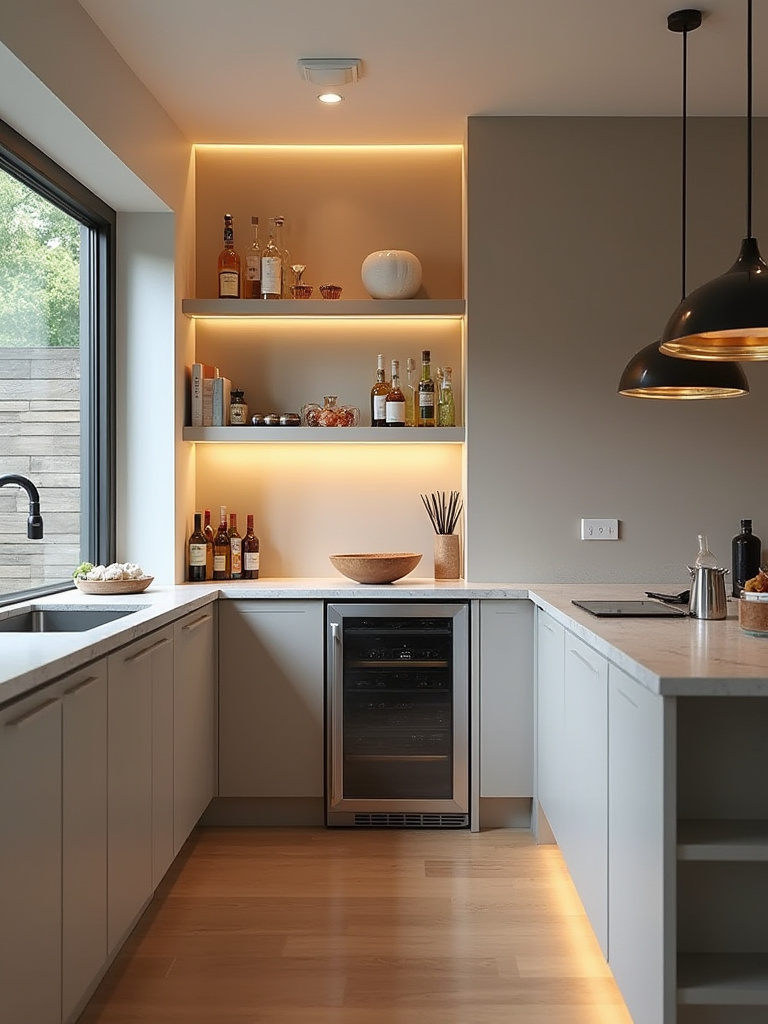
My favorite shortcut for maximizing space is to use the toe-kick. You know that little recessed space at the very bottom? You can install slim drawers there for things you don’t use every day, like placemats, serving trays, or birthday candles. It’s a brilliant little secret that adds a surprising amount of storage without taking up any visual space.
And please, integrate your trash and recycling. Nothing kills the vibe of a beautiful kitchen bar faster than a cheap plastic trash can sitting next to it. Hide it. It’s the most luxurious-feeling upgrade you can make for under a thousand dollars.
9. Invest in Appropriate and Comfortable Bar Stools
Remember what I said about uncomfortable stools? This is critical. Your beautiful bar is useless if no one wants to sit at it for more than five minutes. Comfort is king. A stool with a low back offers support without visually cluttering the space. A footrest is non-negotiable—it takes the pressure off your lower back. Swivel functionality is a huge bonus, as it lets people turn and talk without having to move the whole stool.
When I was setting up my own home, blending furniture from both sides of my family, I realized the power of seating. The heavy, ornate Polish chairs invited you to settle in for a long meal. The simple, elegant Chinese stools encouraged mindful posture. For my kitchen bar, I found something in between: a stool with a solid wood base (a nod to my Polish heritage) and a clean, minimalist silhouette (a nod to my Chinese aesthetic).
Don’t buy stools online without testing them first if you can help it. Go to a store. Sit in them for at least ten minutes. Does your back ache? Do your legs feel weird? Your body will tell you everything you need to know.
Core Design & Material Selection for Lasting Style (Part 2)
These are the details that elevate a bar from good to great. They’re the seamless, thoughtful touches that make a space feel truly custom and modern.
10. Plan for Integrated Electrical Outlets and Charging Ports Within Design
This is absolutely not a suggestion; it’s a requirement for modern life. Your bar will inevitably become a charging station, a laptop perch, and a spot to plug in the blender. Not planning for this means you’ll have a permanent tangle of ugly extension cords ruining your beautiful design. The key is to make the power invisible.
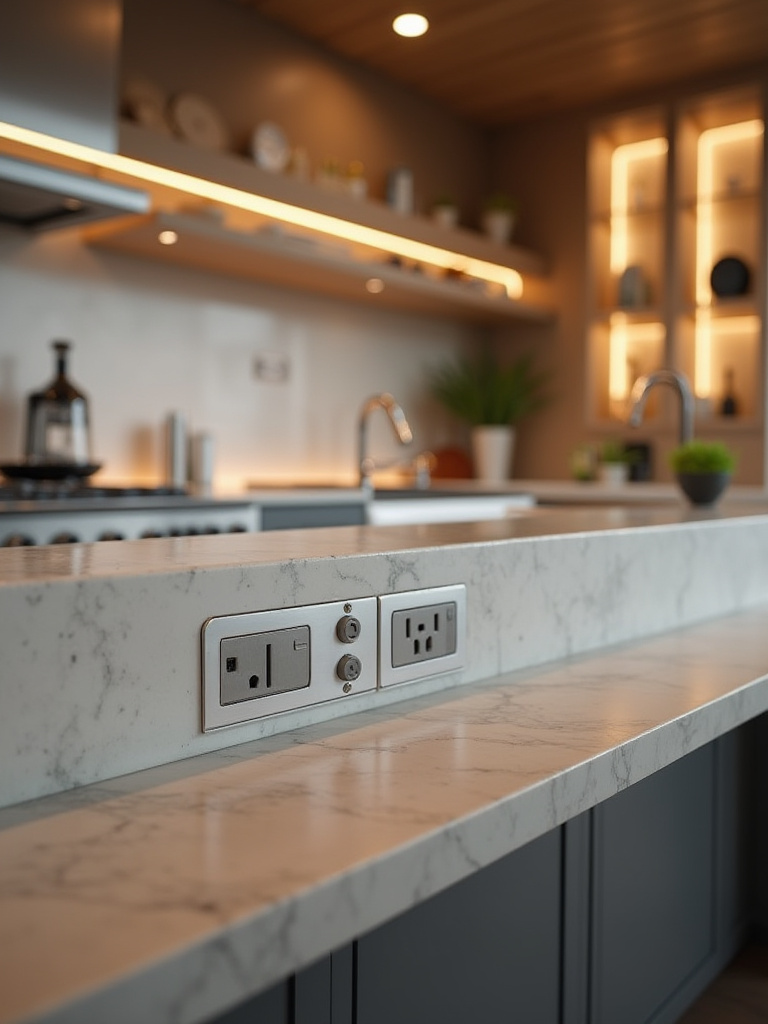
My favorite solution is a pop-up outlet that sits flush with the countertop until you press it. It keeps the surface clean and waterproof. Another great option is an under-counter power strip, mounted just below the overhang so it’s completely hidden but still accessible. Make sure you get a unit that has both standard outlets and USB-A and USB-C ports. USB-C is essential for fast-charging modern phones and laptops. Don’t let an electrician tell you it’s not necessary. It is. Future-proof your bar.
I had a client—a diplomat who entertained frequently—who was adamant about this. We designed a nearly invisible power strip along the inside of the bar, so international guests could plug in their various chargers without having to ask or hunt for an outlet. It was a small detail that communicated immense thoughtfulness.
11. Consider Permanent vs. Portable Bar Structures for Flexibility
While most people dream of a big, permanent island, it’s not always the right choice. For renters, small spaces, or people who just love to reconfigure their homes, a high-quality portable bar or kitchen cart can be a game-changer. It gives you the extra counter space and storage when you need it, and you can roll it out of the way or even use it as a serving station in another room when you don’t.
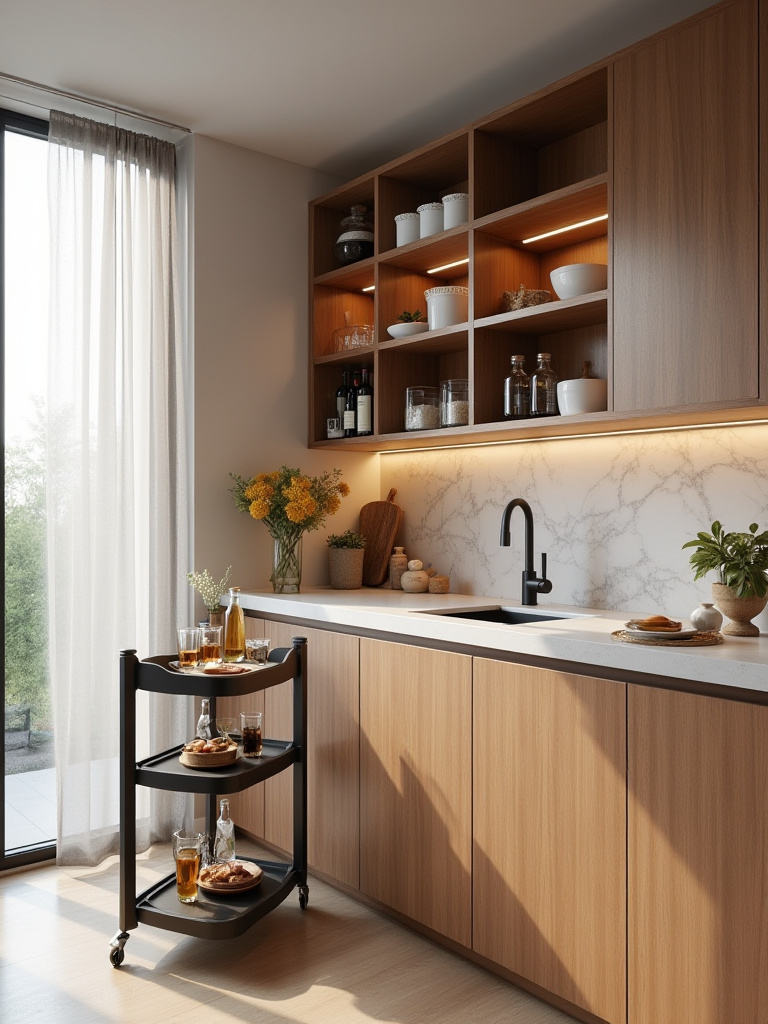
Think of it as the difference between a built-in bookshelf and a beautifully curated étagère. One is a permanent architectural statement; the other is a flexible piece of furniture that tells a story. There’s a beautiful freedom in not being tied down. It allows your home to evolve with you. I especially love this idea for multicultural families who might move internationally; you can take a piece of your home’s “heart” with you.
Don’t dismiss the portable option as being cheap. There are gorgeous freestanding units made from solid wood, marble, and steel that are as much a piece of fine furniture as any built-in.
Enhancing Functionality & Aesthetic Appeal (Part 1)
Now that the structure is set, it’s time for the layers that bring personality and mood—the lighting, textures, and tools that make it a joy to use.
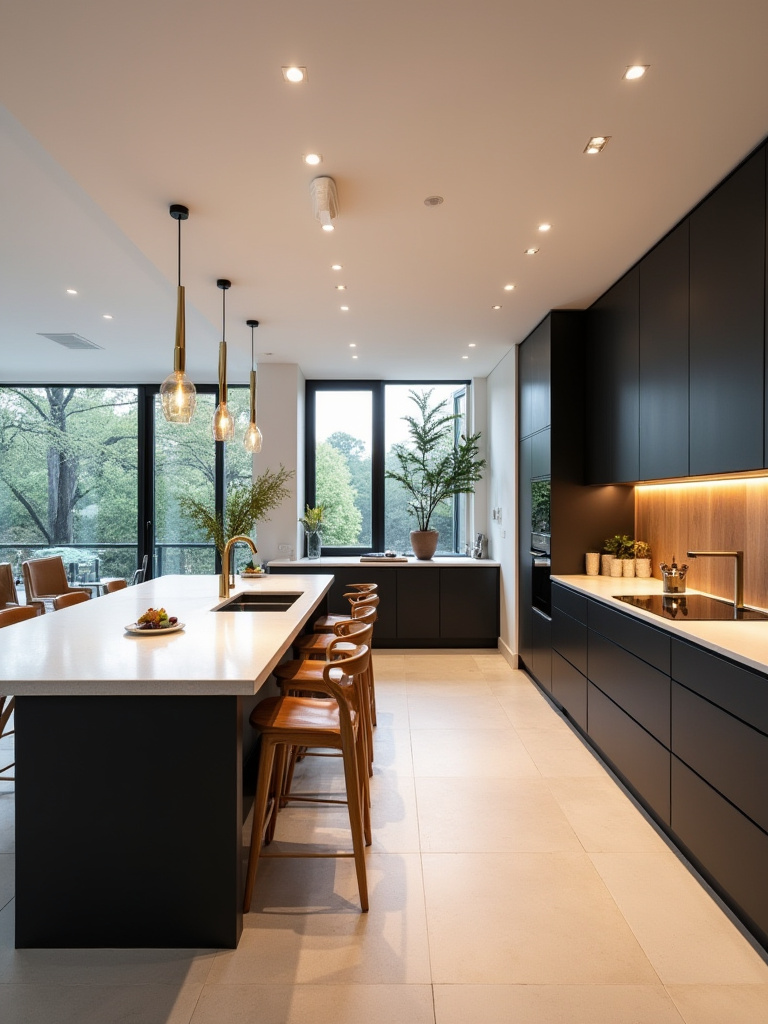
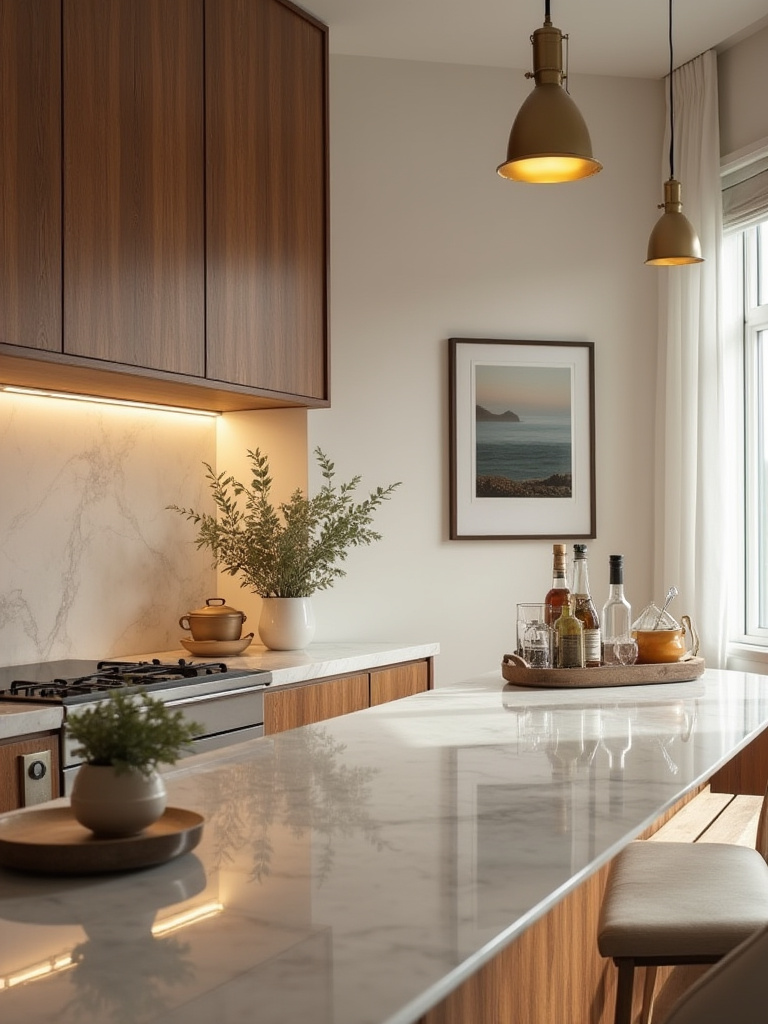
12. Incorporate Strategic Lighting for Ambiance and Task Functionality
Let me be blunt: bad lighting can kill even the most expensive kitchen design. Relying on a single overhead light is a crime against aesthetics. It casts harsh shadows and makes everyone look tired. Good lighting is about layers. You need at least two, preferably three, types of light at your bar. First is task lighting: usually a set of pendant lights hanging directly over the bar. This is your workhorse light for chopping, reading, and seeing what you’re eating.
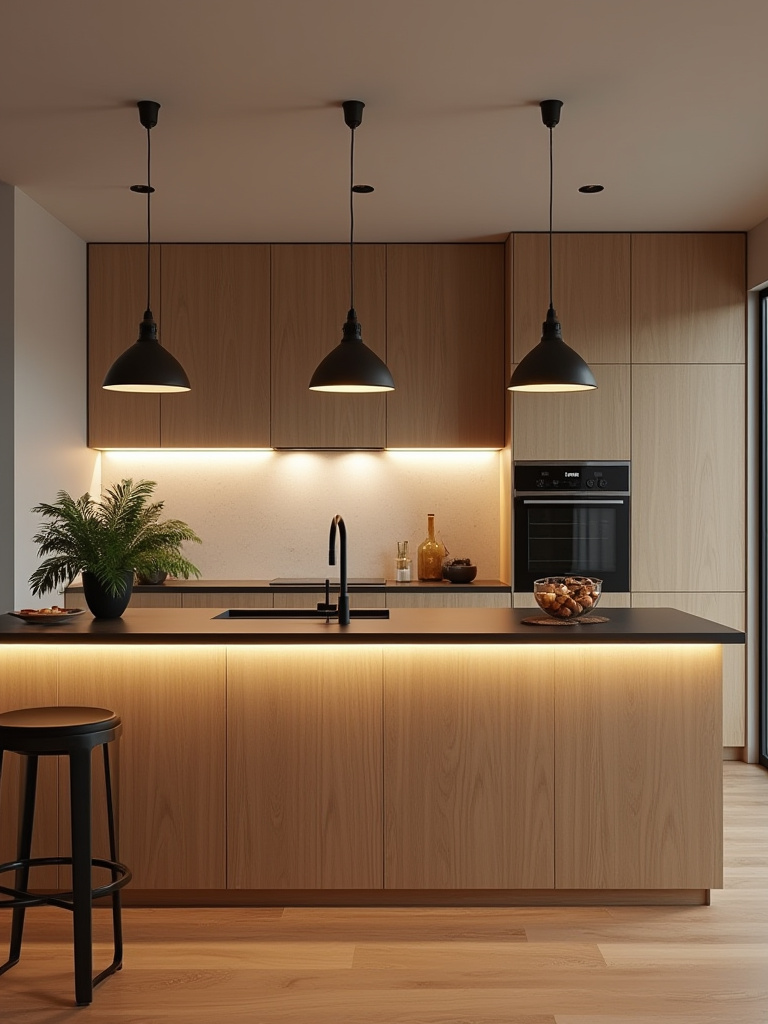
Second is ambient lighting: the general, room-filling light from recessed cans or other fixtures. This provides the base layer. Third, and my favorite, is accent lighting: think a soft glow from LED strips hidden under the counter’s edge. This is pure mood. It makes the bar look like it’s floating and is absolutely stunning at night. The most important tool for all of these? A dimmer switch. Dimmers are non-negotiable. They allow you to go from bright “surgery-level” task lighting to a soft, romantic glow with the flick of a switch.
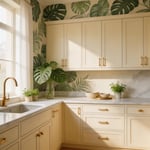
13. Add Decorative Backsplash or Wall Treatment Above the Bar
If the countertop is the bar’s skin, the backsplash is its jewelry. It’s a chance to add personality, texture, and color in a really impactful way. It doesn’t have to match the rest of your kitchen’s backsplash, either. Treating the bar as its own special zone with a unique tile or material makes it feel more intentional. You could use beautiful handmade Zellige tiles, a slab of dramatic veined stone, or even antiqued mirror to bounce light around and add a touch of glamour.
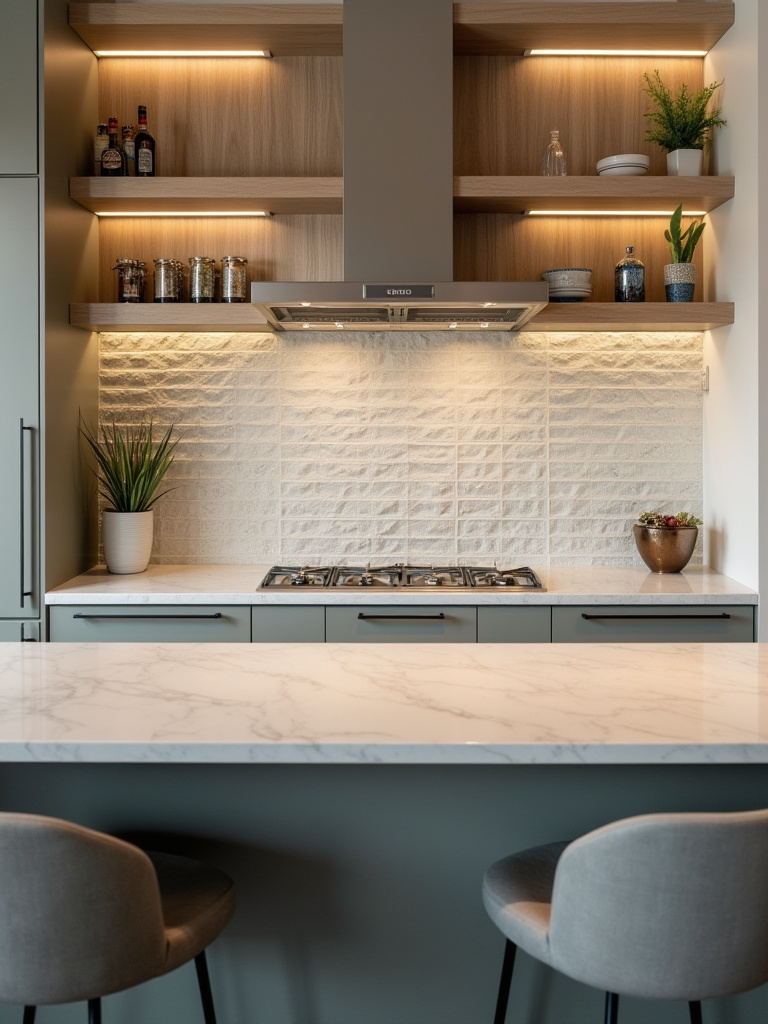
My shortcut here is to think about practicality as much as beauty. It needs to be wipeable. A beautiful but unsealed limestone behind a bar where you’ll be uncorking champagne is a disaster waiting to happen. But a beautiful, easy-to-clean glass tile? Perfection. This is where you can tell a cultural story, too. Think classic Polish folk-art inspired tile patterns, or a calming, subtly textured tile that evokes Chinese ink-wash paintings.
14. Display Complementary Barware and Glassware for Sophistication
You don’t need a massive collection, just a thoughtful one. Hiding all your beautiful glasses and tools away is a missed opportunity. Curating a small selection to display on open shelves or a tray turns functional items into decor. The key is cohesion. Pick a lane: are you going for sparkling, delicate crystal? Heavy, masculine tumblers? Sleek, minimalist glasses? Don’t mix them all.
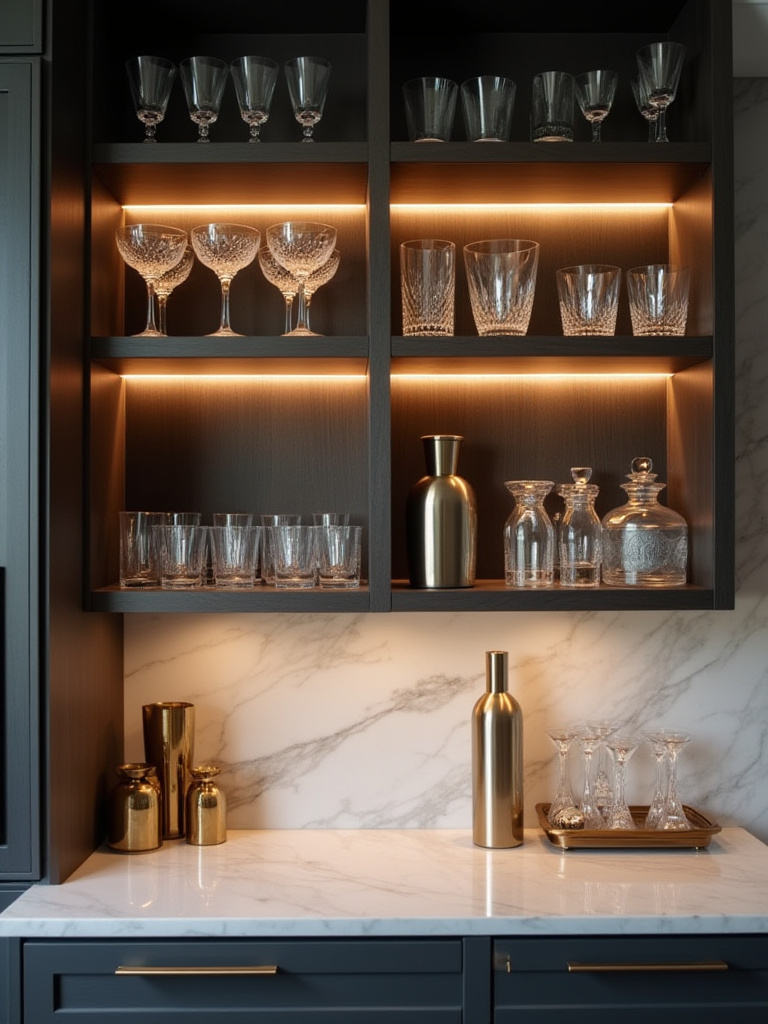
My one rule is to keep it real. Display the things you actually use. I once saw a home with an elaborate set of copper bar tools that were clearly just for show—they still had the price tags on the bottom. It felt so inauthentic. It’s far more stylish to have a beautiful wooden tray with a few of your favorite glasses, a nice bottle of Polish vodka, and a small bowl for limes. It says, “I live here, and I have good taste.” It’s an invitation, not just a display.
15. Integrate Small Appliances or a Dedicated Beverage Center
This is what takes your bar to the next level of utility. If you’re a coffee fanatic, designing a dedicated coffee station with a built-in espresso machine and a drawer for pods is life-changing. If you’re a wine lover, an under-counter dual-zone wine fridge is a must. It clears up so much space on your main countertops and in your main fridge, and it centralizes an entire activity in one efficient, beautiful zone.
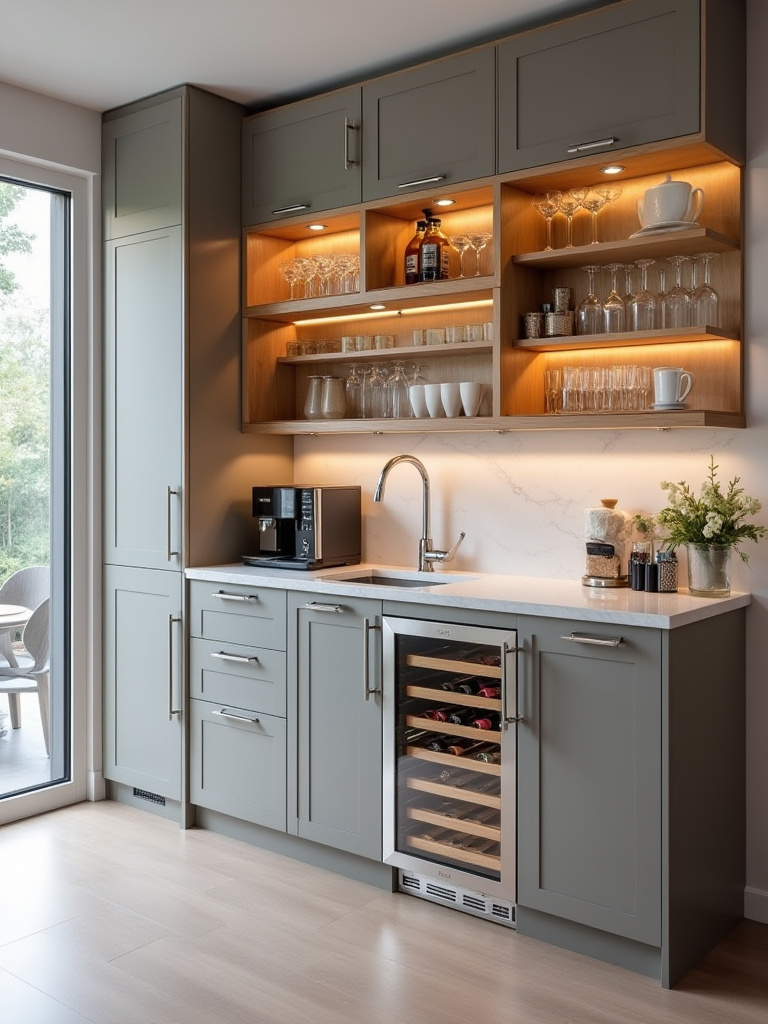
A friend of mine who loves making fresh juices and smoothies for her kids integrated a “blender garage” into her bar. It’s a cabinet with a lift-up door and a power outlet inside. The blender lives there, always plugged in, totally hidden. She just lifts the door, blends, and closes it. No more hauling a heavy appliance from a high shelf. It’s these little thoughtful integrations that make you fall in love with your kitchen over and over again.
Enhancing Functionality & Aesthetic Appeal (Part 2)
We’re almost there. This is the final layer of soul, the breath of life that turns a well-designed space into a place that feels truly alive.
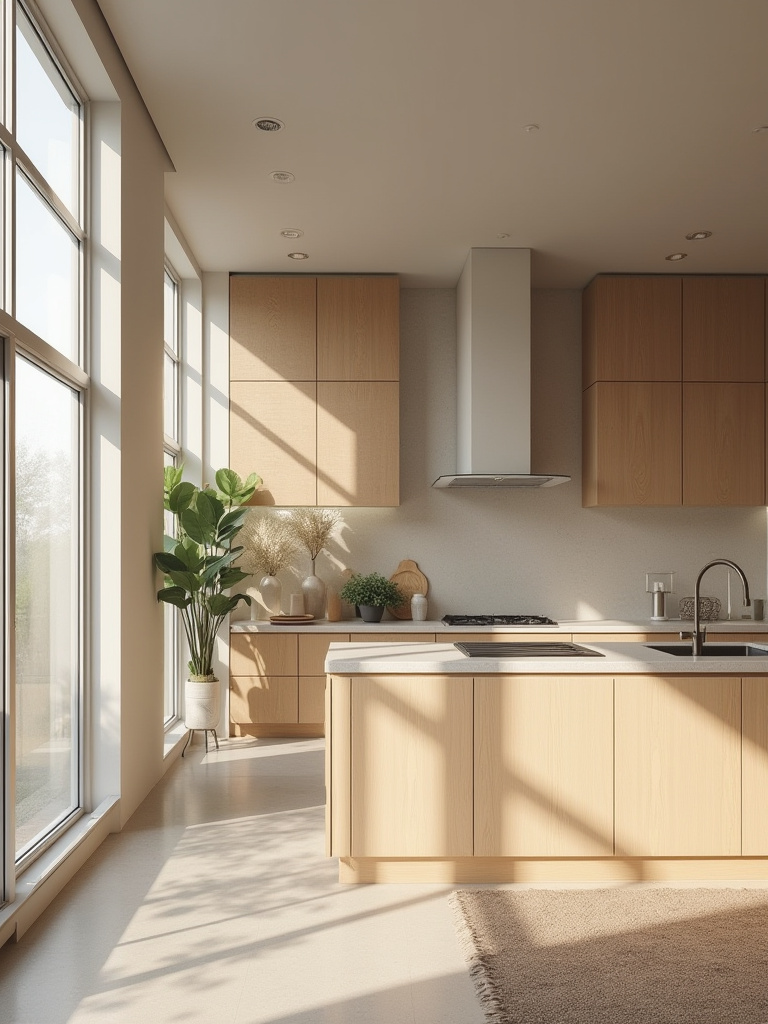
16. Introduce Greenery or Fresh Elements for Vitality
Every space needs something living. It’s a fundamental principle of design that connects back to our innate need for nature, something you see in both Eastern and Western traditions. A kitchen bar, often made of hard materials like stone and wood, especially needs this softness. But I’m not talking about a sad, wilting succulent. I’m talking about something that adds life and function.
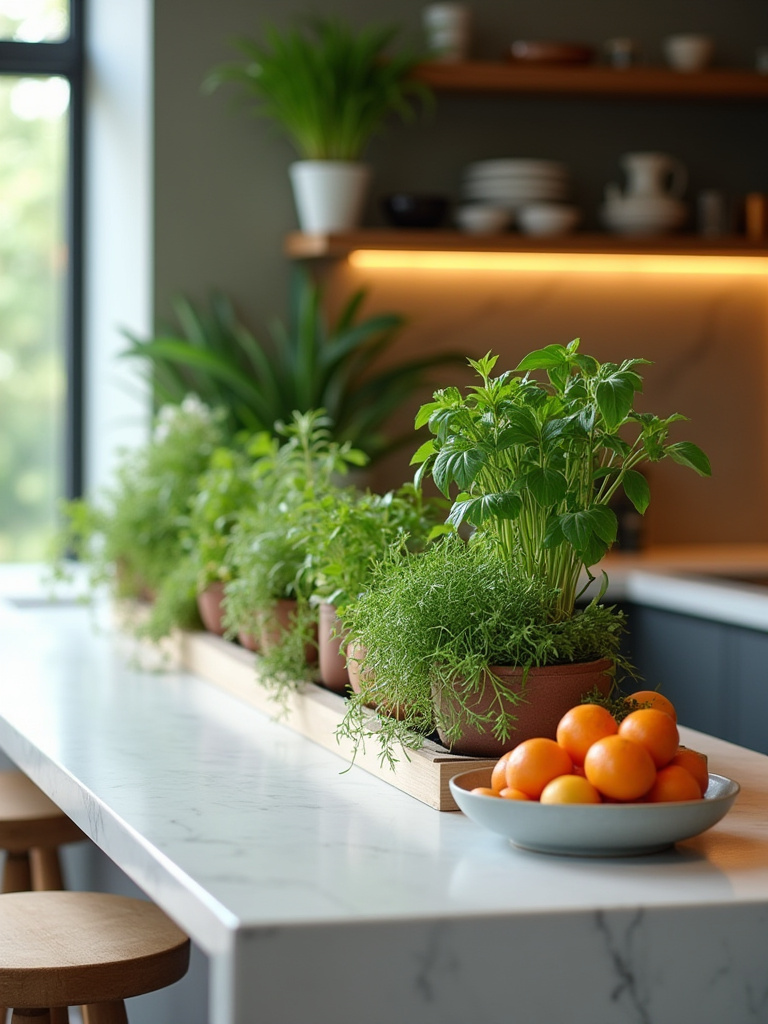
My absolute favorite thing to recommend is a small, indoor herb garden. A few small pots of mint, basil, and rosemary on a shelf near the bar or in a narrow planter is beautiful, smells amazing, and provides fresh garnishes for your cocktails and cooking. Growing mint for mojitos or Polish dill for a soup right where you need it feels incredibly luxurious. If you don’t have a green thumb, a big bowl of fresh lemons, limes, or seasonal fruit adds a pop of color and is just as vital. It’s a simple, ancient gesture that signals abundance and hospitality.
Maximizing Utility & Long-Term Enjoyment
A great bar isn’t a one-and-done project. It’s a relationship. It needs to be cared for, be allowed to evolve, and work for you in the long run.
17. Personalize with Themed Accessories and Curated Art Pieces
This is where you tell your story. A bar is a perfect stage for a small piece of art that makes you happy or an object you picked up on your travels. It’s a place for personality. For me, that meant finding space for a set of beautiful Polish Bolesławiec pottery coasters and a small, framed piece of Chinese calligraphy that says “harmony.” They have nothing in common stylistically, but they tell my story.
Don’t go overboard. The BS is that you need a “theme.” You don’t need a “Nautical Bar” or a “Tuscan Villa Bar.” All you need are a few objects that have meaning to you. It’s about curation, not decoration. Pick one or two things that act as a focal point and a conversation starter. Maybe it’s a framed photo from a memorable trip, or a beautiful vintage corkscrew you inherited. This is what transforms a kitchen from a catalogue showroom into a home.
18. Develop a Tailored Cleaning and Maintenance Routine for Longevity
This is my secret weapon for keeping a space looking new for years. Different materials need different care, and using a one-size-fits-all spray cleaner is a recipe for disaster. Using vinegar on marble will literally dissolve it. Using an abrasive cleaner on a sealed wood top will strip the finish.
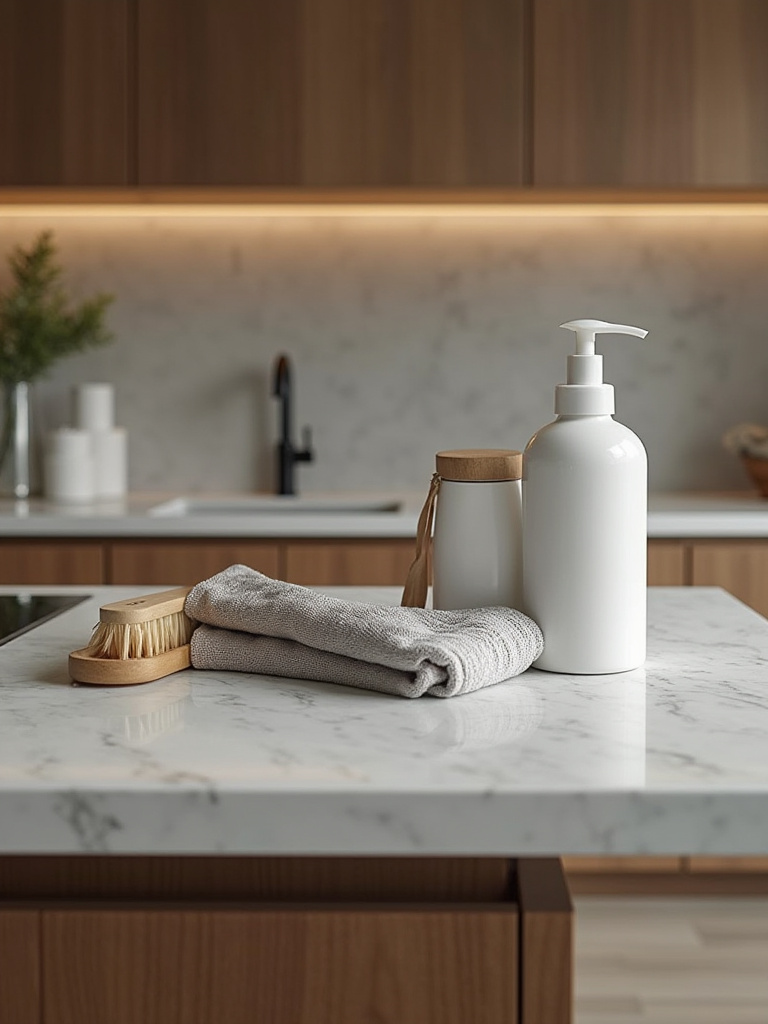
Create a simple cheat sheet. Type it up, laminate it, and stick it to the inside of a cabinet under the bar.
- Stone (Quartz, Granite): Daily wipe with gentle soap and water. No harsh chemicals.
- Wood: Never let water sit on it. Use a wood-specific cleaner. Oil it with food-safe mineral oil once a month to keep it from drying out.
- Stainless Steel: Wipe with a microfiber cloth in the direction of the grain to avoid streaks.
It sounds tedious, but this two-minute daily routine will prevent 90% of all stains and damage. It’s about respecting the beautiful materials you invested in.
19. Evaluate Sound Dampening for Open-Concept Kitchens to Reduce Noise
This is the design detail that no one sees but everyone feels. Open-concept homes are wonderful, but sound travels. The clatter of plates and the roar of a blender at the bar can make it impossible to watch TV or have a conversation in the next room. There are simple, stylish ways to absorb that sound.
Bar stools with upholstered seats do a much better job of dampening sound than hard metal or wood ones. A small runner on the floor in front of the bar can make a huge difference. Even the art you choose can help—a canvas art piece absorbs more sound than a glass-framed print. One of my clients hung a beautiful, large textile piece on the wall behind their bar. It looked like a piece of modern art, but it was a secret sound-absorbing weapon. It’s about creating a space that feels calm, not just one that looks it.
20. Plan for Future Adaptability and Potential Upgrades
The way you live in five or ten years might be completely different from today. Designing with that in mind is the smartest thing you can do. The shortcut is to think in terms of “fixed” and “flexible.” Keep your fixed elements—the countertop, the cabinetry, the core structure—timeless and neutral. Don’t build a bar out of trendy, pink-colored cabinets that you’ll hate in three years.
Instead, let your flexible elements carry the trends. The paint color on the bar’s base, the bar stools, the pendant lights, the hardware—these are all things that are relatively easy and inexpensive to change out. This modular approach, mixing a stable, classic foundation with elements you can easily swap, means your bar can evolve with your taste. It’s the ultimate expression of a sustainable, long-term design that honors both your past and your future.
Conclusion
So, you see, a kitchen bar is never just a kitchen bar. It’s a stage for your daily life, a bridge between your different worlds, and the one place in your home that’s truly designed for connection. It’s where the chaos of cooking meets the calm of conversation. It’s where pierogi and dumplings can find a happy home, side-by-side.
Don’t get overwhelmed by the options. Just start with honesty. How do you really live? What story do you want your home to tell? Build a space that answers those questions, and you won’t just have a beautiful kitchen bar. You’ll have the heart of your home.