Feeling like your kitchen needs a refresh but dreading the thought of a major renovation? You’re not alone. The idea of weeks without a functional kitchen, dust covering every surface, and costs spiraling into the tens of thousands can make even the most design-enthusiastic homeowner hesitate. But here’s the thing – you don’t need to tear everything down to create a space that feels completely transformed.
The beauty of strategic kitchen updates lies in their ability to deliver maximum visual and functional impact while working within your existing layout. These targeted improvements can address your biggest pain points – whether that’s outdated finishes, poor lighting, or lack of storage – without the disruption and expense of structural changes. From quick weekend projects that cost under $100 to more involved updates that still keep you cooking in your own kitchen, there’s a solution for every budget and skill level.
Ready to discover how small changes can yield big results? These 22 kitchen makeover ideas prove that thoughtful updates can completely transform your space’s look, feel, and functionality while keeping your sanity and savings intact.
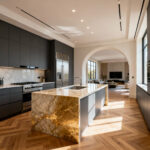
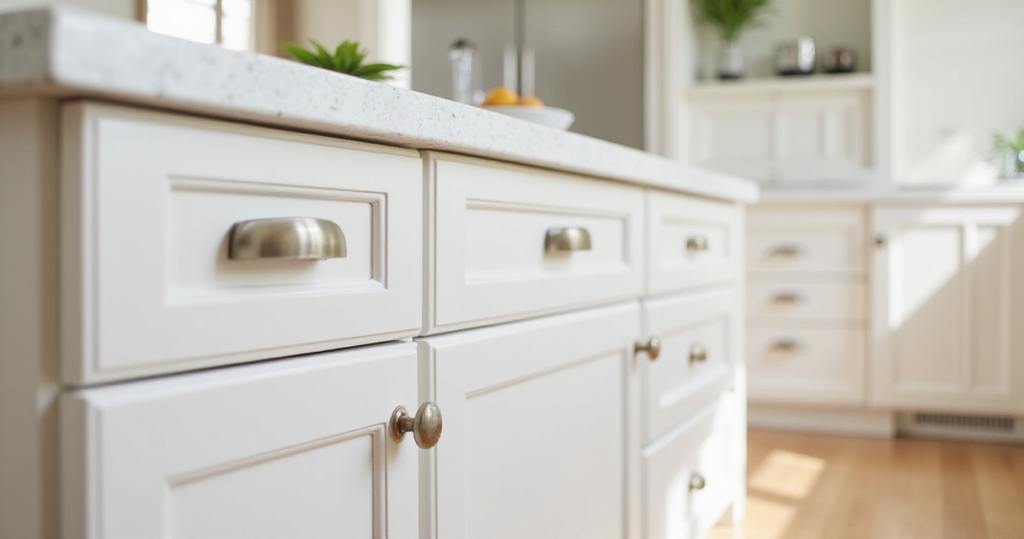
1. Update Cabinet Hardware: The Jewelry That Transforms Everything
Swapping out cabinet knobs and pulls ranks as one of the most dramatic bang-for-your-buck updates you can make. Think of hardware as the finishing jewelry that either dates your kitchen or brings it into the current decade. The difference between brushed brass from the ’90s and sleek Matte Black or warm brass can instantly shift your kitchen’s entire personality from tired to trendy.
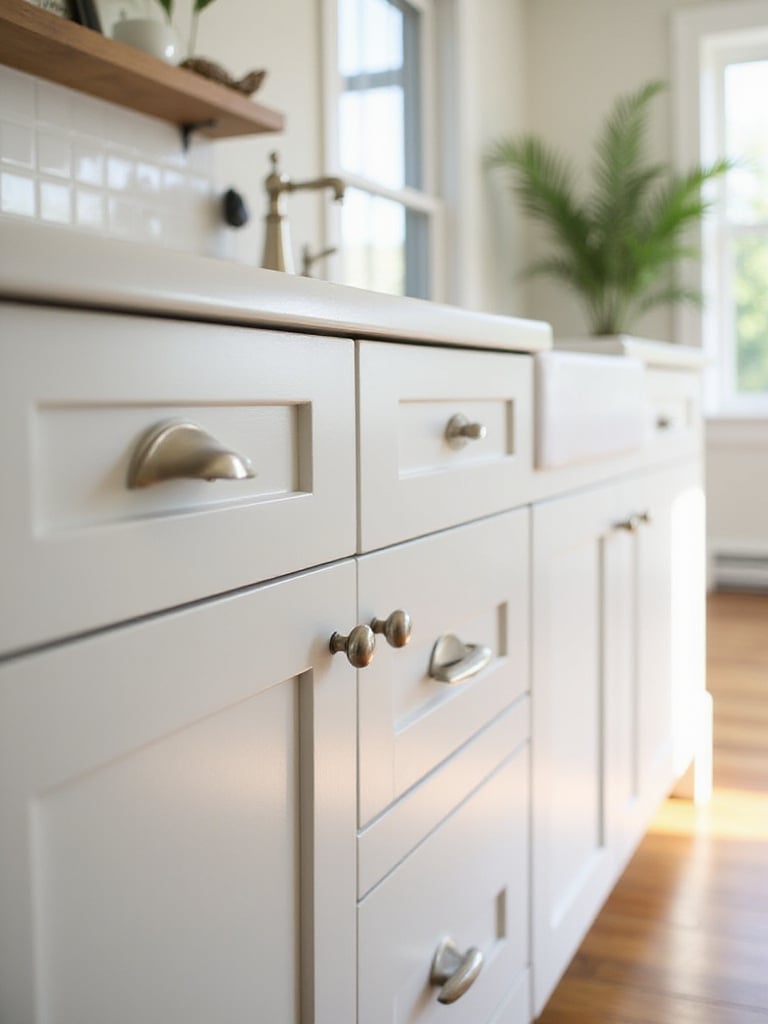
This single afternoon project typically costs between $150-400 for an average kitchen – a fraction of what you’d spend on cabinet replacement. The installation process is straightforward: measure your existing hole spacing (crucial for pulls), select hardware that complements your faucet and lighting finishes, and simply swap them out with a screwdriver. Pro tip: if you’re changing from knobs to pulls or adjusting spacing, use a drilling template for perfectly aligned holes.
- Popular current finishes: Matte black, brushed gold, polished chrome, oil-rubbed bronze
- Key measurement: Center-to-center spacing for existing pulls
- Style impact: Can shift from traditional to modern or farmhouse to contemporary instantly
The transformation is immediate and striking – suddenly, those builder-grade cabinets look custom, and your entire kitchen feels more intentional and current.
2. Paint Kitchen Walls: Color Psychology in Action
Wall color wields incredible power over your kitchen’s mood and perceived size. A fresh coat of paint can make a cramped galley feel airy, a north-facing kitchen feel warmer, or a sterile space feel welcoming. The right color choice can visually expand your space by up to 30% while costing less than $200 in materials for most kitchens.
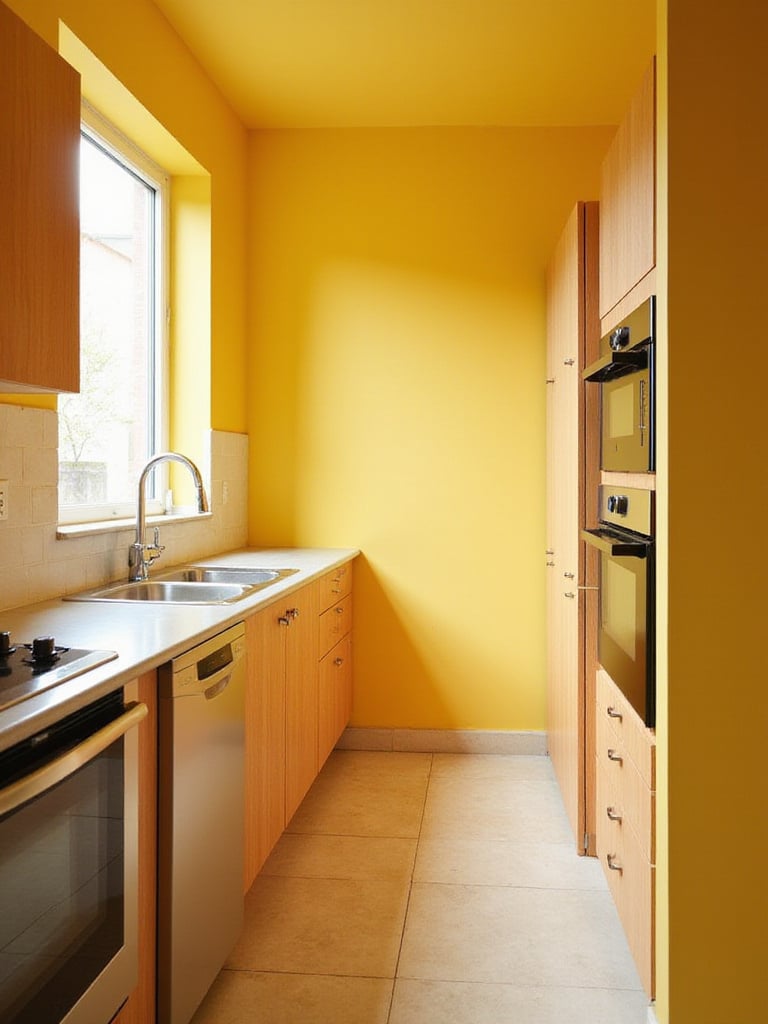
Kitchen walls face unique challenges – grease splatters, humidity, and frequent cleaning – so choosing the right paint finish matters as much as the color. Satin or semi-gloss finishes offer the durability you need while providing easy cleanup. Preparation is everything: thoroughly degrease walls, prime properly, and use painter’s tape for crisp lines. Light colors reflect more light and make spaces feel larger, while deeper tones can create intimacy and sophistication.
- Best finishes for kitchens: Satin, semi-gloss, or kitchen-specific formulations
- Color temperature impact: Cool blues and greens feel calming; warm yellows and oranges stimulate appetite
- Light reflection benefit: Light colors can increase perceived brightness by 20-30%
“The right wall color doesn’t just change how your kitchen looks – it changes how it feels to cook and gather there,” notes color consultant Maria Killam. “It’s the backdrop that either supports or fights against everything else in the room.”
Look closely and you’ll notice how dramatically lighting affects color throughout the day, making it essential to test samples in your specific kitchen conditions.
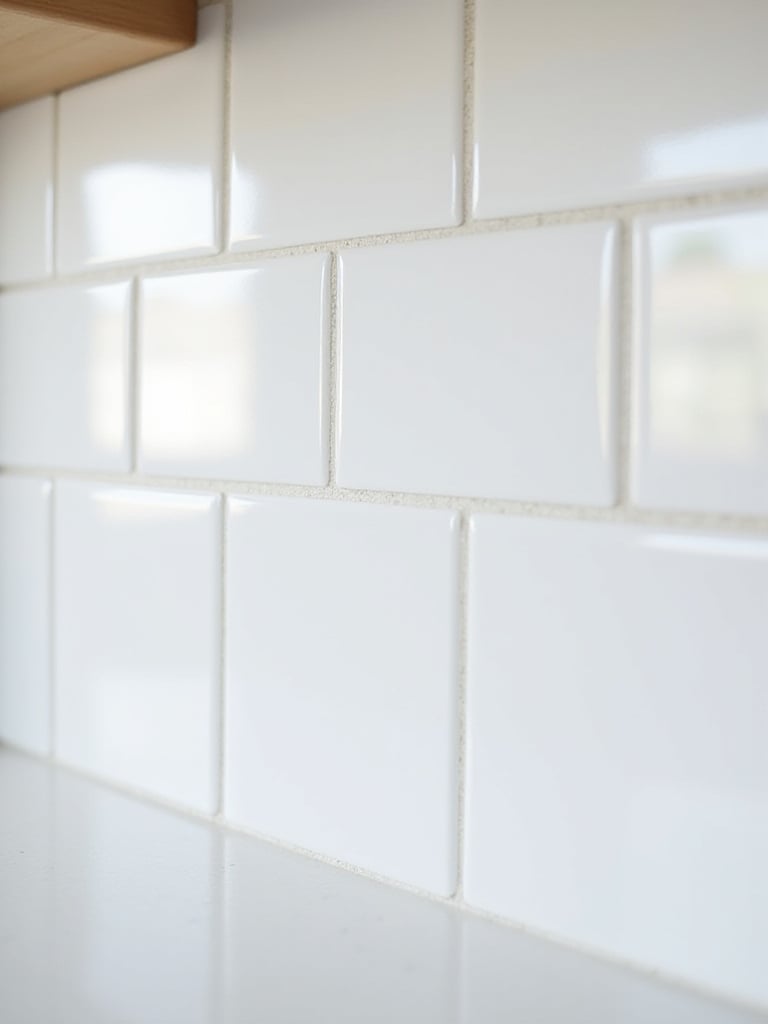
3. Refresh Grout Lines: The Detail That Makes Everything Look New
Dingy grout can make even beautiful tile look dated and dirty. Over time, grout lines collect cooking grease, food particles, and moisture, creating the perfect breeding ground for bacteria and mold. Professional cleaning or recoloring these lines can restore your backsplash and floor tiles to their original glory, making the entire surface appear newly installed.
The process involves deep cleaning with specialized grout cleaners or a DIY paste of baking soda and hydrogen peroxide, followed by thorough scrubbing with a stiff brush. For permanently stained grout, consider applying a grout colorant that both covers stains and seals the surface. The health benefits extend beyond aesthetics – clean grout reduces bacteria harboring in porous surfaces where harmful microorganisms can multiply.
- Cleaning timeline: Allow 2-3 hours for average kitchen backsplash
- Cost comparison: Grout refresh costs 10-20% of complete regrouting
- Health impact: Eliminates bacteria colonies that can number in hundreds of thousands per square inch
Always seal grout after cleaning to prevent future staining and make maintenance easier. Choose sealers specifically designed for kitchen environments that can withstand heat and moisture.
What makes this design special is the way clean grout lines define each tile, restoring the crisp pattern that originally caught your eye.
4. Add a Statement Rug: Warmth and Personality Underfoot
Introducing a well-chosen rug transforms your kitchen from purely utilitarian to welcoming and designed. Beyond adding visual warmth and color, rugs provide comfort underfoot during long cooking sessions and can define specific zones within an open floor plan. The key lies in selecting materials that can withstand kitchen demands while contributing to your desired aesthetic.
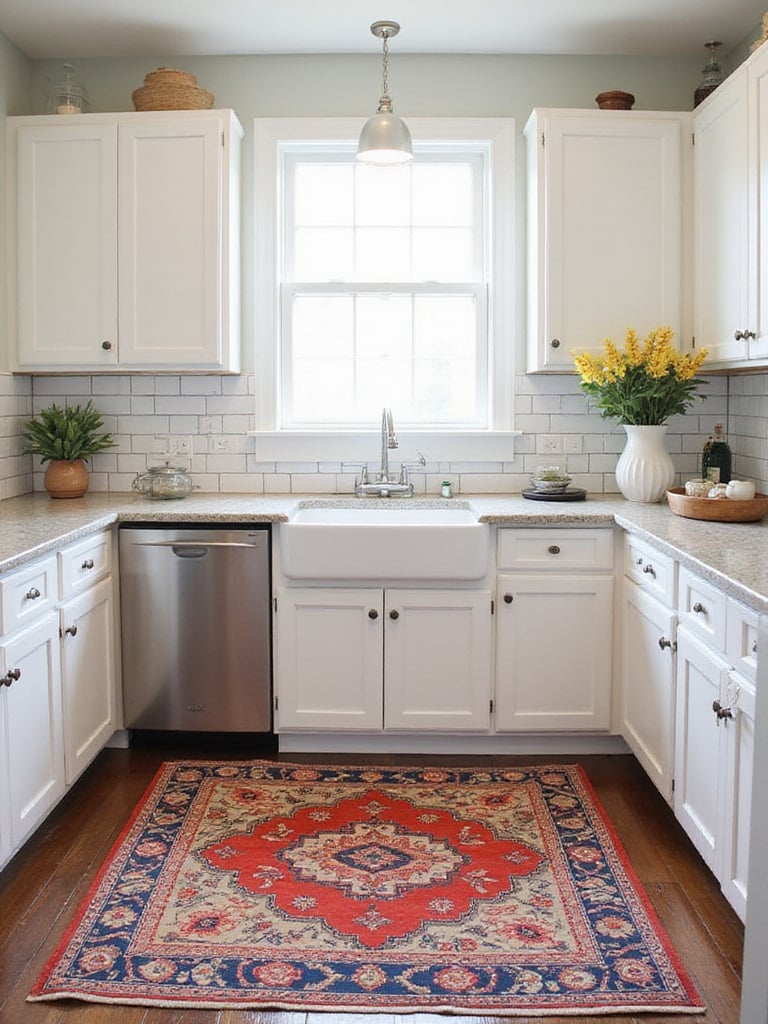
For kitchen durability, prioritize low-pile materials like polypropylene, washable cotton blends, or treated wool that resist stains and moisture. Placement matters enormously – runners work beautifully in front of sinks or along galley kitchens, while larger rugs can anchor dining areas or islands. Always use high-quality rug pads designed for hard floors to prevent shifting and extend the rug’s life.
- Durable materials: Polypropylene, washable cotton, low-pile wool, jute blends
- Ideal placements: In front of sinks, under dining tables, along prep areas
- Safety essential: Non-slip rug pads prevent dangerous shifting on smooth floors
Consider washable options for high-spill areas – many manufacturers now offer stylish rugs designed for machine washing, making maintenance effortless while keeping your kitchen looking fresh.
The unexpected pairing that always works is combining bold patterns with neutral kitchen palettes, allowing the rug to become a dynamic focal point.
5. Update Window Treatments: Light Control Meets Style
Window treatments in kitchens must balance privacy, light control, and moisture resistance while contributing to your design vision. Replacing dated mini-blinds or worn curtains instantly refreshes the space while improving functionality. The right choice can also boost energy efficiency, reducing heat gain in summer and loss in winter by up to 25%.
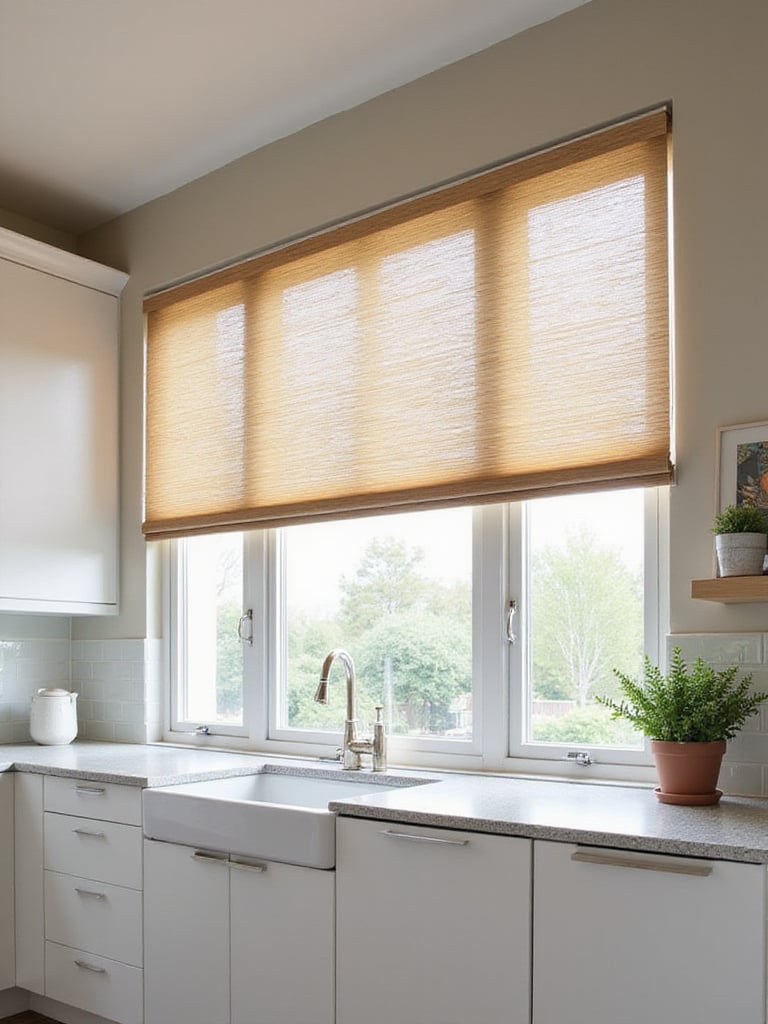
Faux wood blinds, cordless cellular shades, or moisture-resistant Roman shades work exceptionally well in kitchen environments. These materials withstand humidity and grease while offering precise light control throughout the day. For windows above sinks, consider café curtains that provide privacy while maximizing natural light from the upper portion.
- Kitchen-appropriate materials: Faux wood, vinyl, washable fabrics, aluminum
- Energy efficiency: Quality treatments can reduce heat transfer by 15-20%
- Safety feature: Cordless options eliminate hazards around children and pets
Measure carefully and consider both inside and outside mount options – outside mounting can make windows appear larger while inside mounting offers a cleaner, built-in look.
When clients ask us about balancing style with function, window treatments offer the perfect opportunity to achieve both without compromise.
6. Add Storage Organizers: Maximize Every Cubic Inch
Kitchen clutter stems from inefficient use of existing cabinet space rather than insufficient storage overall. Adding targeted organizers can increase usable space by 25-50% while reducing the time spent hunting for items. The key lies in utilizing vertical space and improving accessibility in deep cabinets where items often get lost.
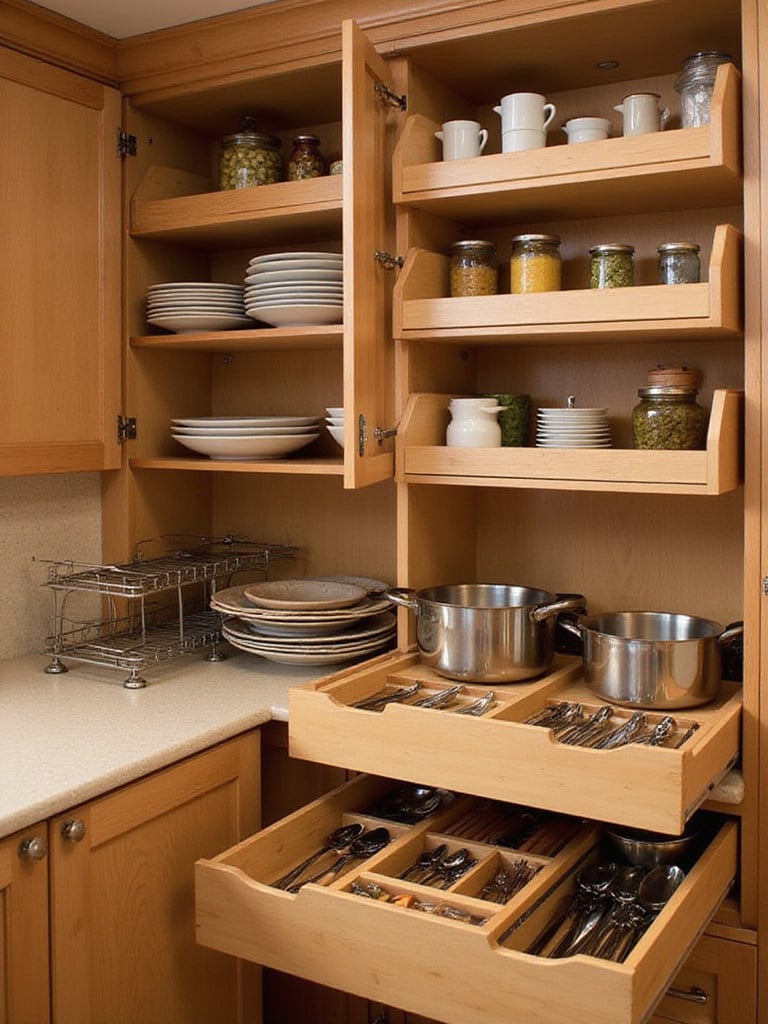
Start by completely emptying cabinets to assess what you actually use versus what’s taking up valuable real estate. Install pull-out shelves in deep lower cabinets, add stackable risers for dishes and cans, and use drawer dividers to corral utensils and gadgets. Lazy Susans work wonders in corner cabinets, bringing hard-to-reach items within easy access.
- Space-saving solutions: Pull-out shelves, stackable risers, drawer dividers, lazy Susans
- Efficiency gain: Proper organization can save 15-20 minutes daily in food prep time
- Vertical utilization: Most cabinets waste 30% of potential storage in unused height
Organization isn’t about having less stuff – it’s about creating systems that make everything accessible and functional,” explains professional organizer Marie Kondo. Clear containers for pantry items not only look neat but make inventory management effortless.
Even in smaller spaces, here’s how this works: vertical dividers can transform a single cabinet shelf into organized zones for baking sheets, cutting boards, and serving platters.
7. Replace the Kitchen Faucet: Where Function Meets Daily Ritual
Your kitchen faucet endures more use than almost any other fixture in your home, making its replacement both a functional and aesthetic upgrade. Modern faucets offer improved water efficiency, better spray patterns, and features like pull-down sprayers or touch activation that streamline daily tasks. The visual impact on your sink area is immediate and substantial.
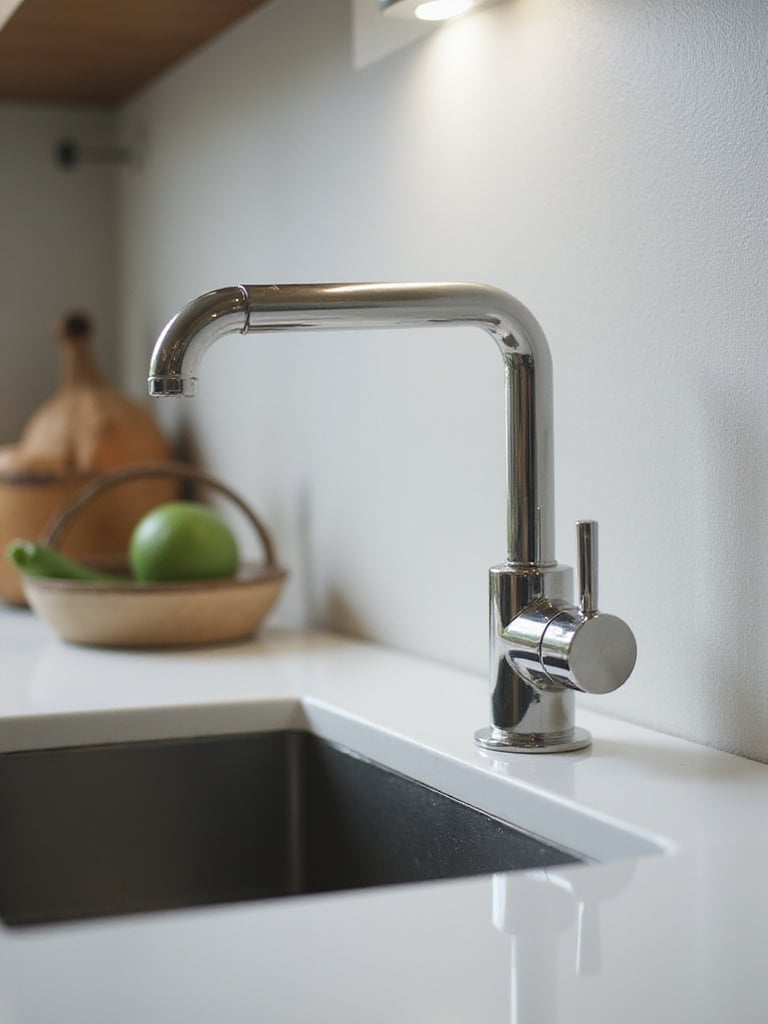
Installation typically takes 2-3 hours and requires basic plumbing skills – turn off water supply, disconnect old lines, remove the existing faucet, and install the new one following manufacturer instructions. The key tool for tight spaces is a basin wrench, which allows access to nuts in cramped under-sink areas. Always test thoroughly for leaks before considering the job complete.
- Water efficiency: WaterSense labeled models can save 700+ gallons annually
- Popular features: Pull-down sprayers, touch activation, ceramic disc valves
- Installation time: 2-3 hours for most DIY installations
Check your sink’s hole configuration before purchasing – single hole, widespread, or bridge styles each require different mounting approaches. Ceramic disc valves offer superior longevity compared to older compression or ball valve designs.
The craftsmanship reveals itself in details like smooth operation and consistent water pressure, transforming routine tasks into more pleasant experiences.
8. Install Under-Cabinet Lighting: Eliminate Shadows, Add Ambiance
Under-cabinet lighting addresses one of the most common kitchen complaints – inadequate task lighting that leaves countertops in shadow. LED strips installed beneath upper cabinets provide focused illumination for food prep while creating a warm, layered lighting scheme that transforms your kitchen’s evening ambiance.
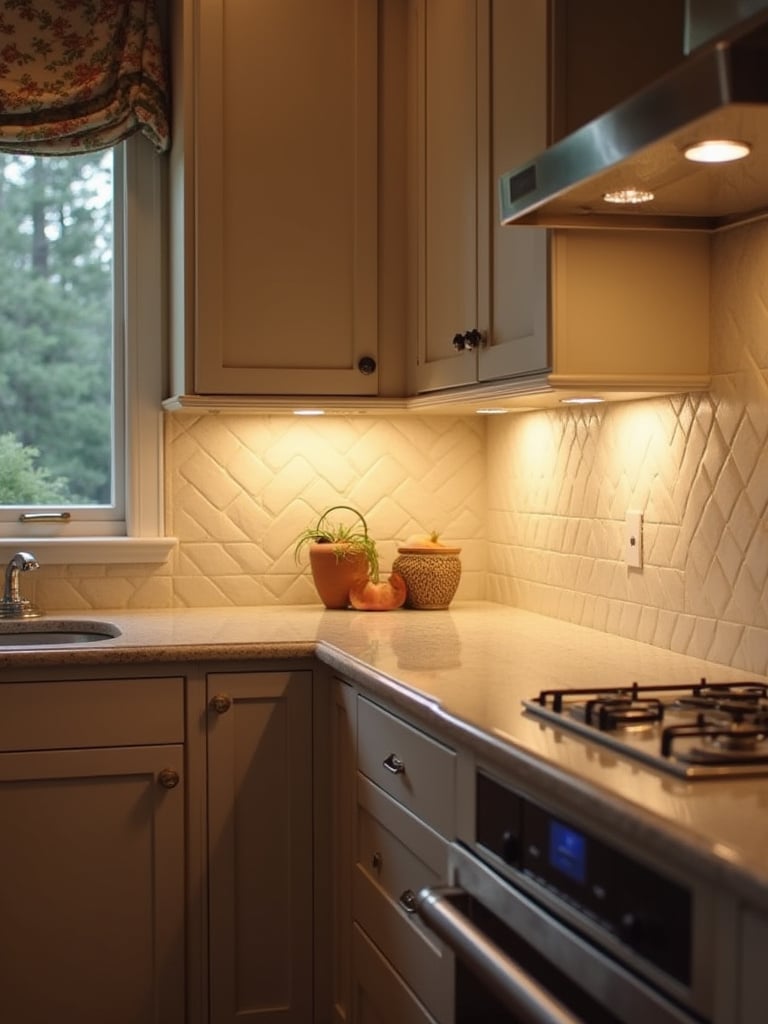
Modern LED systems offer incredible efficiency, using 85% less energy than traditional options while lasting 25 times longer. Installation varies from simple plug-in strips with adhesive backing to hardwired systems requiring basic electrical work. Battery-powered options work well for renters or situations where running power is challenging.
- Energy savings: LED systems use 85% less electricity than halogen equivalents
- Brightness increase: Can improve workspace visibility by 50% or more
- Color temperature: 2700K-3000K provides warm, inviting light for kitchens
Use diffusers or channels to create smooth, even light distribution without visible LED dots. Dimmable options allow you to adjust brightness for task work or ambient evening lighting.
The visual weight balances perfectly when you layer under-cabinet lighting with overhead fixtures, creating depth and eliminating harsh shadows.
9. Upgrade Lighting Fixtures: Layer Light Like a Designer
Kitchen lighting requires multiple layers – ambient for general illumination, task for specific work areas, and accent for visual interest. Upgrading fixtures addresses these needs while serving as decorative elements that define your style. Poor lighting makes even beautiful kitchens feel unwelcoming and can compromise safety during food preparation.
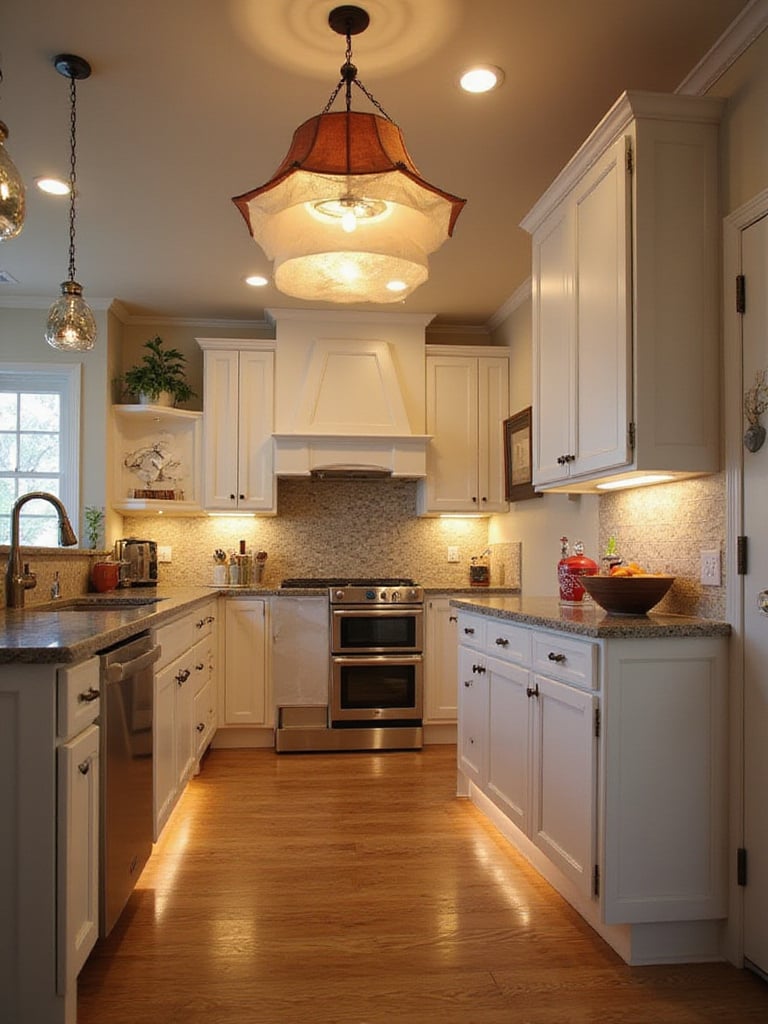
Replace outdated fluorescent boxes with modern LED flush mounts or recessed lights for ambient lighting. Add pendant lights over islands or peninsulas for both task lighting and visual anchoring. Consider the color rendering index (CRI) of bulbs – aim for 90+ to ensure food and surfaces appear in their true colors.
- Lighting layers: Ambient (general), task (focused), accent (decorative)
- CRI importance: 90+ rating ensures accurate color representation
- Energy impact: LED fixtures can reduce lighting electricity use by 75%
“Proper kitchen lighting isn’t just about brightness – it’s about creating the right light in the right places for different activities,” explains lighting designer Randall Whitehead. Dimmers on all circuits allow mood adjustment throughout the day.
The interplay between the colors creates dramatic differences in how your kitchen feels from morning coffee to evening entertaining.
10. Add Open Shelving: Create Visual Breathing Room
Replacing some upper cabinets with open shelving instantly makes kitchens feel larger and more open while providing display opportunities for beautiful dishes and glassware. This approach works particularly well in smaller kitchens or those with limited natural light, where solid cabinet doors can feel heavy and confining.
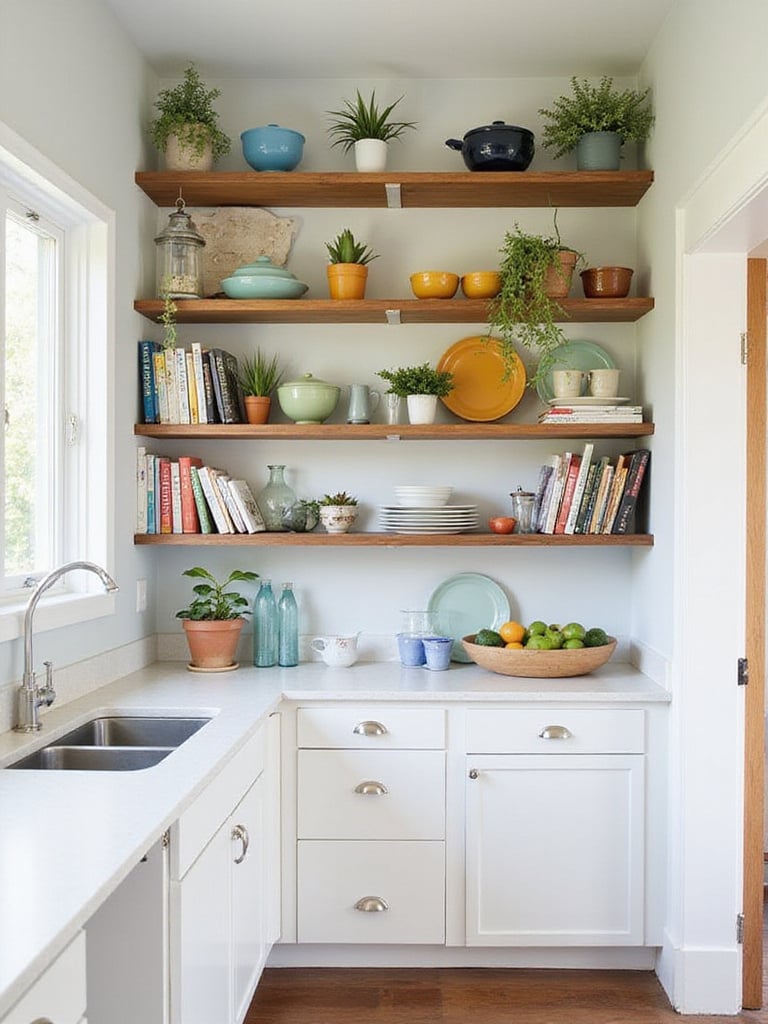
Successful open shelving requires commitment to organization and regular maintenance, as everything remains visible. Choose items that are both functional and attractive – everyday dishes, glassware, and a few decorative pieces work well. Install shelves securely into wall studs using appropriate brackets that complement your kitchen’s style.
- Visual impact: Can increase perceived space by 20-30%
- Maintenance reality: Requires more frequent dusting and organization
- Weight capacity: Properly anchored shelves can support 30-50 pounds per linear foot
Balance open shelving with closed storage to maintain both display areas and concealed storage for less attractive items. Consider adding subtle LED strip lighting beneath shelves to illuminate displays and provide task lighting.
Unlike mass-produced alternatives, this technique allows you to customize the exact spacing and materials to complement your existing kitchen elements.
11. Install Peel-and-Stick Flooring: Quick Floor Transformation
Peel-and-stick flooring offers a budget-friendly way to completely transform your kitchen floor without the time, mess, and expense of traditional tile or hardwood installation. Modern options convincingly mimic wood, stone, and ceramic while providing water resistance and easy maintenance suitable for kitchen environments.

Success depends entirely on proper subfloor preparation – the surface must be completely clean, dry, and smooth. Any debris, grease, or unevenness will prevent proper adhesion and lead to premature failure. Plan your layout carefully, starting from the room’s center and working outward for balanced borders.
- Cost savings: 50-70% less than traditional flooring materials
- Installation time: Most kitchens completed in 4-8 hours
- Thickness options: 3mm+ provides better durability and subfloor imperfection hiding
Choose thicker options (3mm or more) for better durability and sound absorption. Use a flooring roller after installation to ensure maximum adhesion, and maintain room temperature between 65-85°F during installation for optimal adhesive performance.
The sustainable journey of this material involves recyclable components and reduced waste compared to traditional flooring removal and installation.
12. Paint Kitchen Cabinets: The Ultimate Budget Transformation
Cabinet painting delivers the most dramatic visual transformation for the least money, costing 10-20% of cabinet replacement while achieving similar aesthetic impact. This process requires patience and proper technique but can completely modernize a dated kitchen. Professional results depend on meticulous preparation and using appropriate materials.
Success starts with thorough cleaning to remove all grease and grime, followed by light sanding to create paint adhesion. High-quality primer designed for slick surfaces is essential – it ensures paint bonds properly and blocks stains. Use alkyd or acrylic-alkyd hybrid paints that cure to a hard, durable finish suitable for cabinet doors and drawers.
- Cost comparison: 10-20% of cabinet replacement cost
- Preparation importance: Surface prep accounts for 80% of final results
- Paint selection: Alkyd or hybrid formulations provide superior durability
Remove doors and hardware for easier painting and professional results. Apply multiple thin coats rather than fewer thick ones, sanding lightly between coats for smoothness. Allow proper cure time – several days to weeks – before heavy use.
“Cabinet painting is 20% technique and 80% patience,” notes professional painter Mike Senese. “Rush the prep or cure time, and you’ll see the shortcuts in daily use.”
The environmental story behind this choice includes significantly reduced waste compared to cabinet replacement and lower carbon footprint from manufacturing.
13. Reface Existing Cabinets: New Doors, Fresh Style
Cabinet refacing replaces doors, drawer fronts, and sometimes cabinet box veneers while keeping the existing structure intact. This approach offers more style flexibility than painting while costing 30-50% less than complete replacement. It’s ideal when cabinet boxes are structurally sound but the style feels dated.
The process involves precise measurement of existing openings to order custom-sized replacements. Choose from various door styles, materials, and finishes to achieve your desired aesthetic – from sleek contemporary slabs to traditional raised panels. New hinges, especially soft-close versions, significantly improve functionality.
- Cost savings: 30-50% less than cabinet replacement
- Timeline: Typically completed in 2-4 days
- Style flexibility: Complete door profile and finish changes possible
Coordinate cabinet box finishing with new doors for a cohesive look. Some refacing includes applying matching veneer or paint to visible cabinet sides and faces. Update hardware simultaneously for maximum impact.
The maker’s journey from apprentice to master influenced the precision required for perfect door alignment and smooth operation.
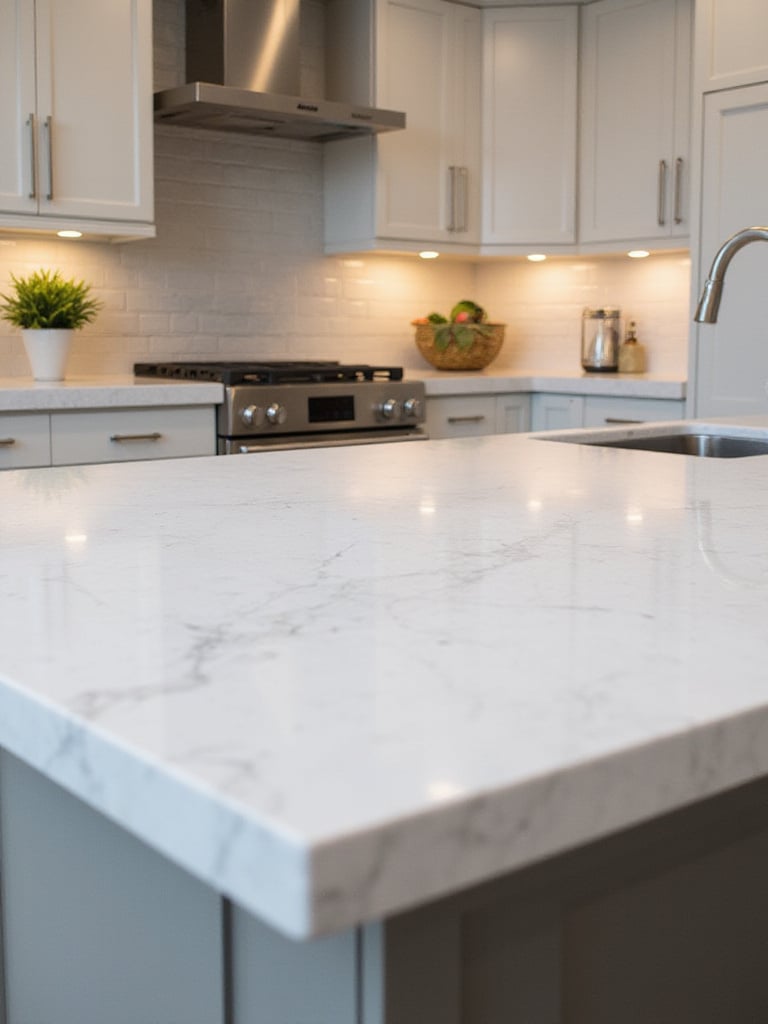
14. Replace Countertops: The Foundation of Kitchen Style
Countertops occupy significant visual real estate and endure constant use, making their replacement one of the most impactful single updates possible. New surfaces instantly refresh the aesthetic while improving functionality, durability, and hygiene. Material choices range from budget-friendly laminates to luxurious natural stone.
Professional measurement and installation ensure proper fit and finish, especially for materials like quartz or granite that require specialized cutting and support. Consider edge profiles, backsplash integration, and sink cutouts during planning. Coordinate with any plumbing changes to minimize disruption.
- ROI potential: 70-80% return on investment at resale
- Material range: $10-$200+ per square foot installed
- Professional necessity: Complex materials require expert fabrication and installation
Factor in removal and disposal of existing countertops, potential cabinet modifications for different thicknesses, and temporary kitchen arrangements during installation. Some materials like butcher block offer DIY-friendly installation options.
The unexpected material discovery story often involves finding sustainable options like recycled glass or paper composite that offer beauty without environmental compromise.
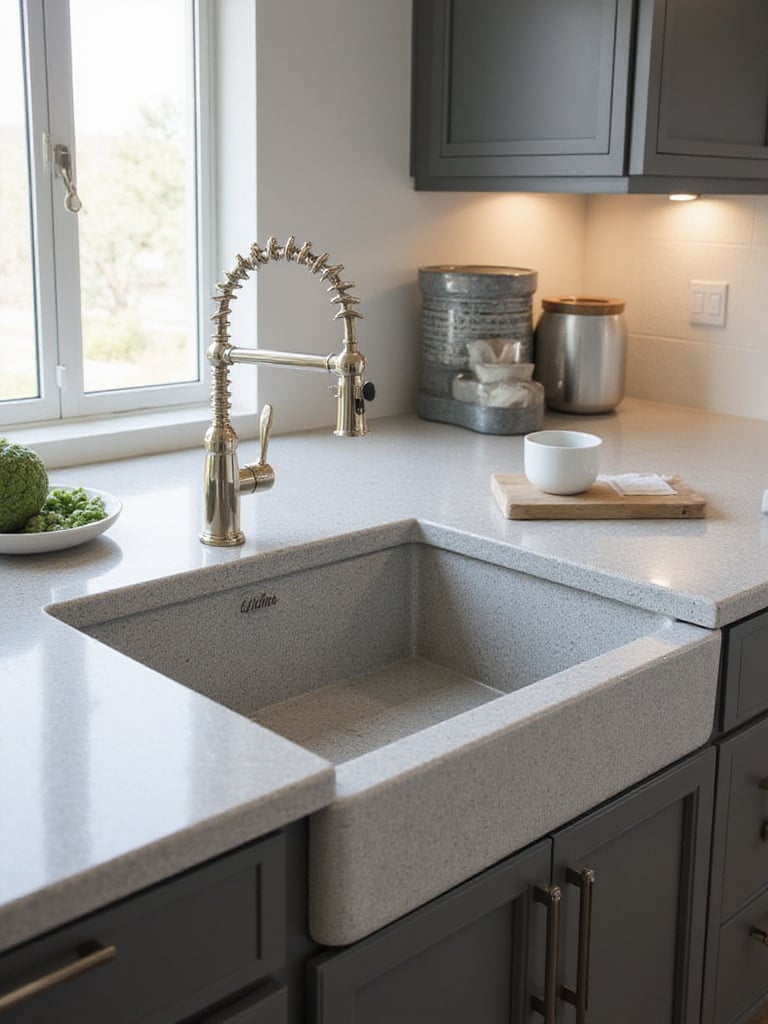
15. Install a New Kitchen Sink: Upgrade Your Most-Used Feature
Sink replacement improves both functionality and aesthetics while addressing common complaints like insufficient size, poor drainage, or dated appearance. Modern sinks offer features like low-divide configurations, integrated cutting boards, and superior materials that resist stains and scratches.
Measure existing cutout dimensions carefully and verify cabinet depth to ensure new sinks fit without modifications. Consider upgrading from double-bowl to single large bowl for washing oversized items, or choose low-divide options that offer flexibility. Undermount installation requires compatible countertop materials and professional installation.
- Capacity increase: Single bowls can increase washing space by 30%
- Material durability: Granite composite and stainless steel offer superior longevity
- Installation types: Top-mount (easier) vs. undermount (cleaner appearance)
Replace drain assemblies when installing new sinks to ensure proper sealing. Consider accessories like cutting boards, colanders, and drying racks designed for your specific sink model.
Running your hand across this material reveals the quality differences between budget and premium options in thickness, finish consistency, and sound dampening.
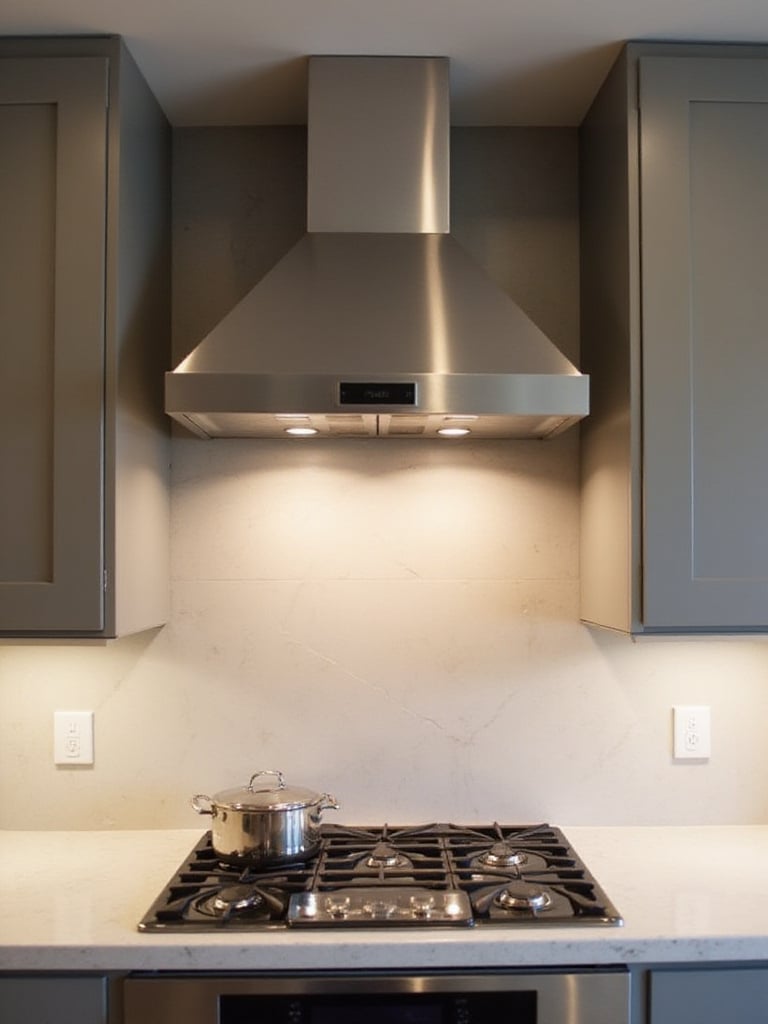
16. Install a New Range Hood: Clear the Air, Define the Space
Range hood replacement improves air quality while serving as a focal point above your cooking area. Effective ventilation removes smoke, grease, moisture, and odors that can affect indoor air quality and leave residues on surfaces. Modern hoods combine powerful performance with attractive designs that complement your kitchen style.
Size the hood appropriately for your cooking surface and habits – it should be at least as wide as your range, with higher CFM ratings for gas cooktops or heavy cooking. Ducted installations offer superior performance compared to recirculating models, but require exterior venting capability.
- Air quality impact: Removes 70-90% of cooking-related pollutants when properly sized
- Sizing rule: Hood should be wider than cooking surface for effective capture
- CFM calculation: 100 CFM per 10,000 BTU for gas ranges
Consider noise levels (measured in Sones) when selecting models – lower ratings provide quieter operation. Install appropriate ducting with minimal bends and proper exterior termination for optimal performance.
The composition comes together when you balance powerful ventilation with design elements that enhance rather than dominate your kitchen’s aesthetic.
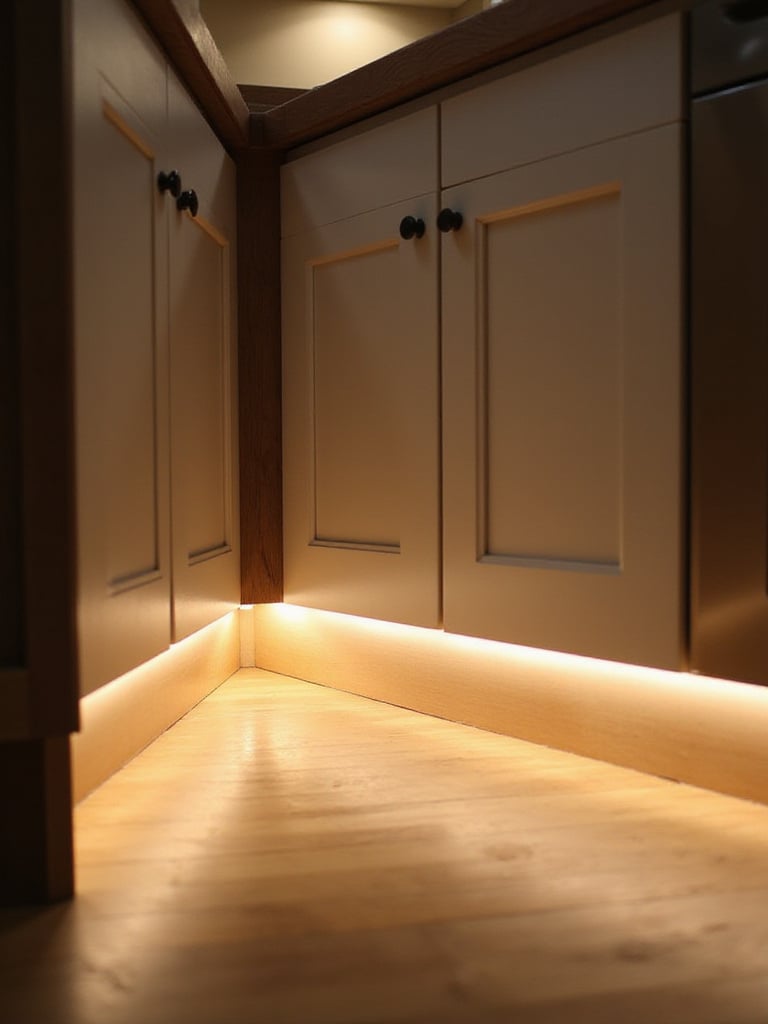
17. Install Toe-Kick Lighting: Subtle Sophistication
Toe-kick lighting adds a layer of ambient illumination that enhances safety and creates sophisticated visual depth. LED strips installed beneath base cabinets provide gentle floor-level lighting that’s particularly useful for late-night kitchen visits without harsh overhead lights.
Installation involves adhering LED strips to the recessed toe-kick area and connecting to power sources. Battery-powered options offer simple installation, while plug-in or hardwired systems provide permanent solutions. Use aluminum channels with diffusers for professional-looking, even light distribution.
- Safety benefit: Illuminates potential floor hazards in low-light conditions
- Energy efficiency: LED strips consume minimal electricity
- Aesthetic impact: Creates floating cabinet appearance and visual depth
Choose warm color temperatures (2700K-3000K) for welcoming ambiance. Dimmable options allow adjustment from subtle night lighting to functional task illumination.
The mood shifts dramatically when you add this layer of lighting, transforming utilitarian base cabinets into floating design elements.
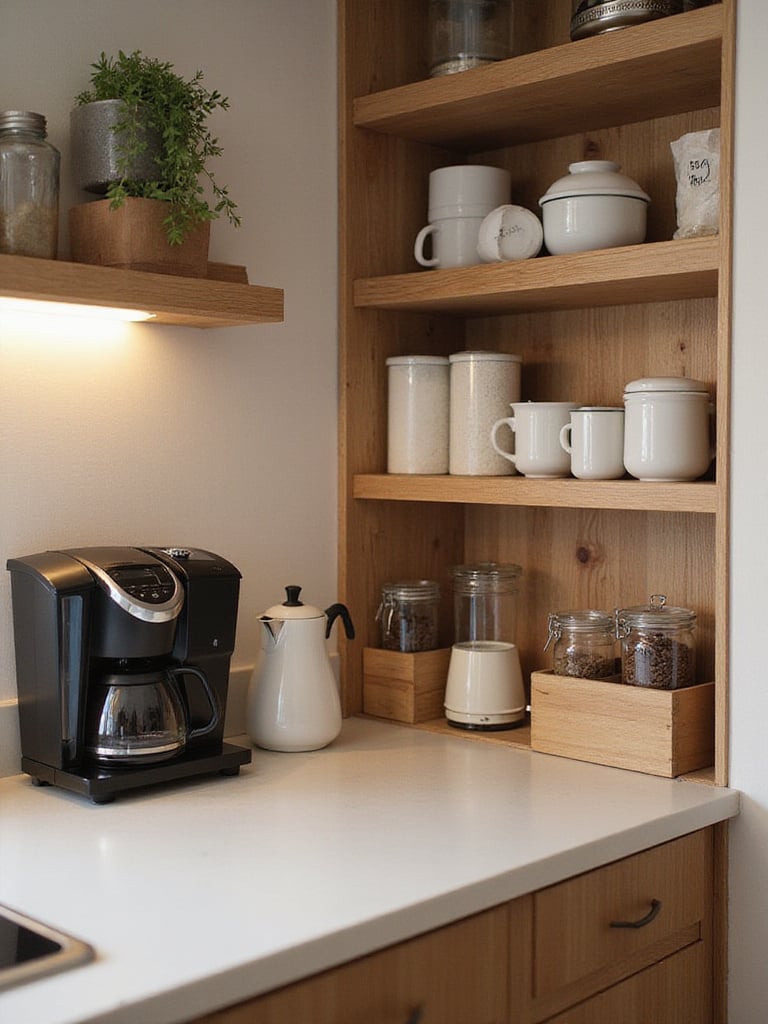
18. Create a Dedicated Beverage Station: Streamline Your Routine
Consolidating coffee, tea, and beverage preparation into a dedicated area improves kitchen workflow while reducing countertop clutter. This organizational strategy creates efficiency by grouping related items and appliances in one convenient location, particularly valuable during busy morning routines.
Choose a location with easy access to power outlets and consider proximity to water sources for convenience. Use trays to define the space and contain spills, vertical storage for mugs and supplies, and attractive canisters for bulk items like coffee beans or tea bags.
- Time savings: Consolidation can save 5-10 minutes during morning routines
- Space efficiency: Frees prime counter space for food preparation
- Organization benefit: Reduces searching time and improves accessibility
Include cleaning supplies specific to beverage equipment – descaling solutions, coffee filters, and microfiber cloths for maintaining equipment and surfaces.
Picture the warmth of morning conversations around a well-organized station that makes your daily ritual more enjoyable and efficient.
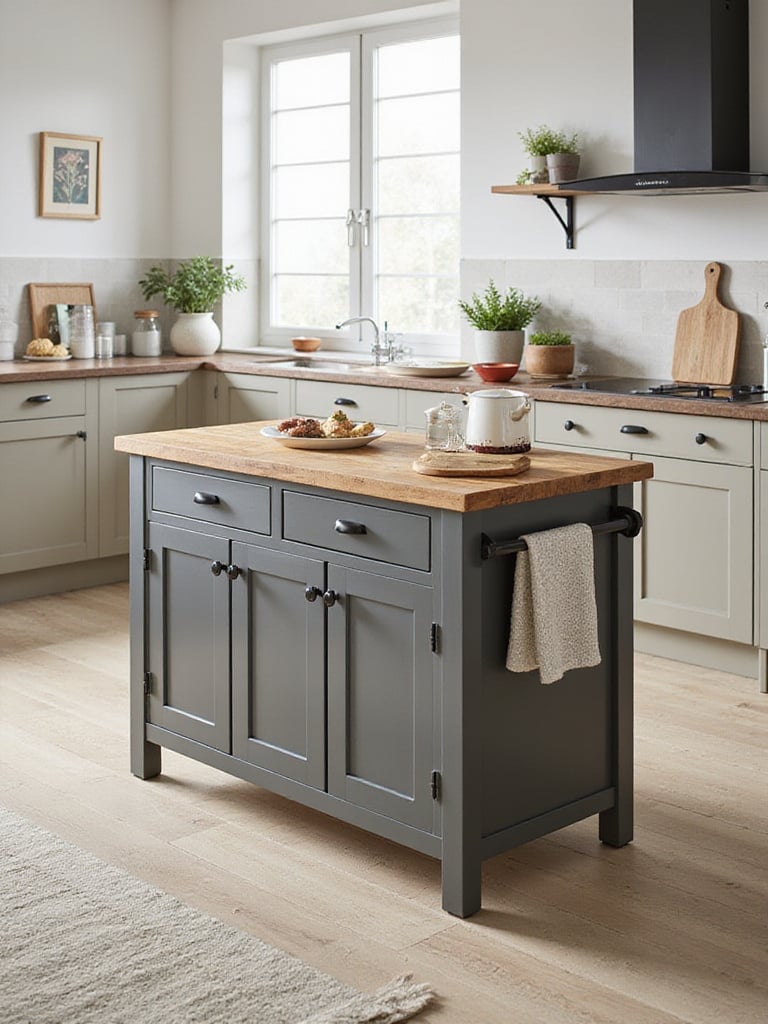
19. Add a Kitchen Island or Cart: Expand Your Workspace
Freestanding islands or carts provide additional prep space, storage, and often seating without permanent installation. These versatile pieces adapt to changing needs and can be repositioned or removed as necessary. They’re particularly valuable in smaller kitchens where built-in islands aren’t feasible.
Ensure adequate clearance around the island – minimum 36 inches, ideally 42+ inches for comfortable traffic flow. Consider features like locking casters for mobility, drop-leaf extensions for flexible sizing, and built-in storage solutions like spice racks or knife blocks.
- Space addition: Can add 5-15 square feet of usable surface area
- Mobility advantage: Carts can be moved or stored as needed
- Multi-function potential: Combines prep space, storage, and seating
Choose materials that complement existing finishes or provide intentional contrast. Butcher block tops offer warm, natural surfaces ideal for food preparation, while stainless steel provides professional durability.
The versatility reveals itself when you pair this addition with your existing workflow, creating new possibilities for food preparation and casual dining.
20. Add a Pot Filler Faucet: Professional Convenience
Pot fillers eliminate the physical strain and safety hazards of carrying heavy, water-filled pots from sink to stove. This professional-grade feature provides water directly at the cooking surface, improving ergonomics and kitchen efficiency. Installation requires running a new water line but doesn’t alter the overall kitchen layout.
Choose models with dual-joint swing arms for maximum reach and flexibility. Include a shut-off valve at the wall connection for security when not in use. Position the faucet to reach all burners while folding neatly against the wall when not needed.
- Ergonomic benefit: Eliminates carrying 20+ pound water-filled pots
- Safety improvement: Reduces spill and burn risks from transporting hot liquids
- Professional feature: Adds commercial kitchen functionality to home spaces
Consider the faucet finish to coordinate with other kitchen fixtures for visual cohesion. Test reach and clearance with your largest pots before final installation.
The artisan collective that creates these pieces understands the importance of both functionality and durability in high-use kitchen environments.
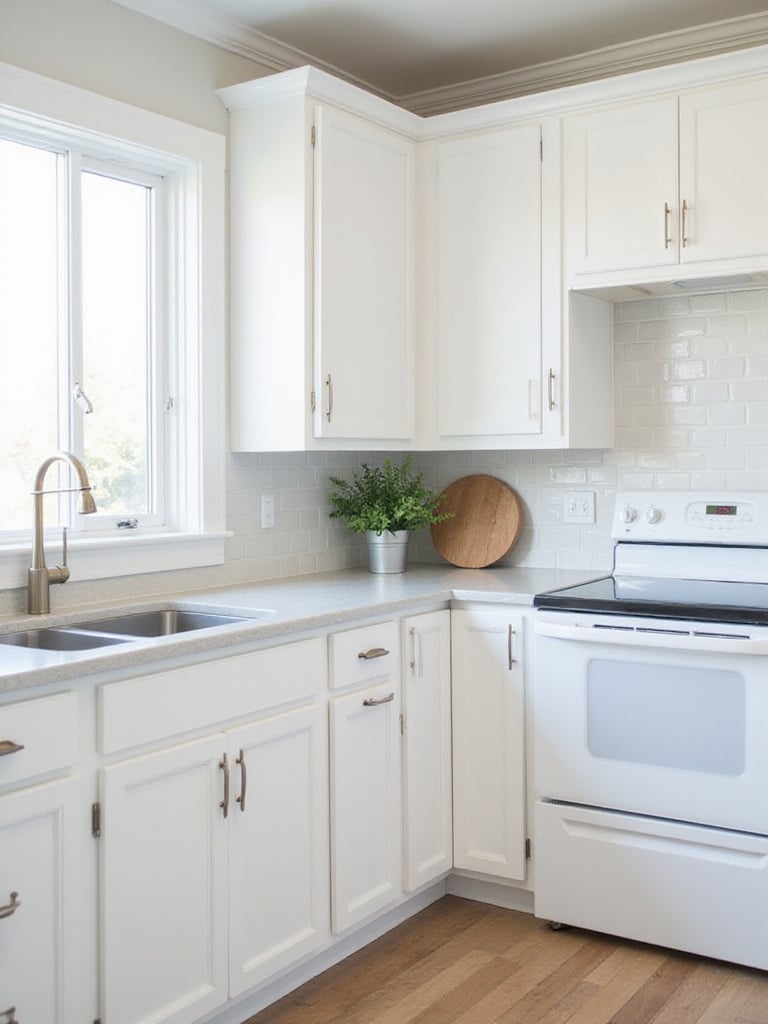
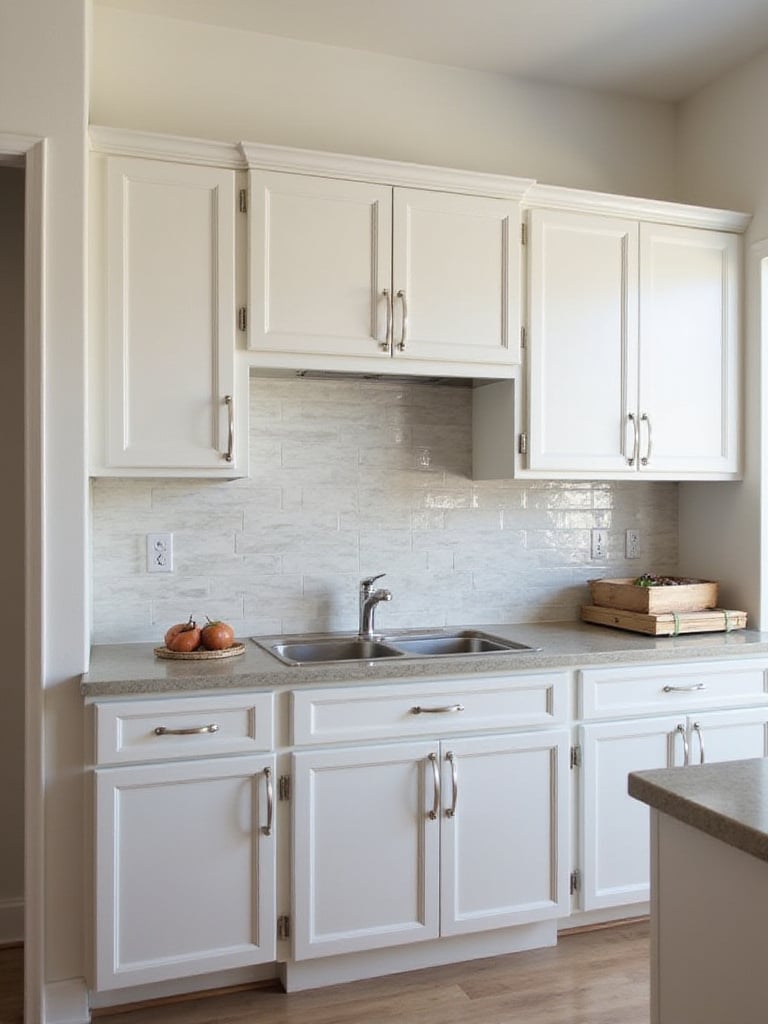
21. Add a New Backsplash: Protection Meets Personality
Backsplashes serve dual purposes – protecting walls from cooking splatters while providing opportunities for color, pattern, and texture. This contained area allows for bolder design choices that might overwhelm larger surfaces, making it ideal for introducing personality and style.
Material options range from classic subway tile to natural stone, glass, or even metal panels. Consider maintenance requirements, especially in high-splash areas behind cooktops. Proper surface preparation and installation ensure longevity and professional appearance.
- Protection value: Prevents costly wall damage from moisture and grease
- Design opportunity: Contained area perfect for bold patterns or luxury materials
- Maintenance benefit: Wipeable surface reduces cleaning time by 50%
Extend backsplashes to the ceiling in areas with upper cabinets for visual continuity, or create focal points with different materials behind ranges or sinks.
The cultural heritage preserved in each piece includes traditional patterns and techniques that connect contemporary kitchens to timeless design principles.
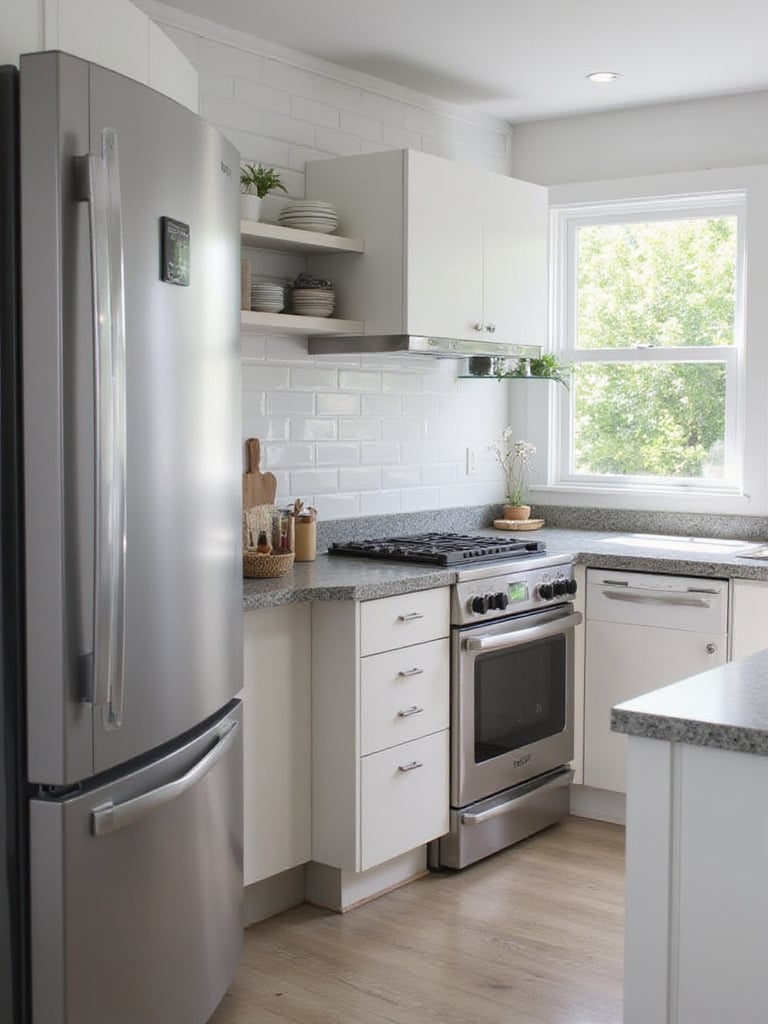
22. Upgrade Kitchen Appliances: Invest in Daily Performance
Appliance upgrades offer improved efficiency, enhanced functionality, and modern aesthetics that instantly update your kitchen’s capabilities. Focus on the workhorses – refrigerator, range, and dishwasher – that impact daily life most significantly. Energy-efficient models provide long-term utility savings while offering advanced features.

Measure existing spaces carefully, including height, width, depth, and door swing clearances. Verify electrical requirements and gas line compatibility before purchasing. Consider appliance packages for coordinated styling and potential cost savings.
- Energy savings: New appliances can reduce consumption by 20-30%
- Feature improvements: Smart capabilities, precision cooking, enhanced capacity
- ROI potential: Quality appliances recoup 60-80% of cost at resale
Factor in delivery, installation, and disposal costs when budgeting. Professional installation ensures proper operation and warranty coverage, particularly for gas appliances requiring licensed technicians.
The forecast for next season already hints at continued integration of smart technology and sustainable materials in appliance design.
Conclusion
These 22 kitchen makeover ideas demonstrate that transformational change doesn’t require demolition and reconstruction. Whether you tackle quick wins like cabinet hardware updates and fresh paint, or invest in more substantial improvements like new countertops and appliances, each project offers the opportunity to address specific pain points while enhancing your kitchen’s overall appeal and functionality.
The beauty of this approach lies in its flexibility – you can implement changes gradually, spreading costs over time while living in a functional kitchen throughout the process. Start with projects that address your biggest frustrations or offer the most visual impact for your budget. Layer improvements over months or years, building toward your ideal kitchen without the disruption and expense of a complete renovation.
Your kitchen should work for your lifestyle while reflecting your personal style. These strategic updates prove that thoughtful improvements can create dramatic results, transforming not just how your kitchen looks, but how it feels to cook, gather, and live in the heart of your home. The investment in your daily comfort and enjoyment, combined with potential increases in home value, makes these targeted improvements both personally rewarding and financially smart.